In the spirit of details and edges to convey perspective, as well as the fact I was really intrigued by the water and rocks and such from yesterday’s painting, I went toRick Surowicz’s YouTube channel. I know he has a lot of videos, some which feature flowing water. I chose his study “Rushing Waters” to practice detail and edges along with perspective.
I am rather pleased with the way my version of this study came out. As I do these practice studies, I find I am beginning to rely on myself more and more for painting. In other words, 6 months ago I would bemoan the fact that my painting does not look like the photo or the painting I was using as a study. Now, while I look and learn from the instructions, I also am comfortable making my own painting decisions.
I really like Surowicz’s work. His attention to detail and ability to explain his process of painting really helps the person attempting to learn. This kind of knowledge sinks in with time, and it’s a lot of fun to see one’s own progress both on paper and in one’s head . . .
Some Thoughts
When I do studies like this one, and am pleased with the results, I think one day I will be a good painter. When? That is the question. Copying someone’s work is pretty easy once you get the hang of it – but what about producing original paintings which are not copies and practice studies of another’s?
I know that we all need to practice what we want to learn. Sometimes, though, it would be nice to “get there” more often than not!
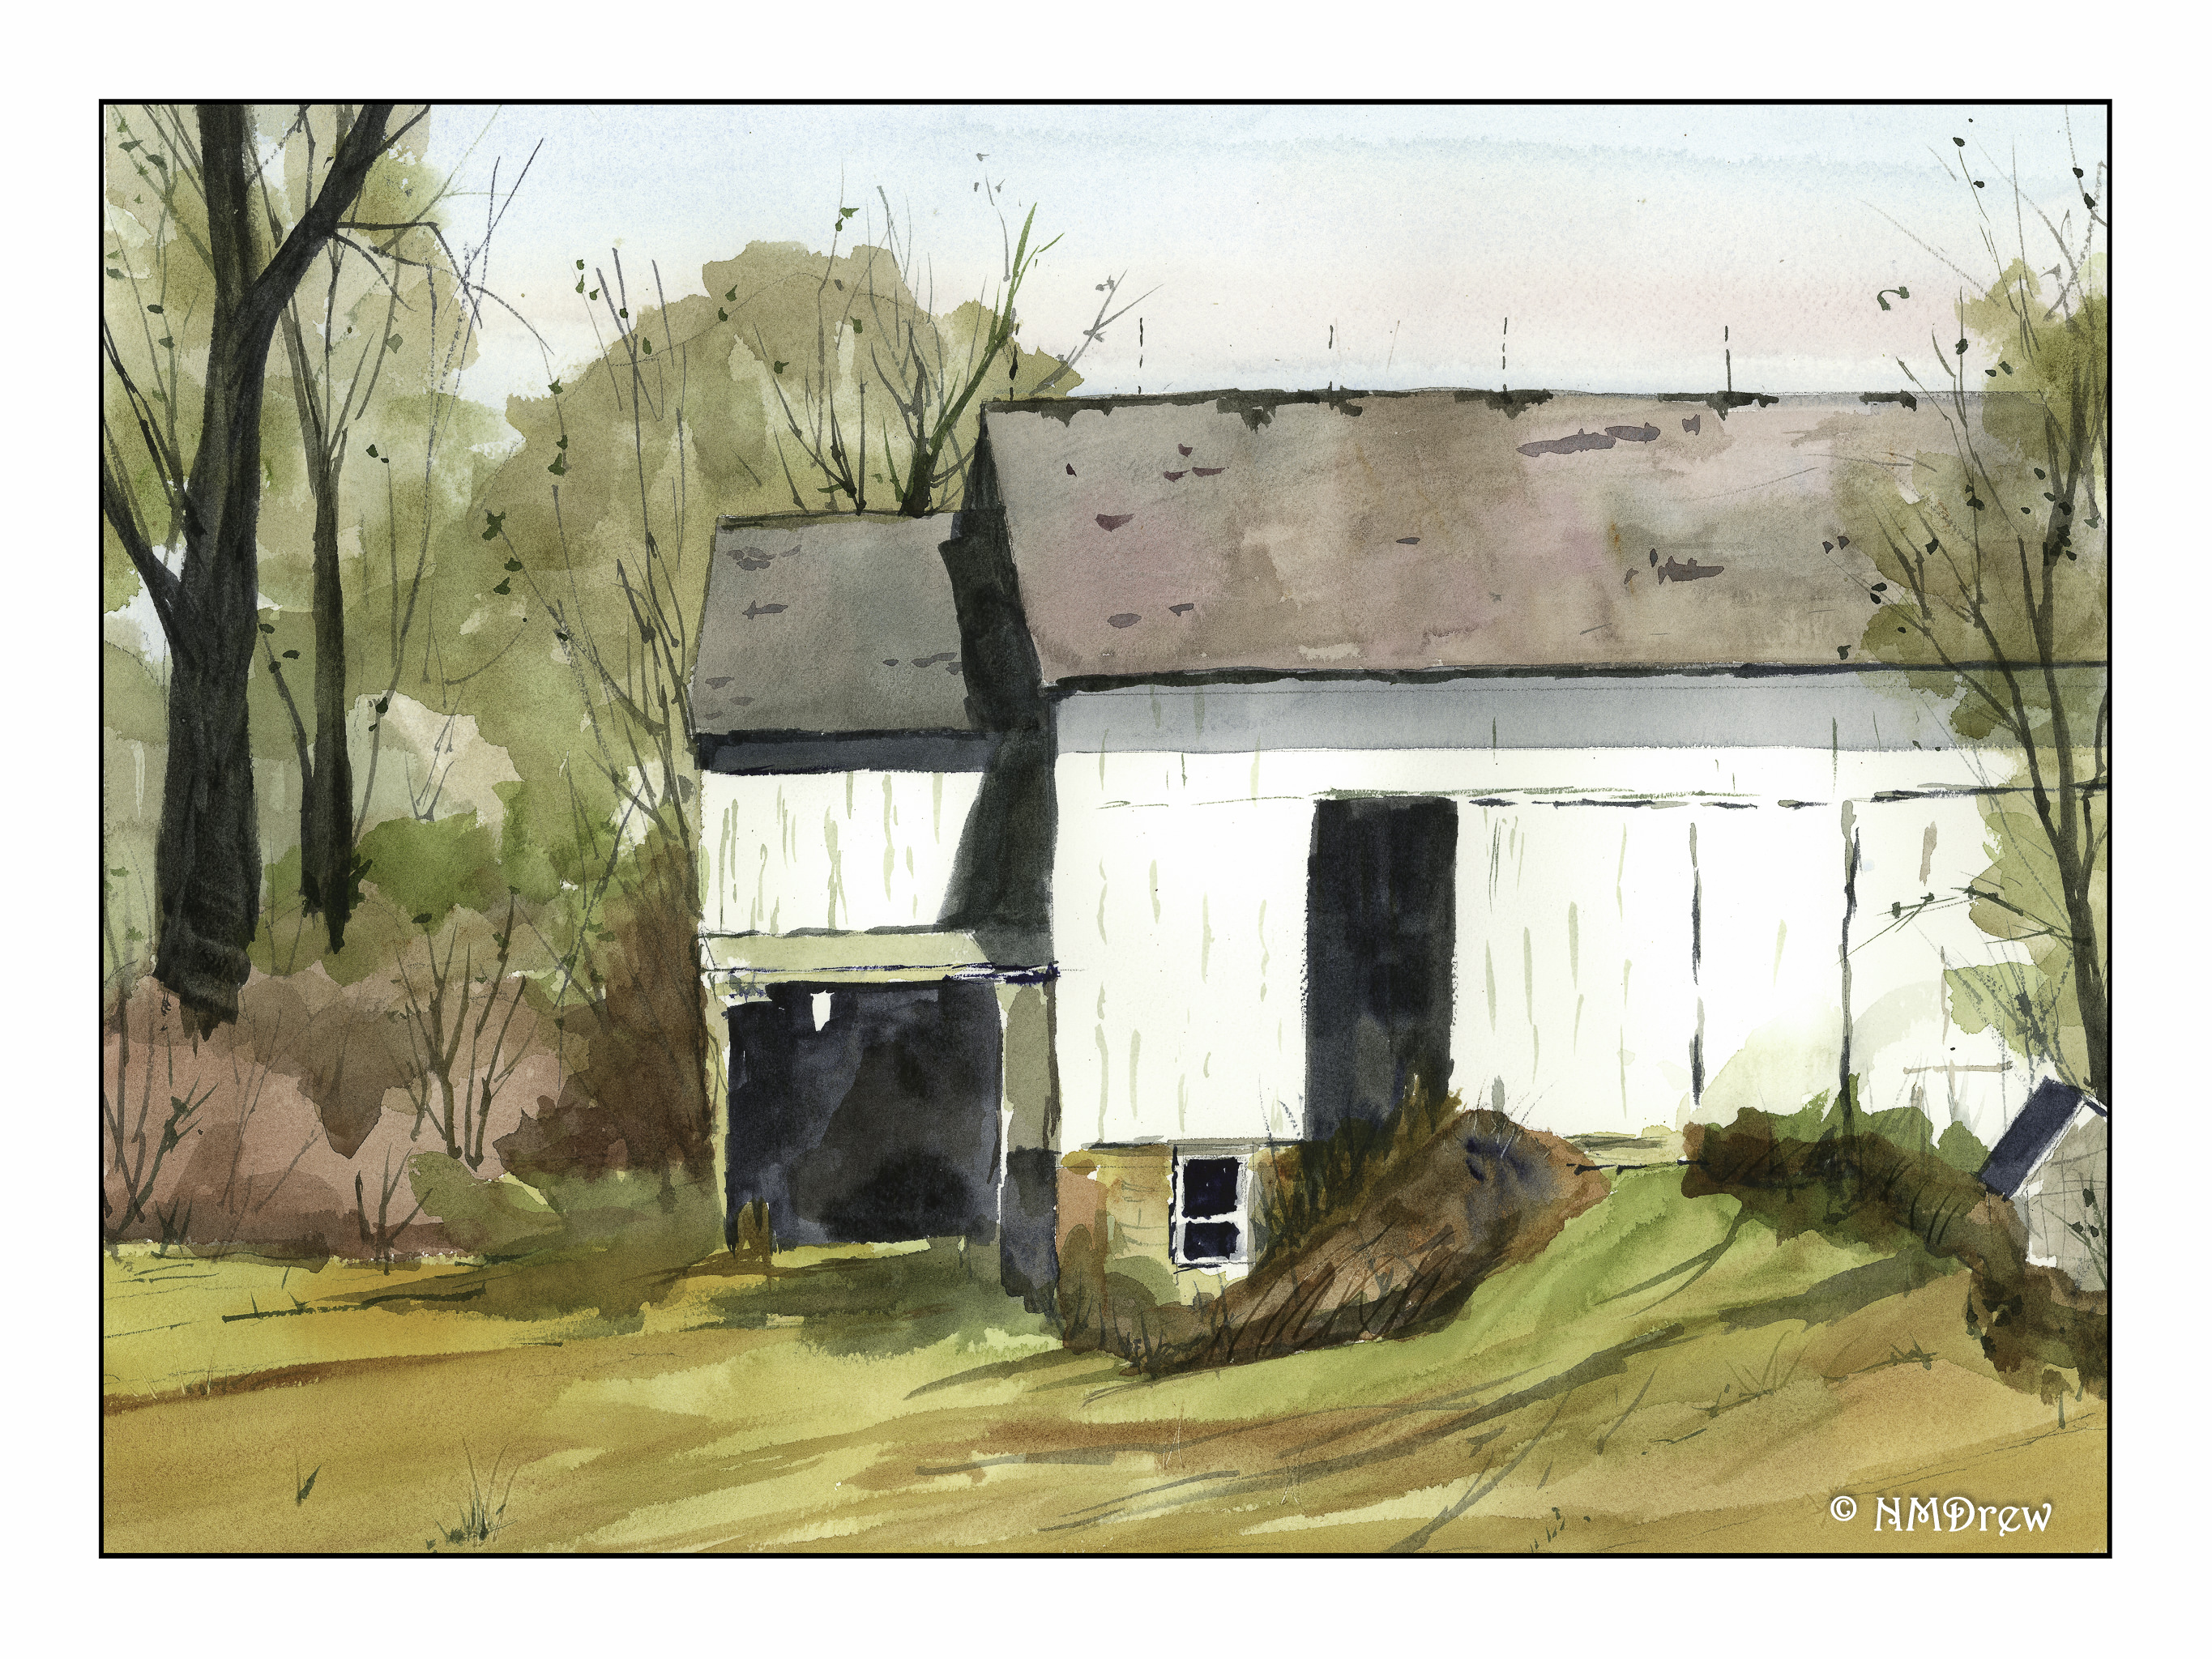
This morning I went out and bought plants for the flower beds, had lunch and a nap, and then decided what I wanted to paint. Rick Surowicz just posted a new video on his YouTube channel called “Waiting for Spring.” On his personal website, he posted a sketch of the study as well as a photograph of the actual barn, and his final watercolor. If you haven’t checked out his channel, you should. He has so much valuable information. When I am feeling more focused, I want to try out his two classes as they are more detailed than his YouTube presentations, although they are detailed enough for anyone who wants to learn.
This video appealed to me for a number of reasons. One, perspective. This is a frontal view, so the roof line is pretty much a straight line across the top, parallel to the top edge of the paper. I got out my ruler and made both straight horizontal and vertical lines. From there, I roughed in the trees and shadows and bushes.
The palette was pretty simple – Rick posts the colors he used at the beginning, as well as mentioned that his Cerulean Blue is PB36 as opposed to PB35 – PB35 apparently is more greenish than PB36. This would be either DaVinci Cerulean or Daniel Smith Cerulean Blue Chromium. Of course, if you don’t clean up your paints, you could have just about anything.
What I learned from this video were a few things. One, mix colors on the paper as you move along. Specifically, on the roof, I moved from one color to the next, picking up paint and working it into the paint on the paper. This gave a nice effect. Another important thing was to realize that while I have flat brushes, most of mine, if not all, are rather stiff. Painting with them at times created problems as a softer flat brush would be a better choice in some areas.
I also realized I need to sort out my brushes better – put rounds in one area, flats in another, and riggers and other specialized brushes in another. I have a stand, and perhaps I shall use that next, or else I may just get individual holders – like jars or tins – to hold specific brushes in specific areas. I continue to learn!
As I look at this painting, I can see my confidence in handling color has come a long, long way. I plan to do a few more barns in the coming week, using photos from Pixabay. This way, I can practice perspective, use my ruler, and try to paint more confidently than I seem to do when I don’t have a video to follow.
More work with water and light. Here I thought about some of the exercises I have followed from Rick Surowicz’s YouTube channel – lines, curves, and dots to capture branches, light, and leaves. I think this painting worked out quite nicely.
Besides considering what I wanted in advance (a way of thinking that has taken a very long time to get to) by applying frisket, I also was determined to paint from light to dark and use glazing and blending. Areas of color were also considered, and rather than trying to paint each leaf, I painted blobs of color to represent the foliage. As a result, I built up layers of color throughout the painting as I moved along, and can say this is possibly the first painting in which I have done this.
I also had to be very patient! Frisket is not happy when you blow dry it – it gets all sticky and you have let it set up again. As a result, this 6×9 painting probably took a couple of hours to do. However, the results, for me, were definitely worth the time it took. Perhaps my impatience is lessening . . .
Wetness in watercolor varies. There are times when a very dry brush on dry paper is necessary to give sharp, clear edges to an object. Then there is wet-on-dry wherein washes are applied to dry paper with a lot of water. And finally, wet-in-wet, where wet color is applied to wet paper. As the paper dries, the color behaves differently. There is so much to learn in watercolor!
Of late, I have been painting with a lot of water and a lot of color. It’s a challenge, but daily painting is yielding better results overall. Not every day, but overall! Yesterday, I watched a number of videos, and did two studies based on videos by Rick Surowicz and Edo Hannema.
This one is from an early video by Surowicz. He used some frisket, but my bottle was not working, so I painted without it. I really needed it as his style is not just wet, but sopping wet! He uses a fine mist sprayer to scoot paint around. The result can be quite nice as you build layers of colors on layers of color. I did this painting on Strathmore 400 paper, a paper I don’t especially like, so I was quite pleased with how it handled all the water. The palette consisted of three colors – sap green, indanthrene blue, and a bit of Indian red.
Edo Hannema is a master of the wash. I enjoy using his videos as study guides. The above painting is my favorite of the two I did yesterday. The palette was limited to raw sienna, burnt sienna, cobalt blue, ultramarine blue. The green was a mixture of cobalt and raw sienna. One thing I really like about Hannema’s videos is he tells you when he thinks he makes a mistake, or needs to fix something in his painting, as well as tips on using colors. It’s rather like eavesdropping on the artist.
I decided to look at mists and soft edges because the other day Rick Surowicz posted a video about mist rising below a mountain ridge – Overlook:
This was a good video to watch on how to create a mist or fog. He also has another one called Misty Lake which was the one I used in my above studies:
Edo Hannema is a master at wet-in-wet techniques, which are great for fogs and soft effects. The horizon of this painting video demonstrates this quite well. The thing that is especially fun about the video below is the fact he took a painting he did of this scene in the summer and converted it to winter:
I find using practice videos helpful in learning techniques. They are also helpful in thinking about how I paint versus how I want to paint. Like many beginners, I put in far too much detail, and my own impatience impairs final results far too often. Letting the paper dry is important, and I am learning to do that – my hair dryer is hanging within easy reach! Leaving white paper is getting more “natural” in feeling, so I am thinking ahead as well.
Nowadays, I find I am plotting out paintings in my head. Daily painting is another big step forward as I now have the time to spend on it without a million other things demanding my time weighing me down with guilt – chores and duties or the pleasures of a hobby.
About a year ago I found the YouTube channel of Rick Surowicz, and artist of considerable talent, and a formidably talented teacher. In the space of just over a year, he has garnered 25K followers, and I am one of them. Check him out if you don’t know who he is!
Anyway, I did two of his videos, both of which make use of frisket. In general, I like to “travel light” – meaning, I like the idea of spontaneity for success, not thoughtful pre-planning. The result for me is usually disaster and disappointment. Rick’s videos are clear. He explains what he does and why. The results speak for themselves. I decided to get off my don’t-panic-I’m-organic high horse and follow along. These next two paintings are from his lessons, which I followed. I can honestly say I enjoyed doing them, even in the moments of terror – that frisket! those colors!
Each one of these paintings required the usage of liquid frisket. I applied it, let it dry, and got to work. The beauty of the liquid frisket is that it allows the application of broad washes across the paper without the loss of white paper, or having to do in painting or negative painting. This actually gives a bit more ability to be spontaneous and splashy than not using it! (Surprise lesson here.) I did each of these paintings over a two or three hour period, watching the steps in each video a number of times.
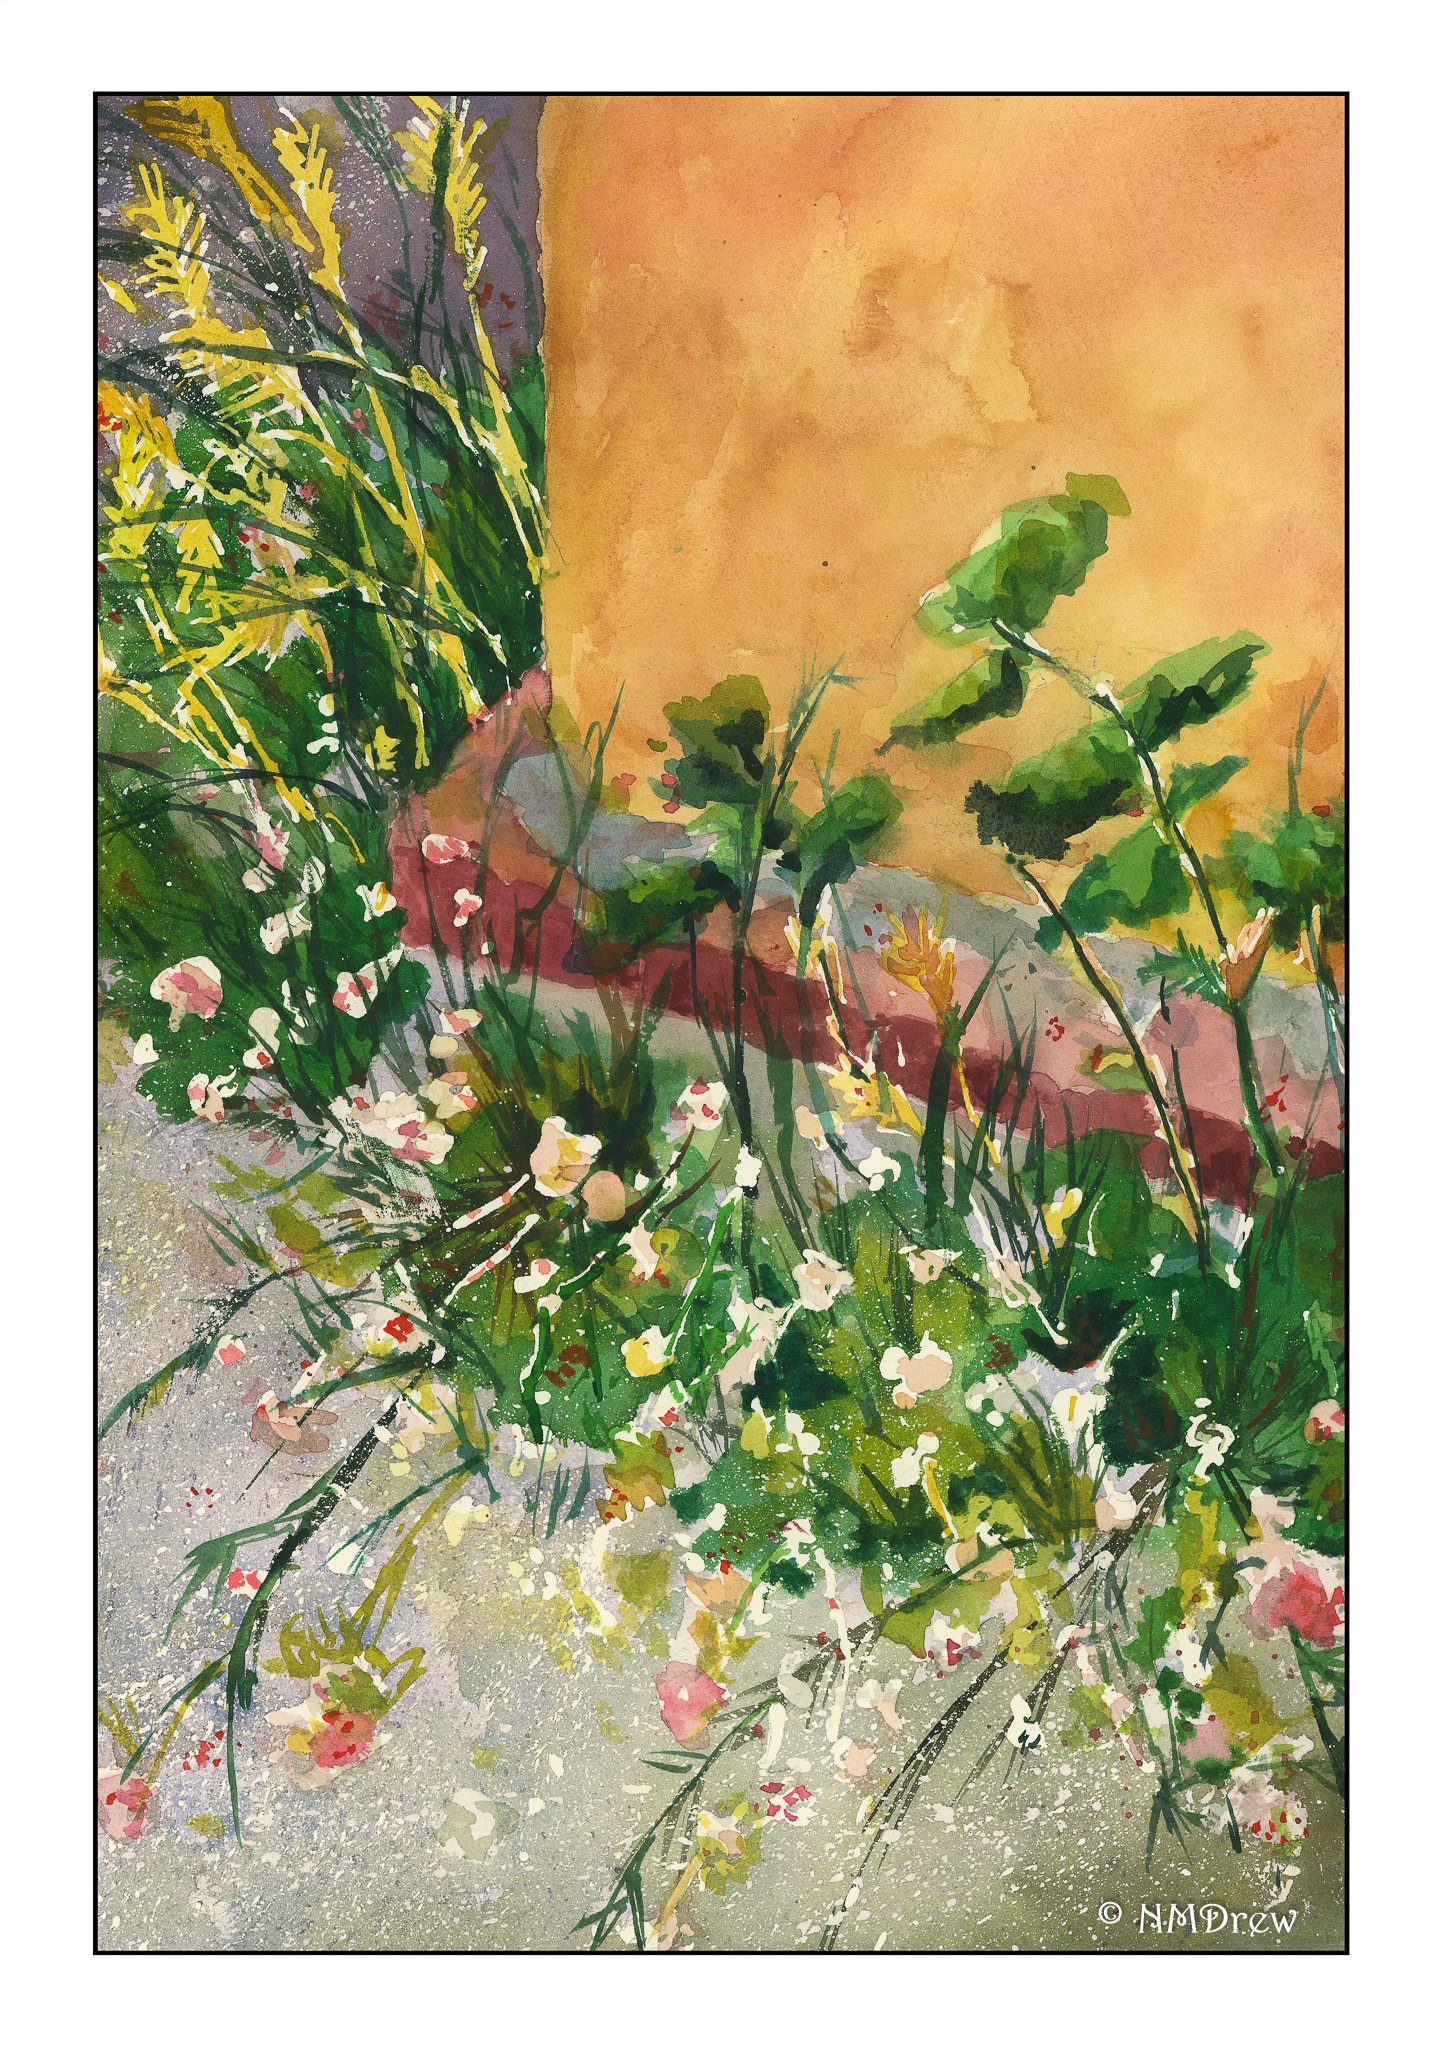
At some point, we all have to try our wings. I took a photo of a weed patch behind La Purisima Mission in Lompoc, California, last summer during a visit. There were white flowers – perfect for frisket – and yellowish grasses – also good for painted-over frisket after it was removed. This painting held a lot of terror, let me tell you! However, I am fairly pleased with the end result – simplification coupled with detail.
This morning, I did this painting, derived from a public-domain photo of an aspen grove. In the photo, light was shining from the right, and in looking at the picture carefully, the trunks of the aspens, which are a brilliant white, much as birch trunks are, were actually darker than the brilliant yellow-green foliage in the distance. I used frisket for the white areas on the right of the trees, and then, as I laid down layers of color, added more frisket here and there to protect areas of color. I did this for three or four layers until I finally removed it all, and then painted in areas needing more detail or contrast.
By following Rick Surowicz’s tutorials, I finally learned something. Frisket is not scary and can be an aid to a spontaneous or splashy wash as it helps preserve white paper. In the process of copying Rick’s process, I learned a bit about color, reworking areas, contrast, and whatever. I was also able to paint a representative of a bush or leaves rather than hankering to paint the details and losing the overall effect. I am thinking about redoing the last two paintings without frisket, just to work at white space without an aid. That will be more of a challenge I think than not using frisket!