I have been in a funk about photography – bad weather is my excuse about not getting out. Laziness is more the reality. And, a total lack of inspiration. We all go through these funks, but it gets exciting when interest picks up again, often with fresh eyes and thoughts.
I started the Instax Printer Project to just get me to do things. Hiking is really what gets me oot-and-aboot to make pictures. On the other hand, it can be a challenge, and a pleasure, to photograph the mundane. Bread and butter is mundane, but homemade rye bread and butter is a different story! I made some yesterday, and managed not to gobble it down just out of the oven.
The third prompt for #WorldWatercolorMonth! Here, picnic food. Bread, wine, cheese, fruit. Sounds a lot more healthy than burgers and fries, and certainly more attractive to paint! But, oh, what a challenge gouache is compared with watercolor. I haven’t worked in opaque medium in years and years and years. Personally, I don’t like the picnic basket, but the cheese, bread, wine, and (sorta) the fruit look okay.
I started with broad swaths of the major colors, such as the green, browns, blues, and laid in the underlying colors for the bread, cheese and apples. From there I moved into less thin paint to thicker, working from the most distant (the grass) to the foreground. At the end, I laid a thin wash of ultramarine blue to dissolve a bit of the underlying gouache to create shadows, knowing full well it would lift and blur the paint underneath it.
While I cannot say I love the painting – still lives are not things I pursue, preferring landscapes – I can say that it was definitely a worthwhile study. Paint handling is getting a bit more intuitive and logical. So different than watercolor – but at the same time comprehensible, if that makes any sense. It’s really just understanding the logistics of the medium . . . And, I think I am improving (a bit) in using gouache, which is a good feeling. I’m looking forward to the challenge of alternating transparent with opaque medium during #WorldWatercolorMonth.
Baking is always a wonderful thing . . . fun to do, and useful, too! This is a loaf of wheat bread with pumpkin and some other seeds on top. We ate it all up! Yum!
Oh, I was exceedingly frustrated by the crusty, crunchy rye bread I made last week.
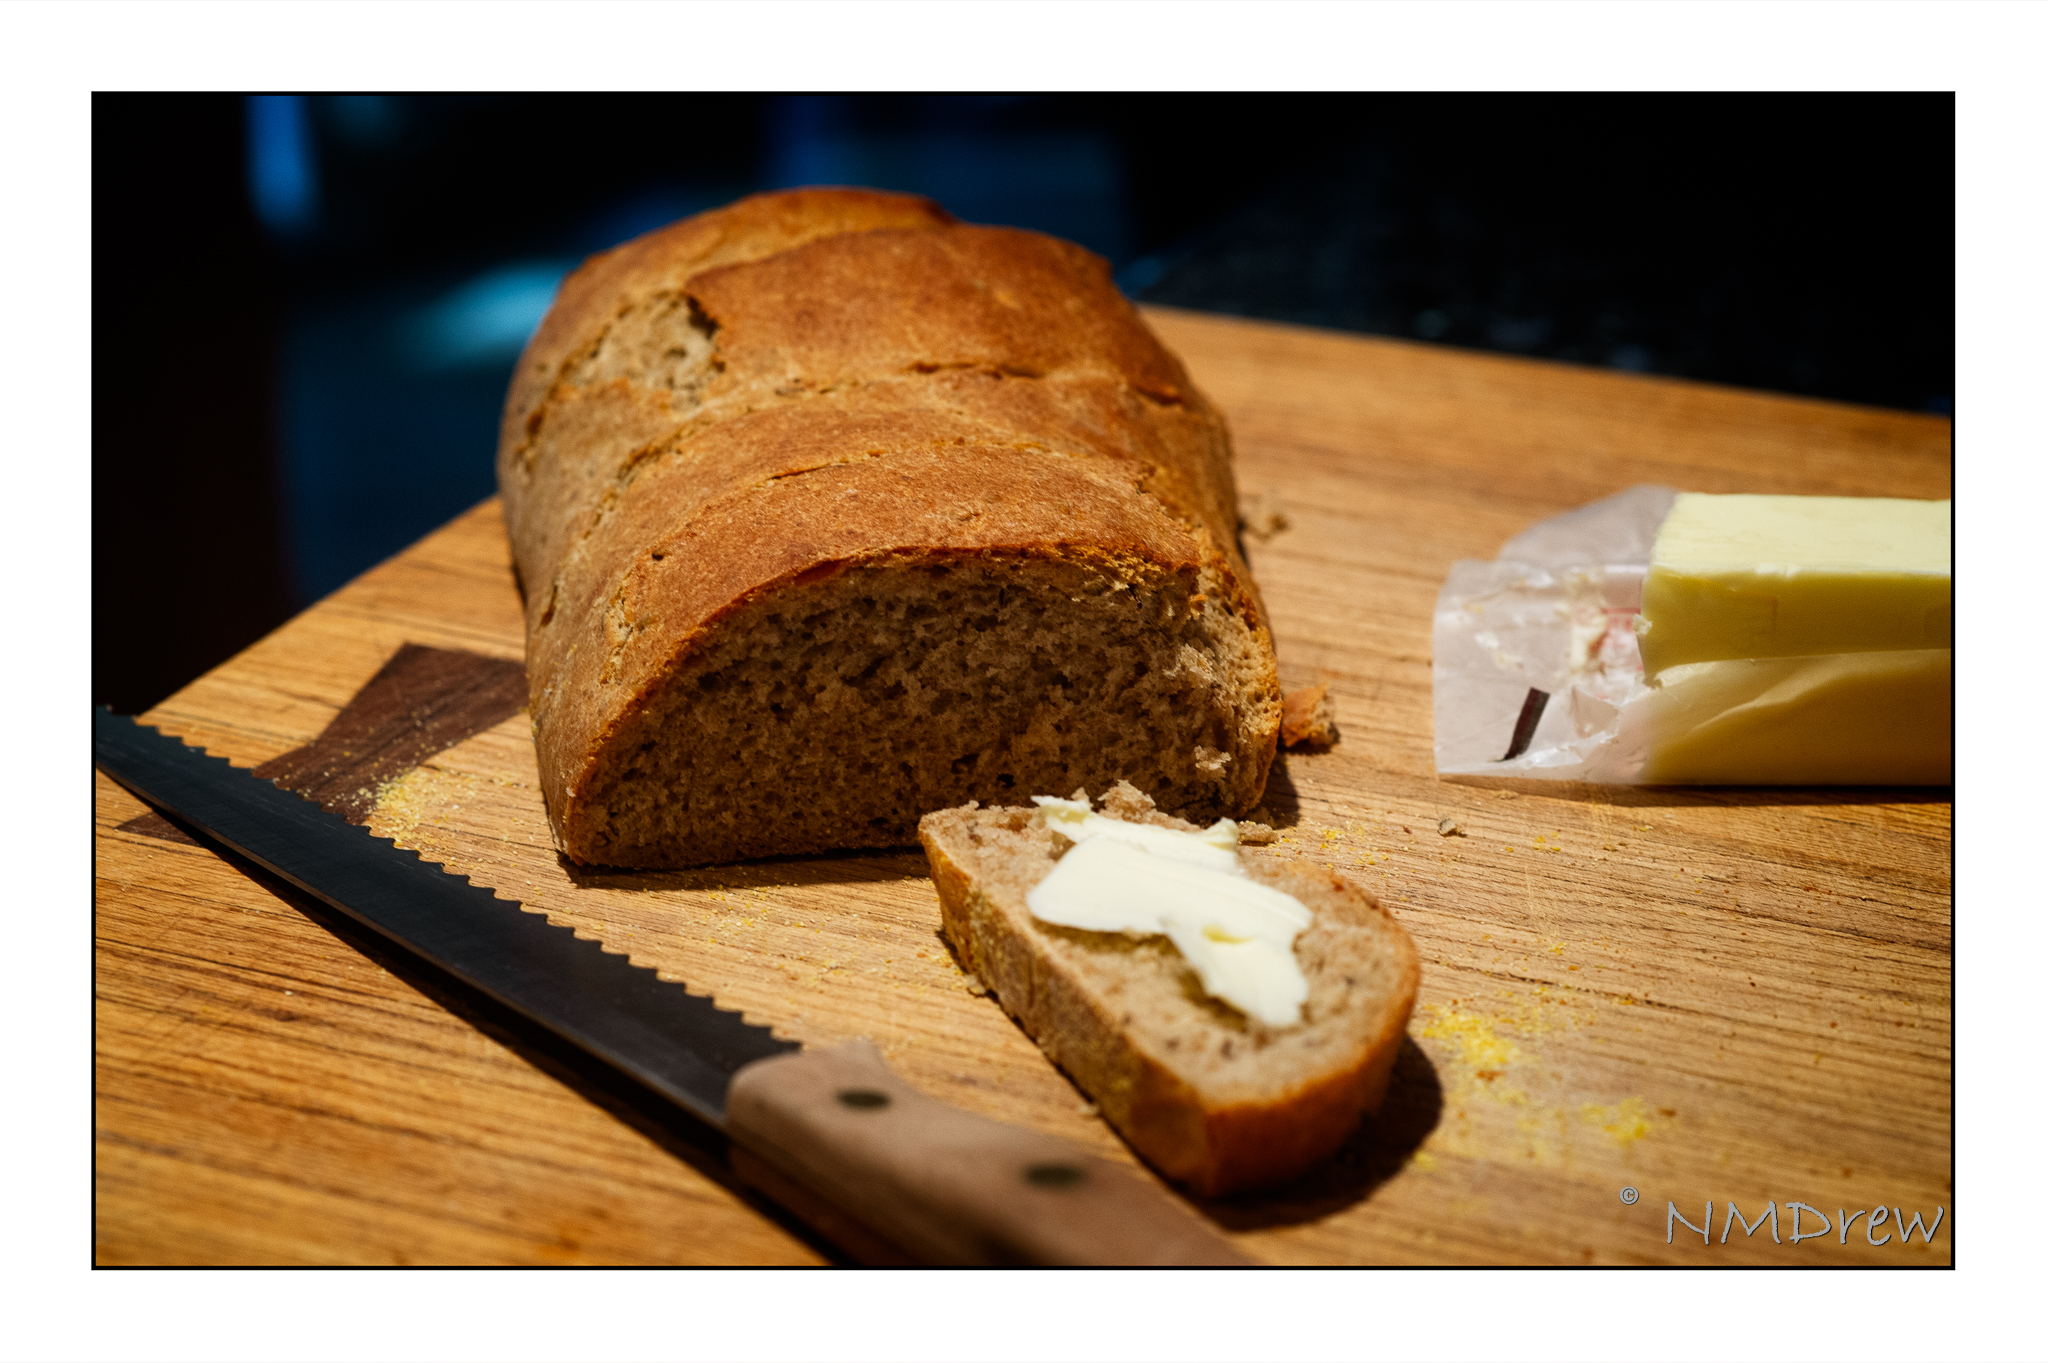
Rye Bread
I knew I shouldn’t cut it while warm because, delicious as any bread is fresh out of the oven – which is why rolls are so much better at times! – it ruins the final product if you don’t eat it all up at once. However, I did not give up, and read more on other sites, and in the end to follow the directions at another site – spray the crust and let the bread dry a bit in the oven, and then, wrap it in plastic overnight.
And there you go – perfectly behaved bread slice with a deliciious flavor, a nice crust, and the ability to support a nice bit of butter and whatever else you wish.
Before I continue, I do want to state that I don’t think the author of the recipe is to blame for my crust problem. I think that there are times when a recipe is not complete, or instructions are not followed correctly. Because this bread is not kneaded, there is less flour in the final product, and it is the first time I have ever made a bread like this. Working with pure rye is tricky, but a kneaded rye is actually workable. My inexperience is to blame as far as I am concerned . . . but continue reading, and let’s see if I can fix my problem.
Well . . . I have been reading about software, but reading and looking at a computer are fine for a short while. I would rather be outdoors, or baking, or something that requires physical activity. For some reason, Danish open-face sandwiches came to mind, and with that, came a search for the bread that lies beneath everything. Recipes abound, and it was a bit of a challenge to find one I liked. By far, the simplest was found on the blog Fahrenbite, and which I followed fairly closely. I even dug out my scales, which will do both pounds and ounces, kilos and grams, and switched it to metric.
The most interesting thing about this bread is that there is no sourdough starter added to the dough. The entire dough ferments for two days, and the smell is mild and pleasant. No white flour is added, and the bread is not kneaded on a board or cloth to incorporate more flour. Instead, it is glopped into bread pans.
The video below is quite charming, and I used it as a basis for my choice not to knead in extra flour.
This video, as well, demonstrates the process. I love the bread cutter, and I expect you can buy one online, but a good, sharp knife and some skill with it should do the trick. The music is quite fun!
Okay, let’s begin. Plan on a 3-day process. The first day you mix up the rye dough, and set it aside, covered with a towel or plastic wrap. The second day seeds and / or rye kernels are set in water to soak overnight. On the third day, it is all mushed together and set aside to rise, and bake, and be eaten!
Day One
2.5 c. water
1 pkg. dry yeast
1.7 lb / 800 g / 3.5 – 4 c. rye flour (I use Bob’s Red Mill and Arrowhead Mills rye flours mixed together – both are great!)
Mix all of these together. Dough will be sticky and thick. If you are using measuring cups, it is a guessing game. I used the scale Josh uses when he weighs grain for beer . . . so 800 g. it was. Set this aside, and cover with a dry or damp towel, or plastic wrap. Ignore it for 2 days. I didn’t dampen my towel, so some of the top layers of dough was a bit dry, but ten minutes in the KitchenAid incorporated it into the rest of the dough quite nicely.
Day Two
Seeds of any variety. I used whole rye berries and hulled sunflower seeds. Other recipes suggest pumpkin seeds, and so on. You choose. I bought the rye berries at Whole Foods – about a cup or two – and had sunflower seeds on hand. Put your chosen seeds into a bowl, and cover with water. Since I didn’t know if they would swell up as much as dried beans, I was on the generous side with the water. Let sit overnight. Pre-soak amount of seeds and rye berries came to about 3 cups.
Day Three
Drain the seed mixture. Together, combine the rye dough and the seeds, and mix for about 10 minutes. I used the regular paddle on the KitchenAid (as seen in the second video) and let it run for about 10 minutes. While it was mixing, I added 1 tsp. salt, and with the mixer stopped, scraped the sides down at regular intervals. Even with the electric mixer, I beat the dough for about 10 minutes before turning it into pans.
The pans I used are called “pullman pans” and have lids to create square loaves. I did not use the lids, but needed a narrower loaf pan than my usual bread requires. They are about 4 inches wide, and rather more deep. With a big spoon, divide the dough between two pans, flattening the dough once you are done. The second video used sesame seeds across the top, but I just sprinkled some rolled oats randomly across the top. Once done, cover with plastic wrap and set aside to rise for 2 or 3 hours.
Rye flour has little if any gluten, so do not expect it to rise much. You will not have an abundance of bread from the flattened amount, but there will be some change.
Baking
Preheat the oven to 350 F / 180 C. Place the rack in the middle. Bake for about 1 1/4 hours, turn out onto wire rack, and cool. Do not slice the bread while it is warm – bread as dense as this will crumble and fall apart. Have patience!
Notes
Here in our beer-making household, we are out of dark malt! As a result, I did not have any coloring to add to the bread, so it is rather pale. The malt would add a flavor to the bread – next trip to the brew shop will result in a purchase of the darkest malt available. Some recipes had user comments – one added “brown coloring” to it, but I have no idea what that is, unless it is the equivalent of caramel coloring.
Open-face sandwiches vary, and you can find a lot of different ones online. Fahrenbite has some suggestions, and what also looks like a yummy recipe for Danish meatballs, known as frikadeller. Another blog with lovely photos, as well as a list of sandwich recipes, is Danish Open Sandwiches, known as smørrebrød.
Afterword . . .
These look lovely, and taste delicious. The problem is the crust – it is thick and crunchy, and the inside of the bread is very soft. Cutting through the crust is a disaster – a professional slicing machine may solve the problem, or letting the bread sit a day or two in a plastic bag to soften the crust. Other thoughts include baking the bread at a lower temperature – maybe 300 – and for longer, as well as possibly use unglazed ceramic pans.
As I write this, I have sprayed the remaining whole loaf – and the half loaf that did not get destroyed in trying to find a way to successfully slice it with different knives – thin filet knife, butcher knife, serrated knife. None were successful. Anyway, I have sprayed the loaves all over with water and placed them in the warming oven.
I got this idea from another recipe for this bread, which said to bake the bread for 2 hours, spray inside the oven every 30 minutes while baking. Then, when finished baking, leave the bread inside the oven for the next few hours as it cools, and now spray the crusts with water. Seems like they saw this problem . . . let’s see if spraying will help, or keeping in plastic for a few days. I expect mold could be a problem here, if not properly watched . . .