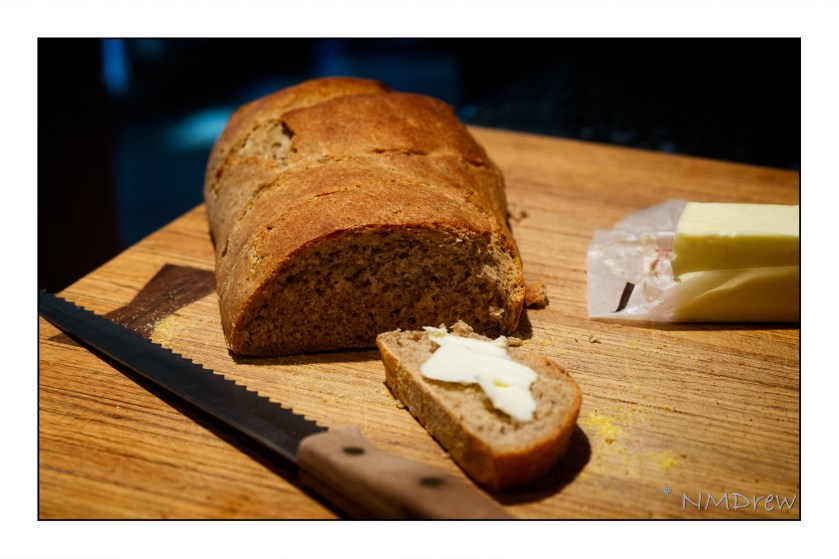
This is a delicious rye bread, made in the French tradition from a recipe found in The Breads of France by Bernard Clayton. It takes time to make this bread, but is time well spent. It begins with a sponge, which ferments and imparts a wonderful flavor to the final loaf. If you want to make this a lighter loaf, use more white flour, and if you like the taste of dill seed or caraway, do not hesitate to add them to the final product. I would do it after the sponge has risen, before the first rise. This recipe is based on Mr. Clayton’s Pain Seigle recipe, with some modifications of my own.
Starter
1 c. dark rye flour (I used Arrowhead Mills Organic Rye Flour)
1 packet active dry yeast (Fleischman’s)
1 c. warm water
Mix all ingredients together in a bowl. Cover with plastic wrap. Let ferment at least 1 day before bread baking day at room temperature. I set mine outside one day in the sun, and it developed a lovely sour smell. I then let it ferment two more days, so on Day 3 I made my bread.
Sponge
1 1/2 c. warm water
1 c. rye flour
1 c. unbleached white flour (I used King Arthur’s Bread Flour)
Add all the above to the starter, stirring all into starter thoroughly. Add any seeds you might like – caraway, dill, or mustard. Let sit for at least 8 hours before making dough.
Dough
1/2 c. warm water
1 tsp. salt
2 c. rye flour (I used the rest of the small bag of rye flour I had boughten)
2 or more c. unbleached white flour, and more for the bread board when kneading
Pour sponge into large bowl. Add 1 c. of each flour, stir in. Add rest of rye flour. Dough is slimey and wet, but mix in the best you can. Dump out onto a floured bread board – be generous with your flour! Get out a spatula or dough scraper to help slap this wet mess into shape, incorporating more flour as needed. Begin to knead dough, adding more flour until dough is firm, no longer slimey, and does not break into wet spots. Do not over-add flour, as you want a firm but soft dough. Too little flour and your final bread will be rather flat.
First Rising
Shape into ball, then place into greased bowl, coating dough with oil in bowl. Cover with plastic or damp towel and let rise 40-60 minutes.
Shaping and Second Rising
Plop dough out of bowl and back onto a lightly floured bread board. Flatten a bit to remove air bubbles, then shape into another ball. Divide ball into 2 or 3 sections (see picture – I cut mine into thirds for small loaves). Shape into balls, pulling dough into smooth surface on top. Place onto baking sheets sprinkled with corn meal or lined with parchment paper. Cover loaves with waxed paper and let rise another 30 minutes.
Getting Ready to Bake
About ten minutes before the end of the second rise, preheat your oven to 400 F, making sure that the rack is in the middle of the oven.
Mix together a glaze of 1 egg yolk and 1 T. or more of milk.
Take a very sharp knife and slash the tops of the loaves, or make slashes on the outside of the bread. This will create nice visual texture and allow the bread to rise during baking without cracking too much.
Make a mop out of a paper towel, or use a pastry brush, and use the egg-milk glaze to cover the tops of the loaves.
Baking
Set timer for 22 minutes. Place bread in oven. When timer goes off, turn the baking sheet around 180 degrees, and reset timer for another 22 minutes. When timer goes off a second time, pull out bread. With a hot pad, pick up loaf and tap the bottom of the bread. If it sounds hollow, it is done; if not, put in for a few more minutes, and then tap again.
When bread is done, place on wire racks to cool, uncovered.
Notes
This bread freezes well. I made 3 small loaves just in case we got tired of the bread. So far, only one is left! This is great for small sandwiches, with sweet butter, or cheese.
For a first loaf, this is a bit of a challenge as rye bread dough is slimey and wet, and really does not develop gluten like whole wheat flour does. The addition of the bread flour increases the overall gluten content of the loaf, letting it rise a bit higher, but if you were to make a loaf of bread with 100% rye flour, it would be heavy and dense, but incredibly delicious!


