Paper Skies

In a lot of ways we just take paper for granted. It’s everywhere. In the arts, though, paper can be more than important – it can be critical. Its qualities can determine how you work, what you do, and so on. In watercolor, paper sizing, texture, and fiber content all play a role. As well, how the paper is handled by the artist, meaning (in this post) how much water is used with the watercolor paints, and if the paper is dry or wet when paint is applied.

The other day, I was watching a YouTube video by an English artist whose work I enjoy: Andrew Pitt. In particular, I was watching how he handled skies with a limited palette of colors (Winsor Newton’s Light Red and Cobalt) and the paper he used. By chance, I have both of his choices – Arches Rough 140# and Bockingford CP (he has 200# and I have 140#). Arches is externally sized and Bockingford is internally sized. Arches external sizing creates a harder surface which does not absorb water as easily as does the internal sizing of Bockingford. You have to work more quickly with the Bockingford than with the Arches.

With this in mind, I decided it was time to tackle skies. I do them all the time, but it was fun to focus a bit more solidly on the subject of the sky itself as well as how wet-on-dry and wet-in-wet worked with the different papers. Watching Pitt’s video a did one thing in particular which he suggested: I kept my brush on the paper when I painted as long as I needed to create a specific area – the sky or a cloud.

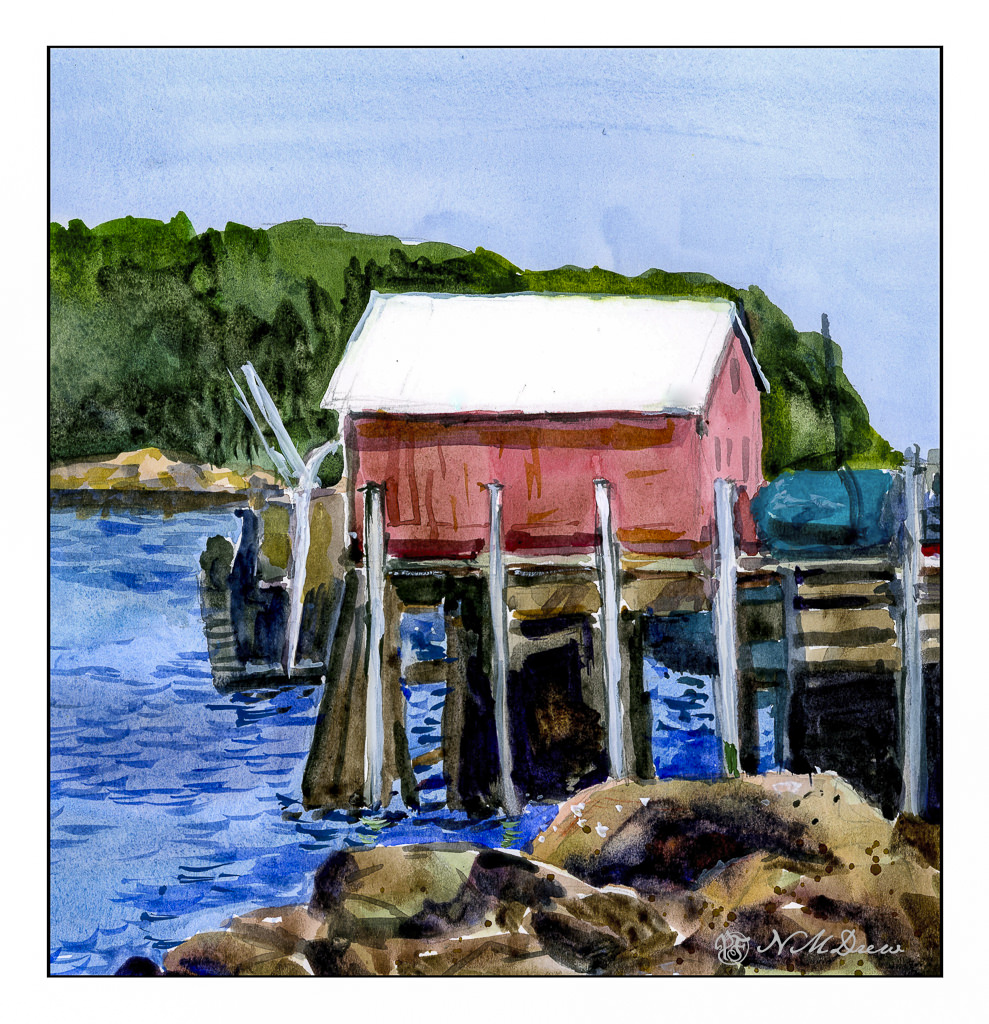
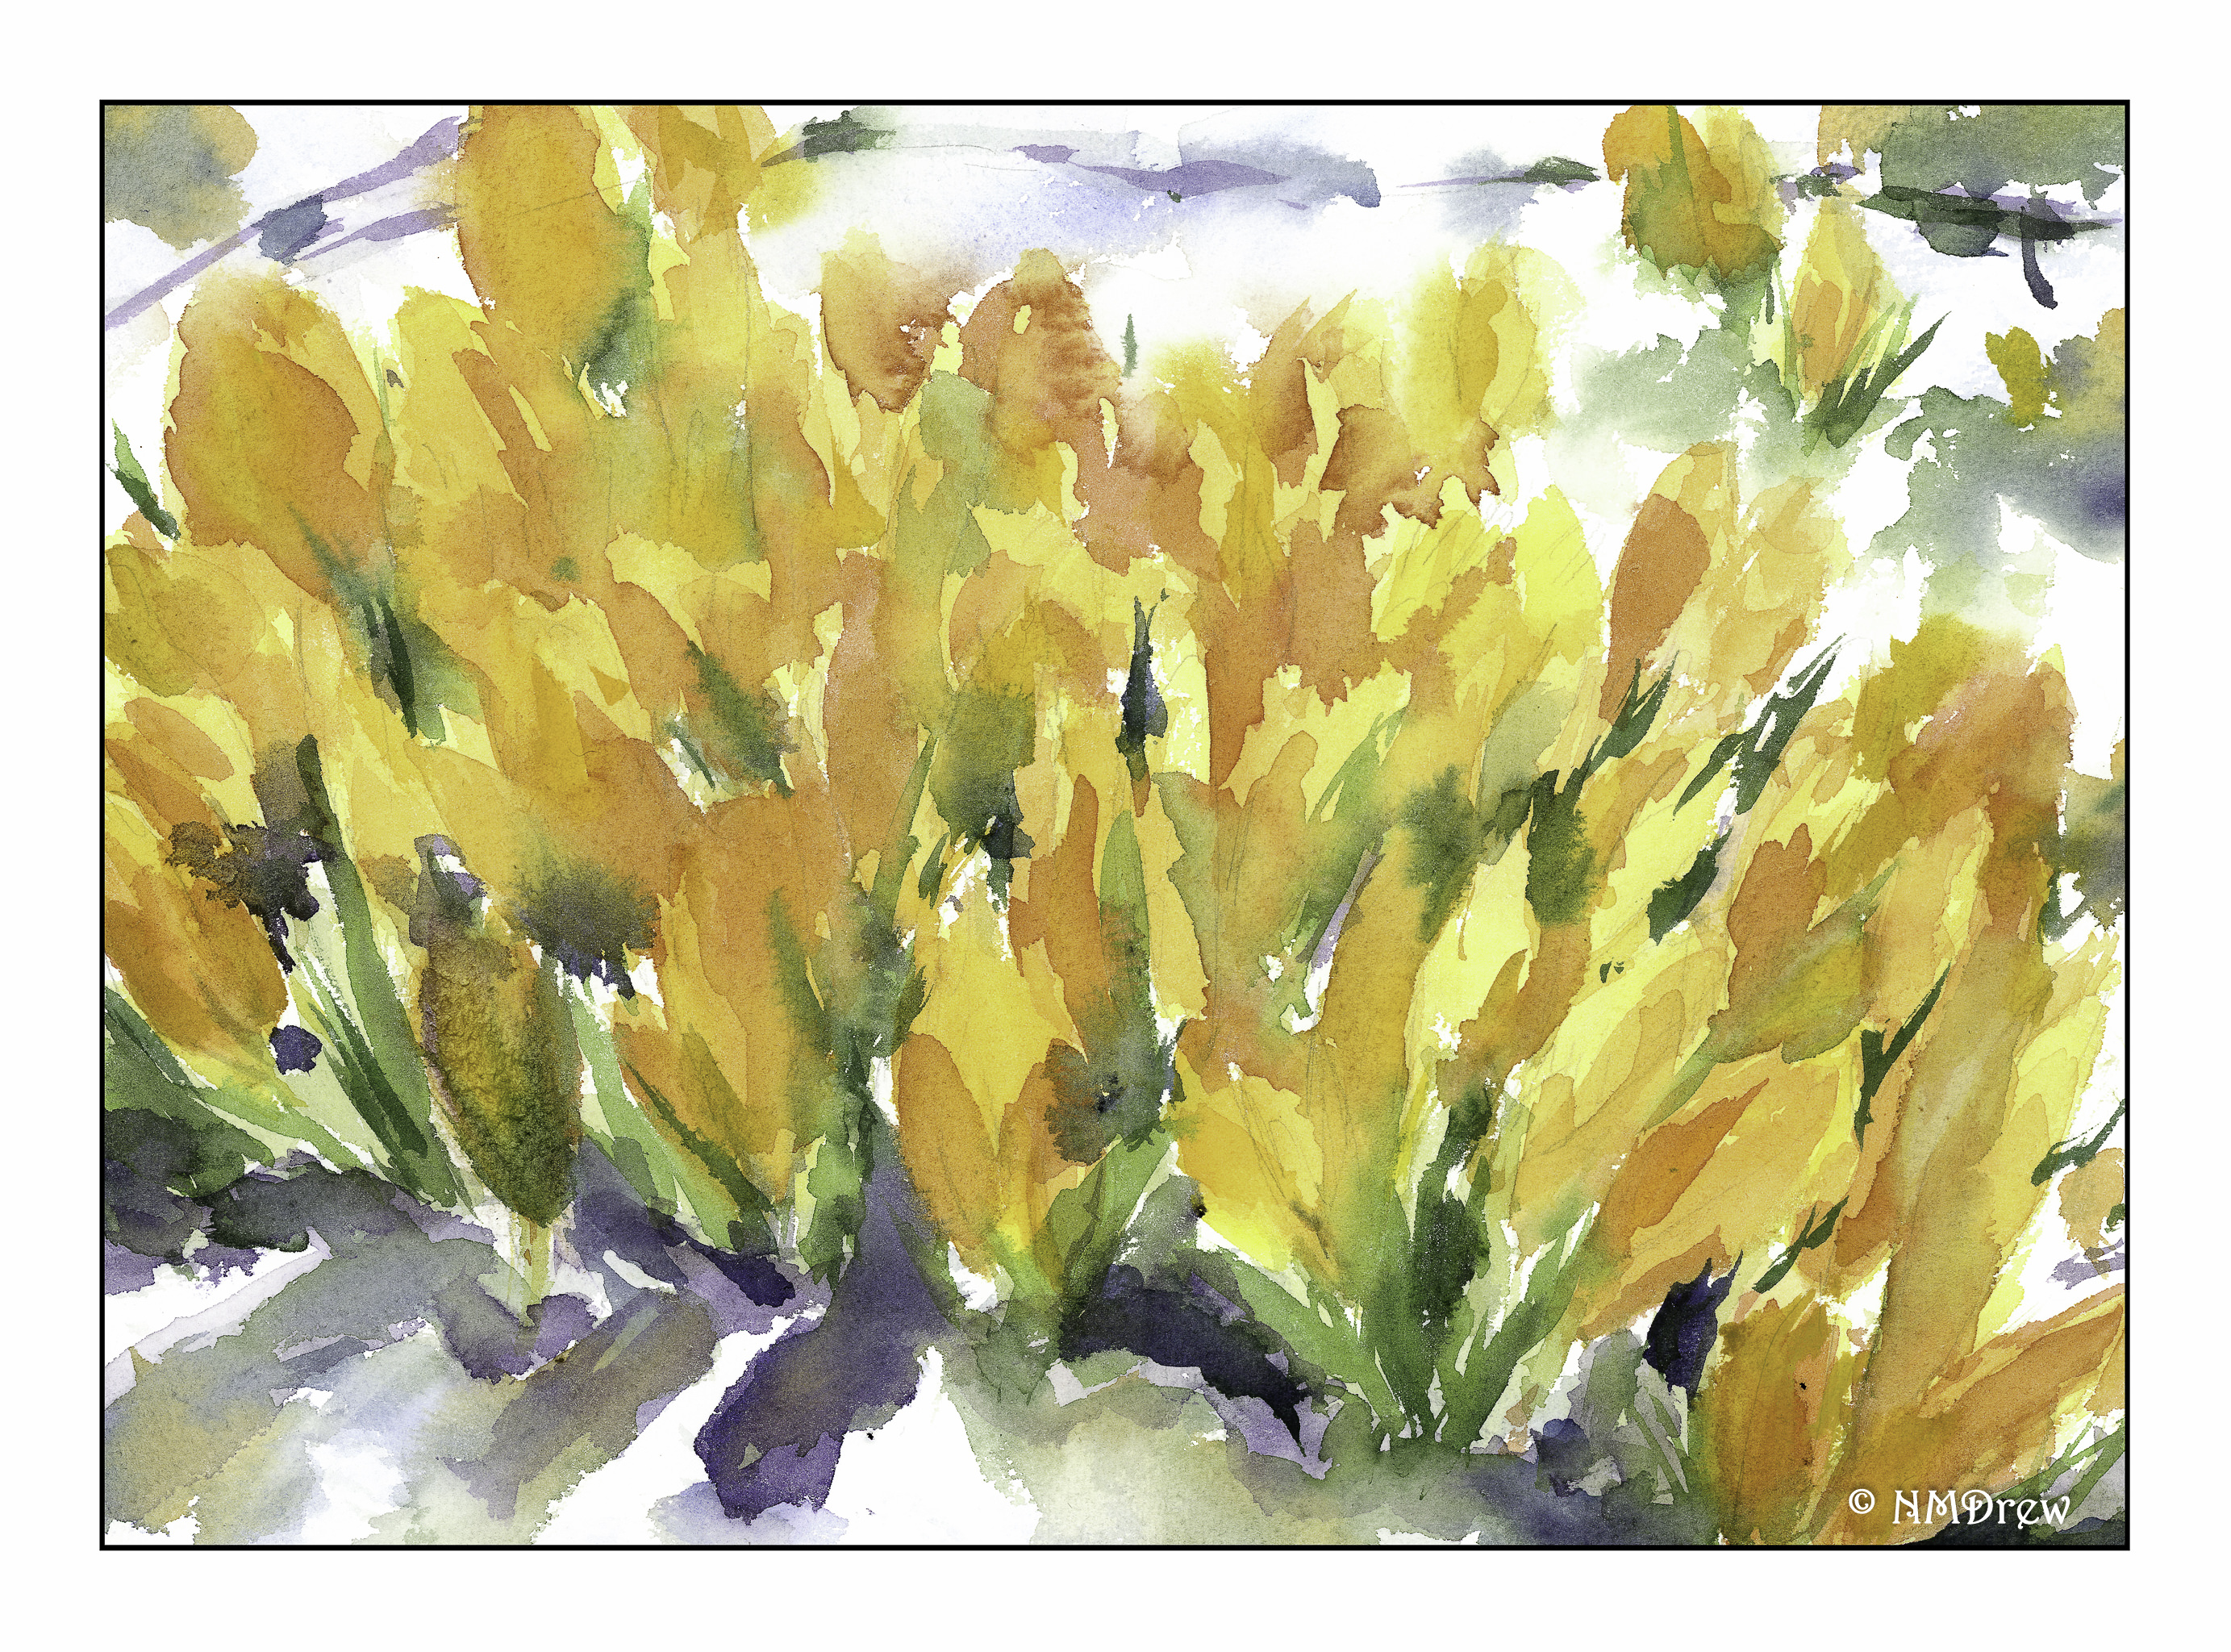
In the above painting, as with Pitt’s sky, I used only Cobalt and Light Red. Here, I used Arches Rough and used a wet brush on a dry surface. First I did the sky in blue. Rinsing the brush a bit, I mixed Cobalt and Light Red together, varying the amount of color and pigments. The lighter greys have more water, the darker greys have more pigment. The white is clean paper without any paint.

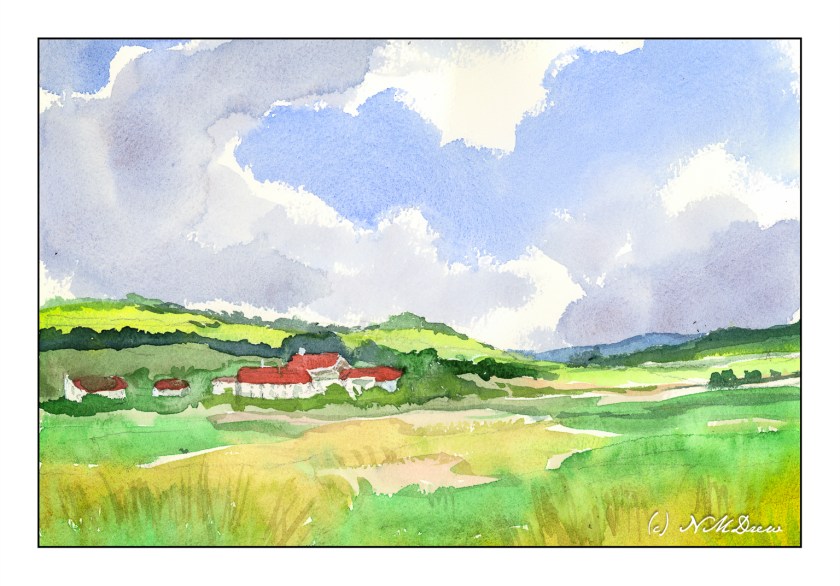
For some reason, Edward Seago wandered through my head as I was painting the first picture. I really like his paintings of the damp skies of the English coast. I figured a master(ish) copy of one of his paintings wouldn’t hurt. This is my copy of his “Farm Near Somerton – Norfolk” – not as simple as his, but the sky was the focus. Here, Arches rough paper, dampened, and then painted with dilute watercolors. As with the wet-on-dry painting, the Arches allowed more control than I have found on other papers, such as Bockingford.

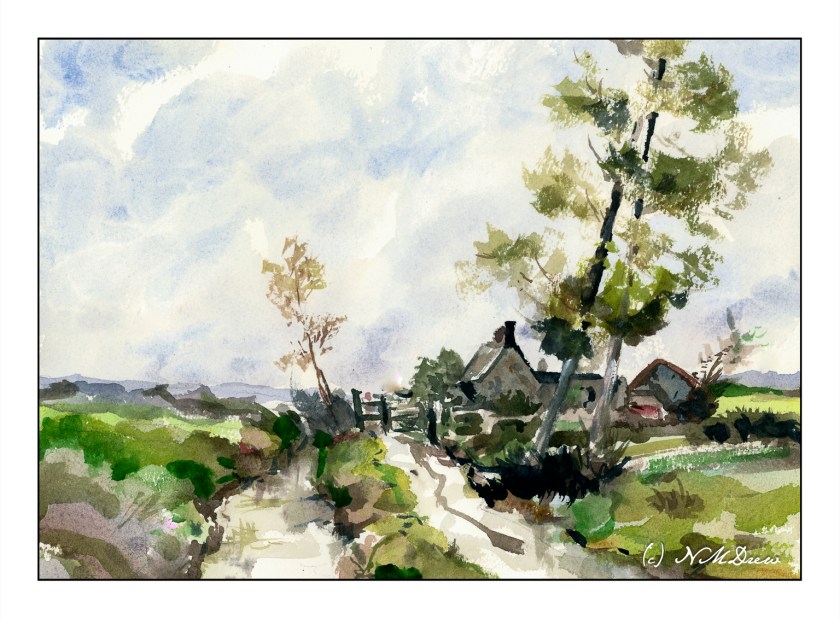
Moving from Arches rough paper to Bockingford 140# CP paper is a different experience than with the Arches rough. The above painting is wet-on-dry, meaning the paper is dry. The Bockingford absorbed the water more quickly than the Arches, and this meant I had to work more quickly, moving the brush and colors more rapidly across the sky. It required a bit more forethought as to where I wanted to place colors. I could pause and think with the Arches. Not so here – I had to plot! Again, cobalt and light red in varying combinations, but a strong mixture to get the dark clouds.

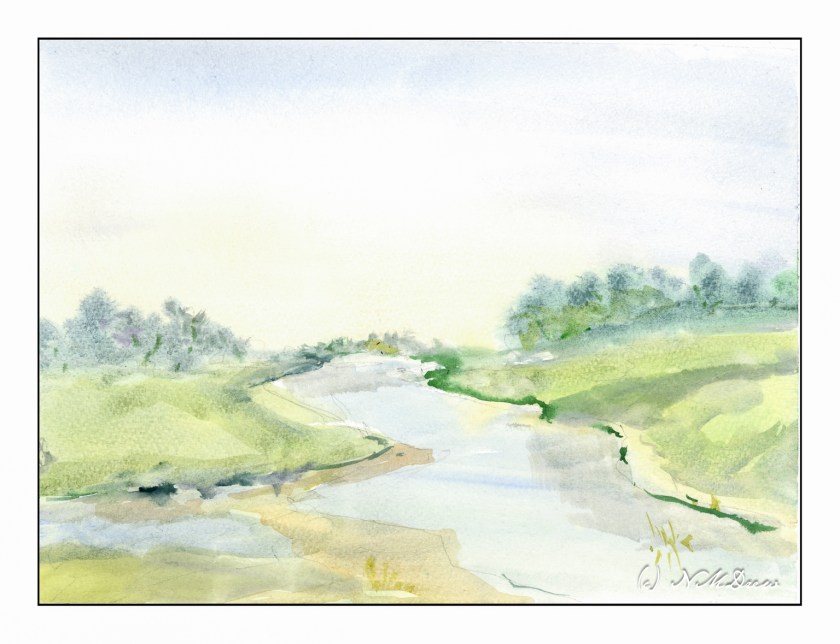
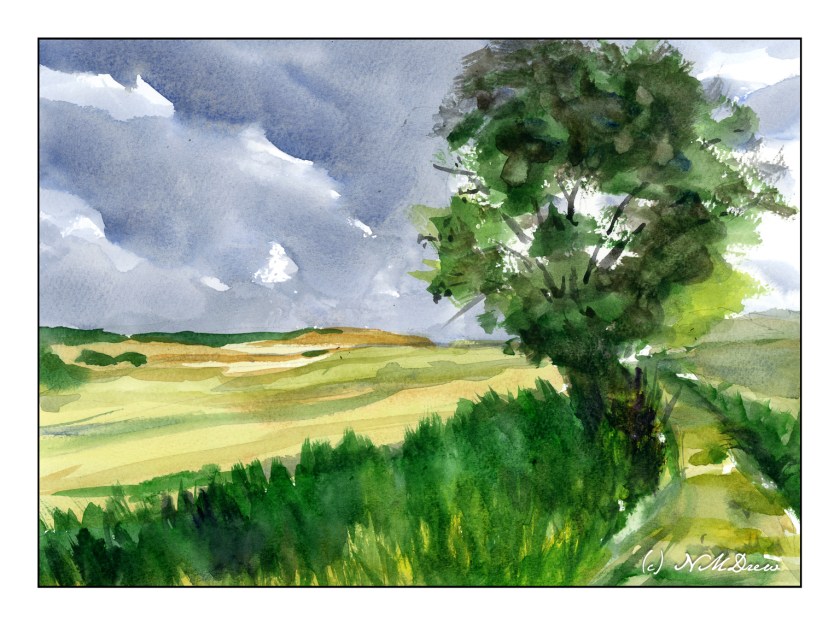
And finally, wet-in-wet on dampened Bockingford. I dampened the paper and let it sit a bit to absorb the water. As this was going on, I mixed very thin washes, mostly water and a bit of pigment. The initial wash was in the lower sky using raw sienna. The upper sky was cobalt or ultramarine, very thin as well. From there, everything else was painted with very thin paint onto damp paper. The dilute paint made for high key picture, so for a bit of contrast I added darker lines in Hooker’s green and Payne’s grey to paper in different degrees of dampness.

Overall, this exercise in paper and paint was a lot of fun. I learned a lot about the paper and its characteristics. Knowing your paper, just as you know your paints and brushes, makes the work of painting less work, if that makes any sense.

In conclusion, Arches rough allows more time to think and application of a lot more water than the Bockingford. Both are excellent papers with different qualities.

Now, go paint!

Red Building on the Pier

After playing around with the Strathmore Vision watercolor paper, I used it for today’s painting. Knowing its strength lies in painting directly on it with little to no lifting or scrubbing, I had to reset my thinking for this painting.

First, I did a pencil sketch on the paper, working to get proportions and placement of the bits and pieces in fairly good proportion to each other. From there, I worked as directly as possible to get values and colors the way I wanted them. I moved around the paper, too, laying in big washes and areas of color before adding detail.

First, the foreground rocks. The wash was laid down to get the ranges of tonality and vary the colors within them. Once dried I added the darker areas to create shadows. If you look, you will know the sun is coming from the upper right, and thus shadows will be toward the left.

Next, the sky. It is a very flat sky so I did a wash of a blue mix once I had dampened the paper, carefully working around various shapes. From there, the red of the building on the pier, working around the light uprights. Then, the green of the trees in the distance, being careful about the roof. Finally, the water.

Once all this was dried, the little things began, such as sorting out the supports and boards on the pier, some rock details, and the ripples of darker blue on the water.

This painting took me quite awhile as I tend to splish-splash and be quite impatient. This time around I worked hard to consider the colors and the paint before placing them on the paper. My mind is fried! Still, even though it is not by any means a great watercolor, I do like the way it looks – there is a bit more freshness to it than some of my other ones. I ordered some Sakura Gelly pens in white for better details for more delicate areas – I couldn’t find mine at all.

More watercolors to come, but I am going to use my 100% cotton Arches and try this same approach – more direct and thoughtful. I am curious as to how I will feel about Arches absorbency vs. the Vision. The Vision paper works rather well in this area – a good balance of absorbency without drying out. Surprisingly, even with a fair amount of water, Vision does not buckle as much as Canson XL does, and it seems quite capable of handling water when applied over the entire sheet without a problem.

Both Canson and Vision have problems with lifting color or scrubbing, and in many ways I think continuing the usage of Vision will force me to retrain my painting techniques a bit by requiring patience and forethought.

Brain Training with Negative Painting

No, I don’t mean painting with negative themes or thoughts, but painting around things – but you already knew that!

The normal course of painting, for the major part anyway, is to paint the object you are focused on. Then you paint around it. Most often it works, but for light-colored objects, or flowers, sometimes you just need to paint around the white to keep it white. Paper also can affect negative painting by how well it absorbs water and pigment. 100% cotton watercolor paper is best for this, and its sizing also will affect its absorbency. Cellulose papers, even if heavy, react differently to layers and layers of watercolors and pigments.

Below is one of my first focused attempts on negative painting. Supposedly these are chamomile flowers, but the fact is they look a lot like any generic daisy. Painted on the cellulose paper, absorbency was an issue, as seen clearly on the flowers. Blending of color was rather forced. However, I could paint around the white of the flower and get crisp edges. The outside green was more difficult; I think if I used water between two green values to soften the edges, blending might have been more successeful.

From this paper I went to 100% cotton Kilimanjaro 140# CP paper, natural tone. Already a difference can be seen and, while painting, felt. Color is easily absorbed and blurs nicely. Layers of color, laid in while wet and dry, still creates a lovelier quality than above. It was far easier to paint the petals with shades of grey and with thin glazes than above since the paper’s response was more absorbent and less resistant to both water and color.

Finally, a painting of yellow lilies – lilies? you ask? Yeah, me, too. Anyway, yellow flowers. I painted the basic shapes of the flowers, then painted around them, and then added what was supposed to add character and depth to the flowers, and then back to the back ground, and then back to the flowers, and so on. As a flower painting it is nothing great, but it was good practice for negative painting. I worked at shapes more than anything – the shape the yellows create as well as the greens and darks outside and in between the flowers themselves. This, too, was on the Kilimanjaro paper, and it shows.

The cellulose paper fails when it comes to lots of washes, but for more direct painting it works pretty well. For lots of water and color, as with the two on the Kilimanjaro, the cotton paper is far better. The frustration level with the cellulose paper is certainly there as I had to pick up drops of water and spend a lot of time with the hair dryer so I could move on to the next wash or glaze. With the Kilimanjaro, only when I wanted a totally dry sheet to paint upon, to add glazes or more paint or another layer of clean water, did I need to use the hair dryer.

So, more painting and focus. Not great, but it is in the doing and the play the learning is done.

Paper & Hyacinths (or Gladioli?!)

These paintings serve two purposes. First is to check out two different 100% cotton papers and decide which has a better feel to it when it comes to handling copious amounts of water. Second is to take a color on a long journey down a sheet of paper, adding similar colors for variety as I go along. I did it in both.

This is done on ArtBeek paper. I consider it to be a student grade paper even though it is 100% cotton. I like it as it has a nice absorbency but it is not up to snuff to my preferences. It is good for studies, though, and a very affordable and nice paper. I prefer it to Strathmore or Canson watercolor papers – they don’t come close as far as I am concerned. This paper has a texture imprinted on the front, but the reverse side is smooth. This actually makes it a good paper for gouache as well as value studies with pencil. No complaints in general.

I mixed together alizarin crimson and some other red to try to get a pink – big failure there, so I ordered some Opera, which is a rose pink of a definitely pink leaning. I worked a bead of color down for leaves and flowers, adding different colors to vary the major color. From there, once the flowers were dry, I added darker values with thicker paint.

These hyacinths are not as appealing to me as the pink-red ones (which could be gladioli, too!), but the paper is. The paper is extra white Fabriano 100% cotton 140# CP paper. It connects with the paint more readily and there is a sense of contact and control that I don’t feel with the ArtBeek. This same feeling comes with Arches and Kilimanjaro (from Cheap Joe) watercolor papers.

As with the pink flowers and leaves, I worked beads of color down and added various colors as I moved. I started out with a blue that I think is too dark now, but that is part of experience. The same techniques as the pink also applied – dry the painting, add darker colors, creating some sense of depth and detail.

I tried to keep each painting pretty direct as far as colors, not adding too much in the way of glazes. I also worked on negative painting, painting the background around the flowers and leaves.

The past two days’ studies of flowers in sketchbooks were rather precious. Fussy, annoying. That, though, is the purpose of sketchbooks in many ways, as well as memories of places visited or developments of ideas.

Both paintings are 9×12.

Crocus

This became more of an impression of crocus rather than a detailed study.  To tell the truth, I have never seen a crocus in my life!  I can imagine the joy they bring, though, as they peek through the last of the winter’s snow.  Hyacinths were the bulbs that bloomed in the snow in the midwest, soon followed by tulips and daffodils.  I tried to work with negative space to define the flowers, as well as blur the background and put a bit more detail in the foreground – perspective in action on a conscious level!

This is the reverse side of the paper I used yesterday, St. Cuthbert’s Millford.  This paper has a really nice tooth, not smooth or CP, and smoother than rough.  It catches the brush bristles rather nicely.  Colors are dreamy when blending together.  It also lifts well – some color ran into another area and I was able to lift it out and recover to a degree from the mischief.  I don’t know if Arches would handle it as well as this paper, but that is something I should check out.

In addition to no longer making masses of mud, I find I am actually remembering things – make long brush strokes, lay down large areas of light colors and leave the whites in the process; think about the direction of the light; a few rules about perspective.