Nocturne Studies in Gouache

For some reason, gouache seems to be especially good for depicting strong colors and contrasts. In part I think it is simply because the colors can be so very saturated compared to watercolor. Their opacity also lends to this. Artist gouache is also water soluble, and you can re-wet what you have painted to modify it. You can hide mistakes, but you can also scumble and scratch and get some rather nice effects.

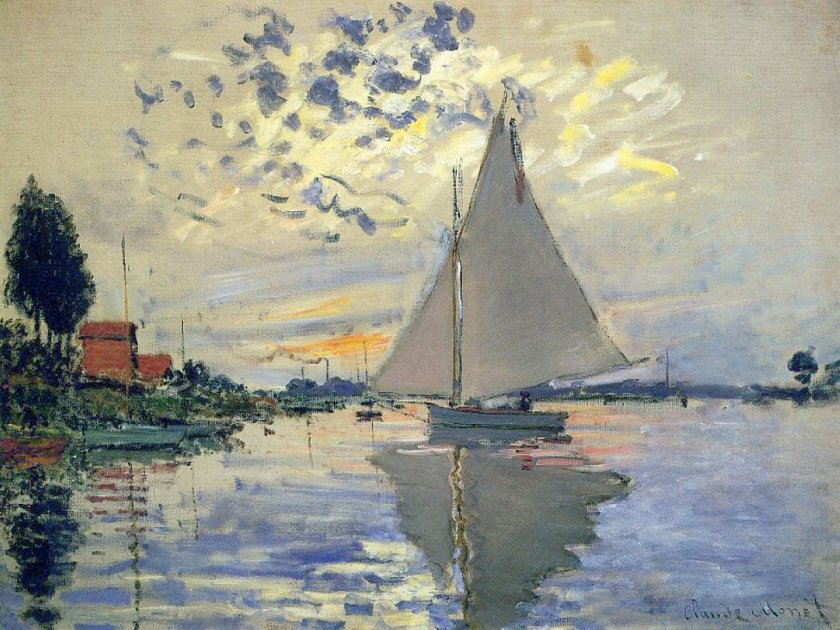
I divided up a sheet of tan paper which measures 11×14 inches. I used a lightly sticky artist’s tape to make up the different areas to paint. The first I painted is the large rectangular area on the right, and then on the left I did the next largest rectangle, and finally the one in the lower left corner. This image is directly from the scanner, so if you look carefully, you can see my mistakes which I corrected using Photoshop. The one in the lower left has 2 masts in the reflections – that is because I misplaced my mast and had to fix it for the final image.

Cheating? Well, if I were printing these critters, I would fix them, so for purposes here, I don’t think so. Also, these are all studies and the point is not accuracy so much as atmosphere – night, whether after sunset, before sunset, and on a full moon night.

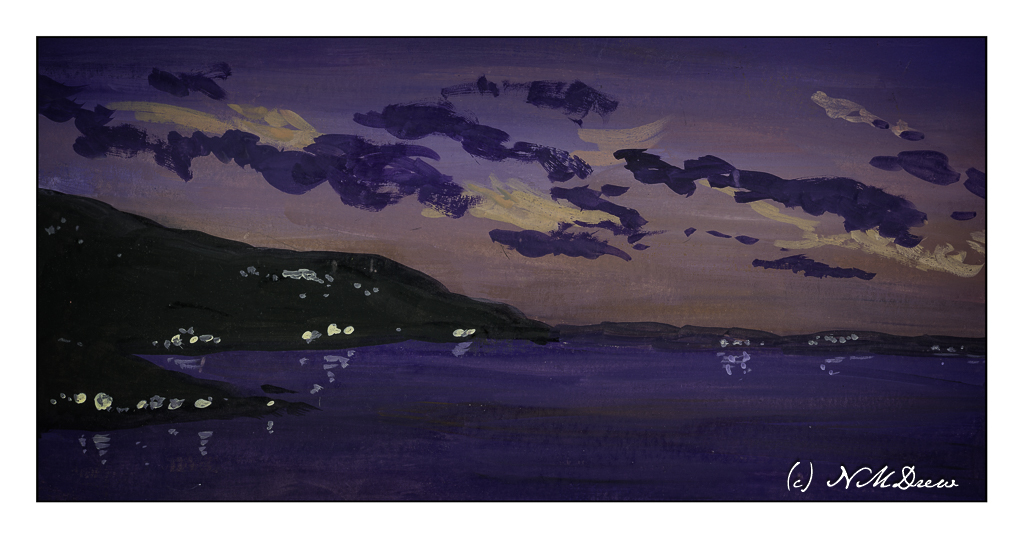
In the above painting I wanted here was a sense of dusk, when the sun is down and darkness is coming on. I worked with the sky, making it brighter than the water because with the earth’s curvature, the sky will still be bright. Lights coming on, too, add to the atmosphere, some warmer than others. And reflections, too, on the rather calm water.

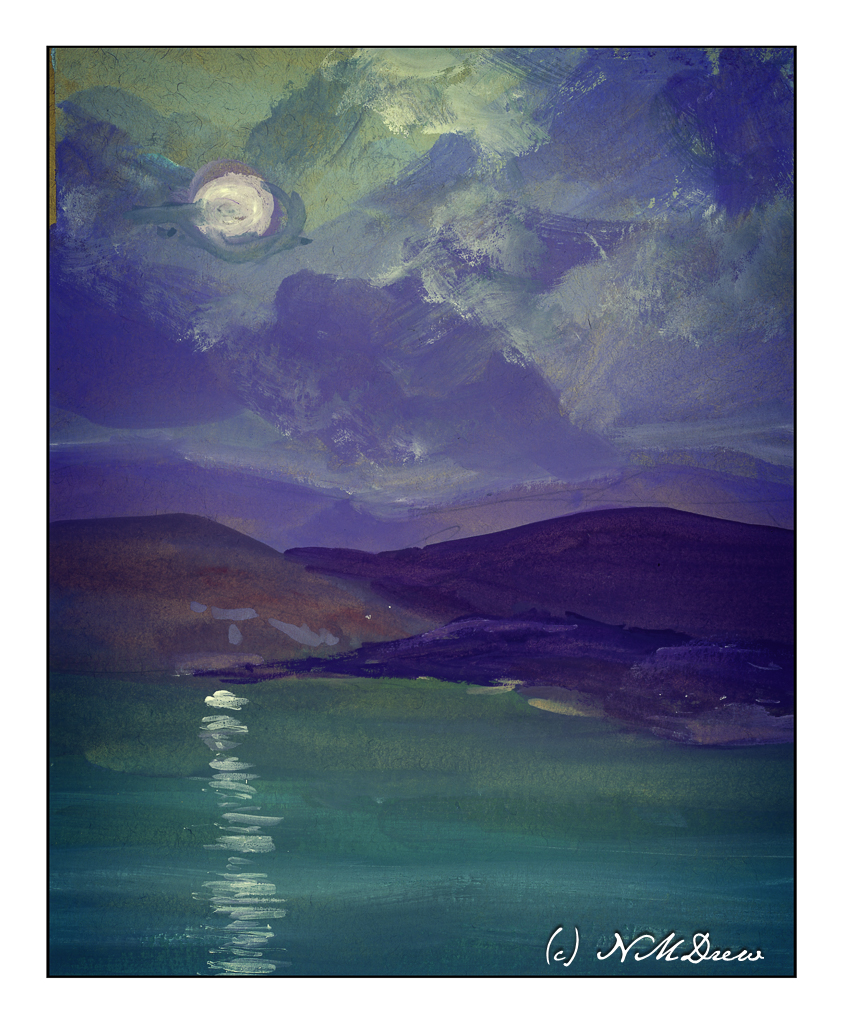
This one I played with in post because all of a sudden, in one foray of this or that setting, the light of the moon suddenly seemed to light up the surrounding clouds! I really liked it. Now, as far as the moon’s reflection on the sea – should it be more narrow closer to shore, and wider toward the bottom of the page, suggesting that is where the viewer is? The same applies to the painting below.

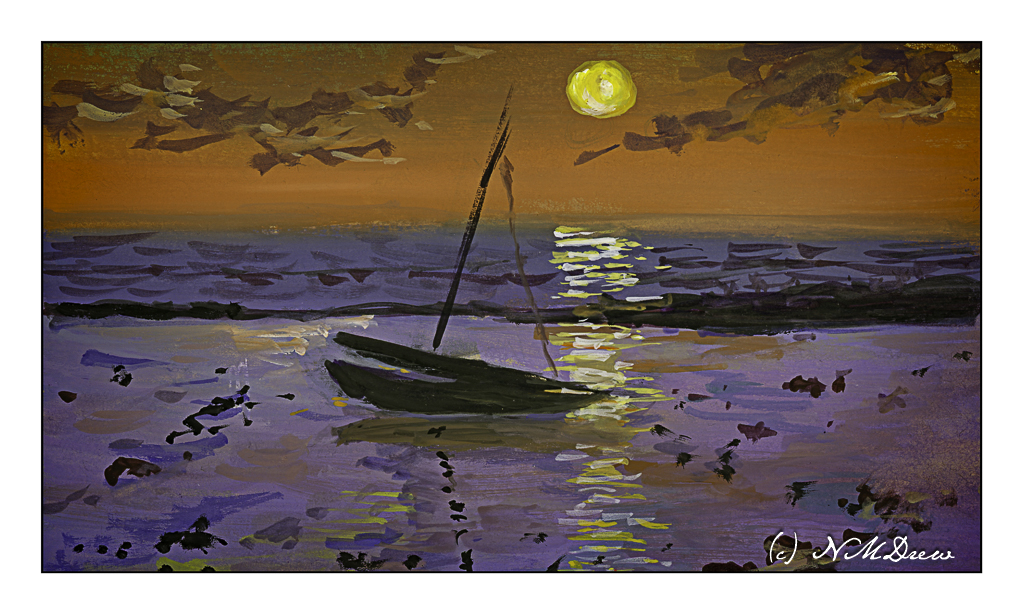
Once more, dusk. The sun is still out, but it is becoming increasingly dark. The sun’s reflection on the sea may need to be more narrow toward the horizon – again, something I need to check. What I wanted to do here was to get a sense of a boat resting on shallow water because the tide has gone out. The water is acting as a mirror and a bit of glass for the light above and the sand below.

Altogether, I had so much fun doing these studies! I want to carry them into watercolor, which I think could be extremely challenging, as well as into acrylic and oils. I also think that, much as I like the tan paper, it is very absorbent and perhaps I need to use a layer of acrylic paint or casein as a bottom layer for the paints. That is something to try later on.

As I post this, I have been awake about an hour. Rather funny to post a bunch of nocturnes as I watch the sunrise.

Now, back to my coffee!

Master Study of Voilier au Petit-Gennevilliers by Claude Monet

The original painting by Claude Monet was painted in 1874 and measures approximately 22 x 29 inches. My painting measures 11 x 14 inches, so it is close to the same proportions. I left out a few things simply because I was not trying to replicate Monet’s painting but catch its sense of spontaneity. This spirit is what I found refreshing, and while Monet probably finished this painting alla prima, I spent about 6 hours in the studio. He used oils. I used fluid acrylics.

As I started to look more closely at Monet’s painting, I saw that his brushwork was very quick in many areas. The smudges of smoke in the left middle ground, the dark, wispy clouds used up a rather dry brush, one where paint was nearly gone. The white-blue swash across the sky seems like a quick thought. As well, it was interesting to see how the dark bits of clouds worked with the yellow and white areas to focus the viewer’s attention on the sailboat itself.

My own painting is more blue than Monet’s, but I saw a lot of blue in my reaction to his painting. Comparing the two is really interesting when I compare my scan to the Wikimedia online image presented here. It is hard work to get a good, warm grey and I did struggle with it. I also had to work on observing little things, such as the boats on the left middle edge – I couldn’t figure them out initially. The chimneys on the horizon also needed to be considered – what were they? The smoke on the left horizon gave it away. Once I had the boats on the left sorted, the vertical lines reflected in the water made a lot of sense.

What I really love about this painting is how it catches the light, which, of course, is the idea behind Impressionism. The moody sky with bits of cloud and fog and light as evening descends is what caught my attention. Even now, as I compare my master copy to Monet’s painting, I see even more subtleties which I could have caught. But, at some point, you just have to stop!

Fluid acrylics, Centurion OP DLX linen canvas pad, 11 x 14.

Before Class

Every Monday afternoon I meet up with a class in oil painting. I paint oils at home, too, and they take far longer to dry than ink or watercolor. Hmmm. I really do miss those two quite a bit, so today, before class, I decided to do two quick sketches and use a bit of watercolor.

The first was daffodils – obviously! I have several in pots, some blooming and fading already, and others sending up leaves and stems and buds. Spring flowers for sure. I have some freesias which are just beginning to bloom, so perhaps some of those later on.

And then some saguaros from the Sonoran Desert. Sunset is always fabulous in Arizona, and here we are overlooking the metroplex that is Tucson / Phoenix in the distance. I am still amazed by these wonderful cacti – so tall and elegant, and silhouetted against the sky they are even more amazing.

Okay – time to pack it up and head out to class!

Winter Farm on Christmas Eve

Now to the northern part of the continent . . . somewhere in North America for winter on the a prairie farm, snow covering field stubble, early evening or morning. Cold, desolate, and heartbreakingly beautiful.

I spent the morning painting this on rough 300# natural white Kilimanjaro. I did it in stages. The sketch was light, with suggestions of shapes. Then the sky was wet and yellow, quin gold, and permanent alizarin crimson used to create the rosy golds. Once down, cobalt blue and ultramarine were placed to simulate sky being careful not to merge into the rose gold of the central cloud. As the sky dried, purple and alizarin were mixed with ultramarine to create the darker clouds. 

After the clouds were laid in, I did the dark trees, blurring some green into the still damp sky, as well as waiting for the sky and soft trees to dry. This was done to create the hard edges needed for the buildings against the tree line. The buildings themselves were left white as the trees dried.

From there, the snowy field was laid in with cobalt and ultramarine in a very light wash and using a 2″ soft brush. Again, drying. At one point, the 2″ brush was dried and dipped into lightly damp burnt umber and applied to make the streaks of brown for field stubble near and far. Then the buildings were done, and once the snow dried, more thin washes as glazes applied to the foreground snow, culminating in a streak of quin gold and then permanent alizarin to the middle of the painting, hoping to show a sense of light reflected in the still dark snow from the breaking clouds above.

After that, details such as dried grasses, windows, tree trunks and whatever were added as deemed necessary.

I am pleased with this painting quite a bit! It achieves what I set out to do – a winter scene, snow, clouds, and patience to wait and think about a painting before just diving in with brush and color. The 300# rough Kilimanjaro is 11×14 and a wonderful paper to paint on. More is needed in the future for sure.

Winter Road in Hill Country

Today I decided to do some oil pastels. This is my second – no, third – painting in the medium. The cat and mandarin were on Strathmore 300 watercolor paper; this is on an 8×8 cotton canvas panel, the kind used for oils or acrylics. I read you could use oil pastels on nearly any kind of surface, so I grabbed this just to try it out.

To tell the truth, oil pastels are fun to use, but they are also tricky. Blending colors makes sense – layer this with that to make thus – but the blending itself is a rather creative experience. I used stumps (tortillons) for the most part, but toward the end I used my finger tips. Also, I found out that if I put on too many layers, eventually the newer layers pull off the underlying colors. While this could work for some desired effect, it was problematic in other ways. Live and learn, right?

I scanned this canvas on my Epson V600 (one of my best purchases!) as photographing paintings is time consuming, tedious, and usually worthless the way I do it. Two scans were needed, and in between I had to wipe of the glass platen to remove little oil pastel bits. Apparently oil pastels never really dry out, but you can apply a finishing spray to them. Sennelier makes one, which I bought along with my pastels, which I will try probably next week.