Practice

With any art or craft, familiarity with it makes it easy to do. With familiarity and understanding comes the ability to explore using the knowledge you have acquired. I am pretty comfortable with watercolors and oils, but acrylic has always been a point of frustration as it dries so quickly and, to me, doesn’t have the qualities of oil paints. Gouache can be opaque or transparent, depending on how used; acrylics can be used in the same way. The difference between artists gouache (vs acryl gouache) is that the colors underneath the other colors can be re-moistened, and used to dissolve and create other colors. Acrylics, while they can work similarly to artists gouache, once dried, are dried, and there is no going back.

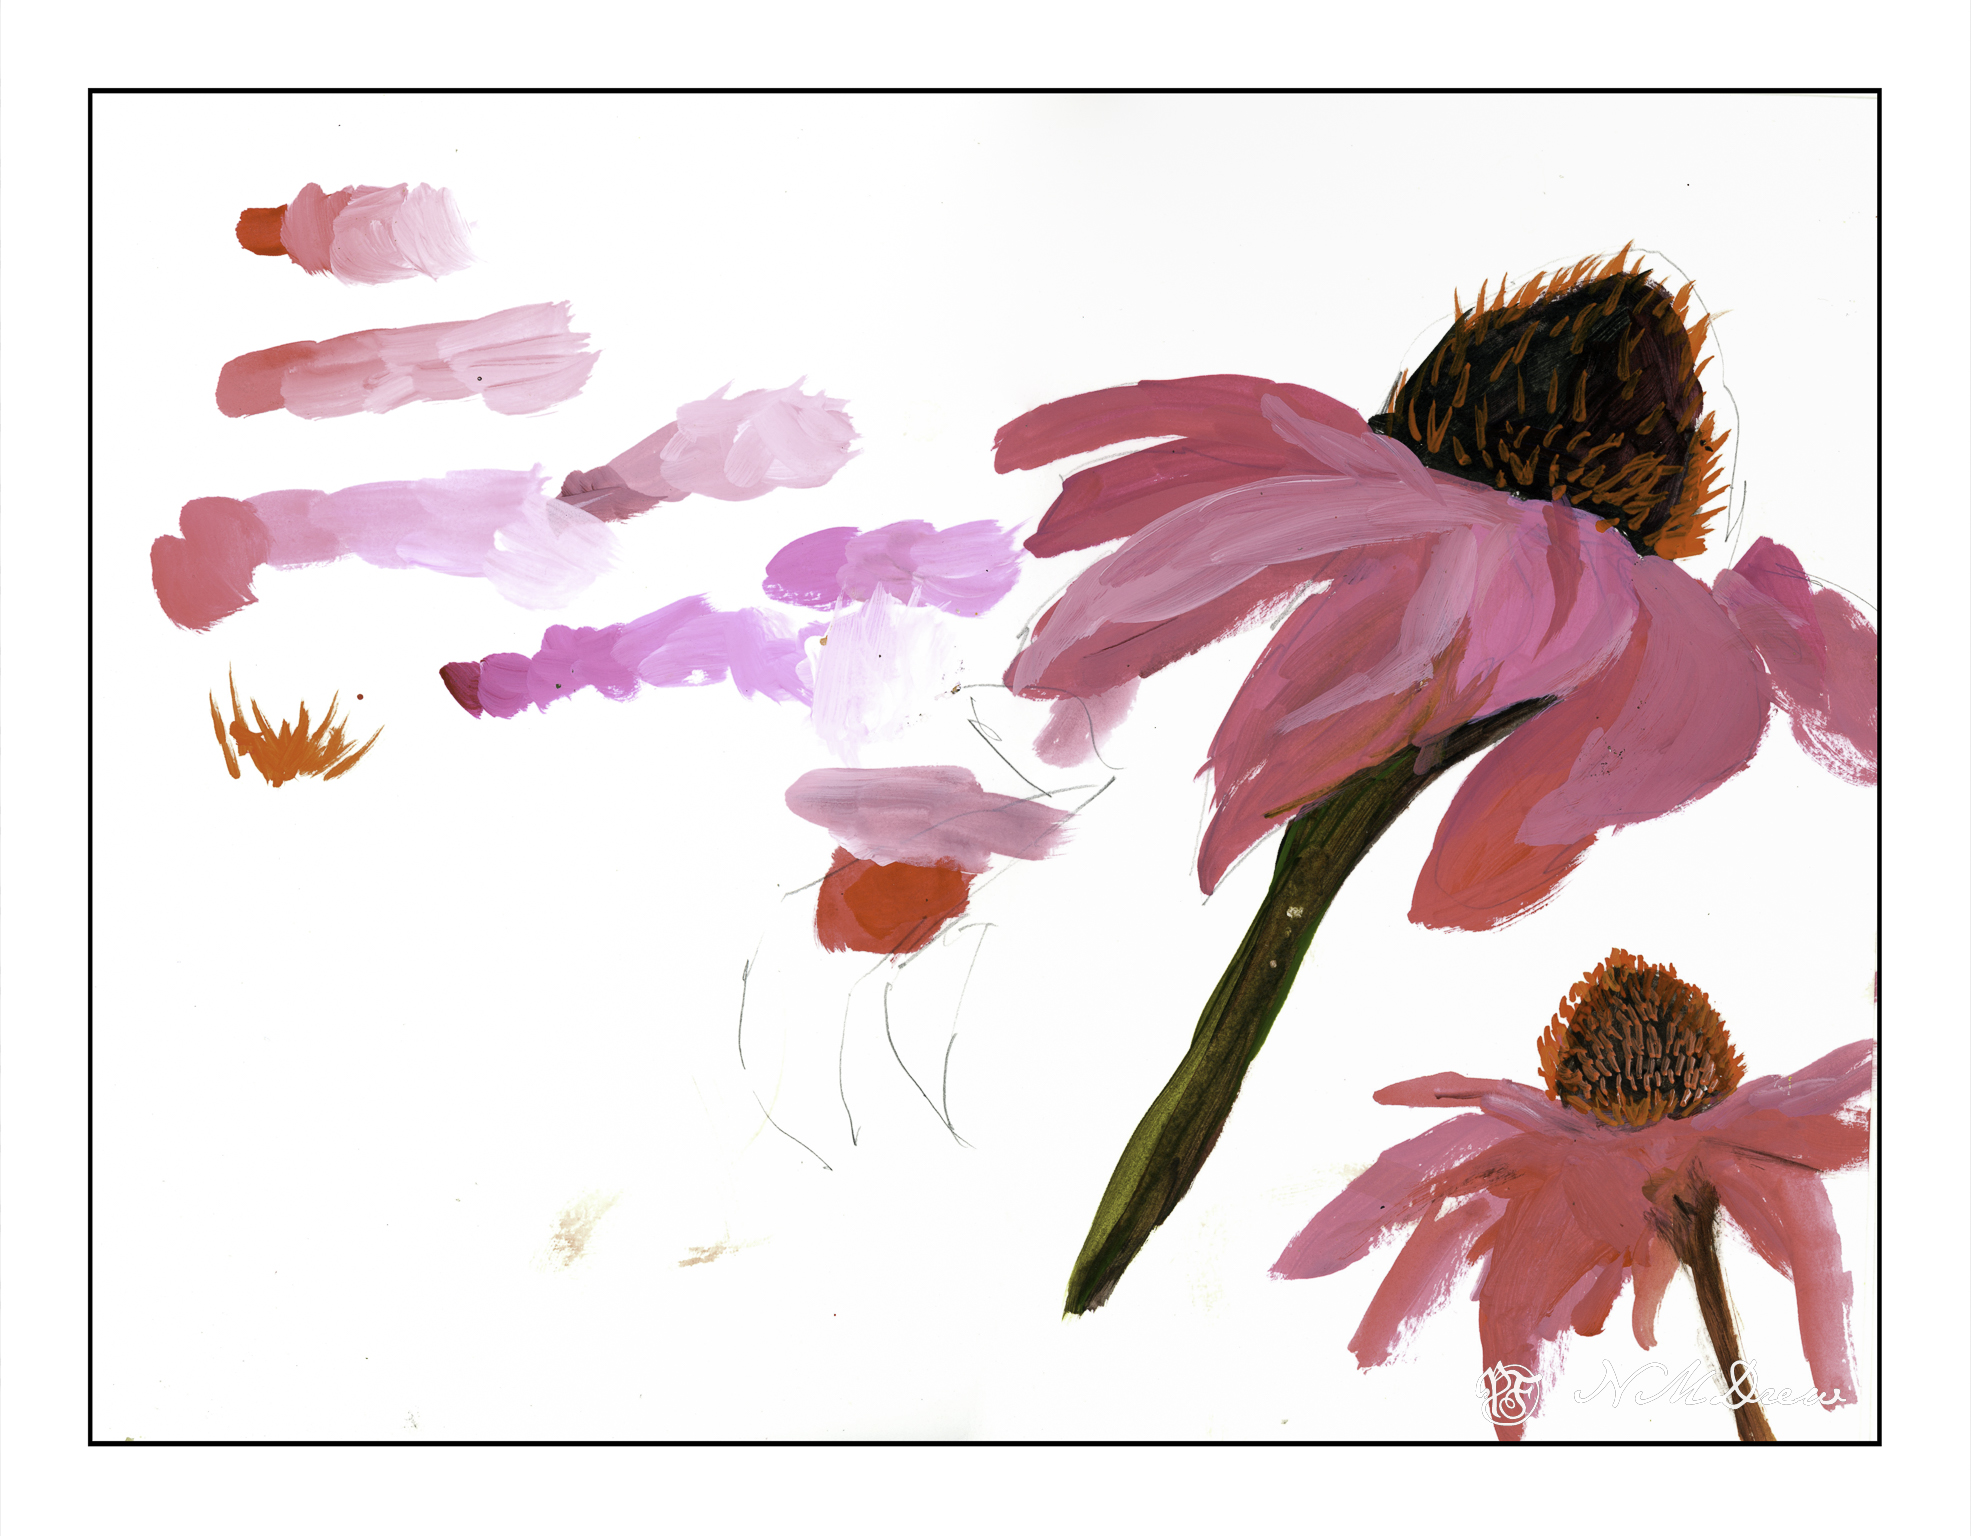
What I am trying to learn is how to use acrylics in ways that make sense to me. This is not coming easily. I like being able to sprawl my colors all over the place without drying, but this doesn’t work quite well with acrylics – unless using the heavy body paints on a sta-wet palette, the fluid acrylics I am using dry very quickly. To use them well I am trying out different ways of painting and mixing paints. Above, on the left, are colors straight out of the bottle and then mixed with white on the palette, increasing the amount of white with each brush dab. From there, I played a bit with painting cone flowers; the one on the lower right is more successful.

Playing is a way to explore. Above was play. Below is a “more serious” foray into painting with acrylics. I worked hard to make layers, and then return to add more color as I moved along. I just painted directly onto paper in a sketch book and practiced both painting and blending, painting directly on other areas, and bouncing around to work at making a bit of a harmonious or connected picture with similar / same colors used in various parts of the painting.

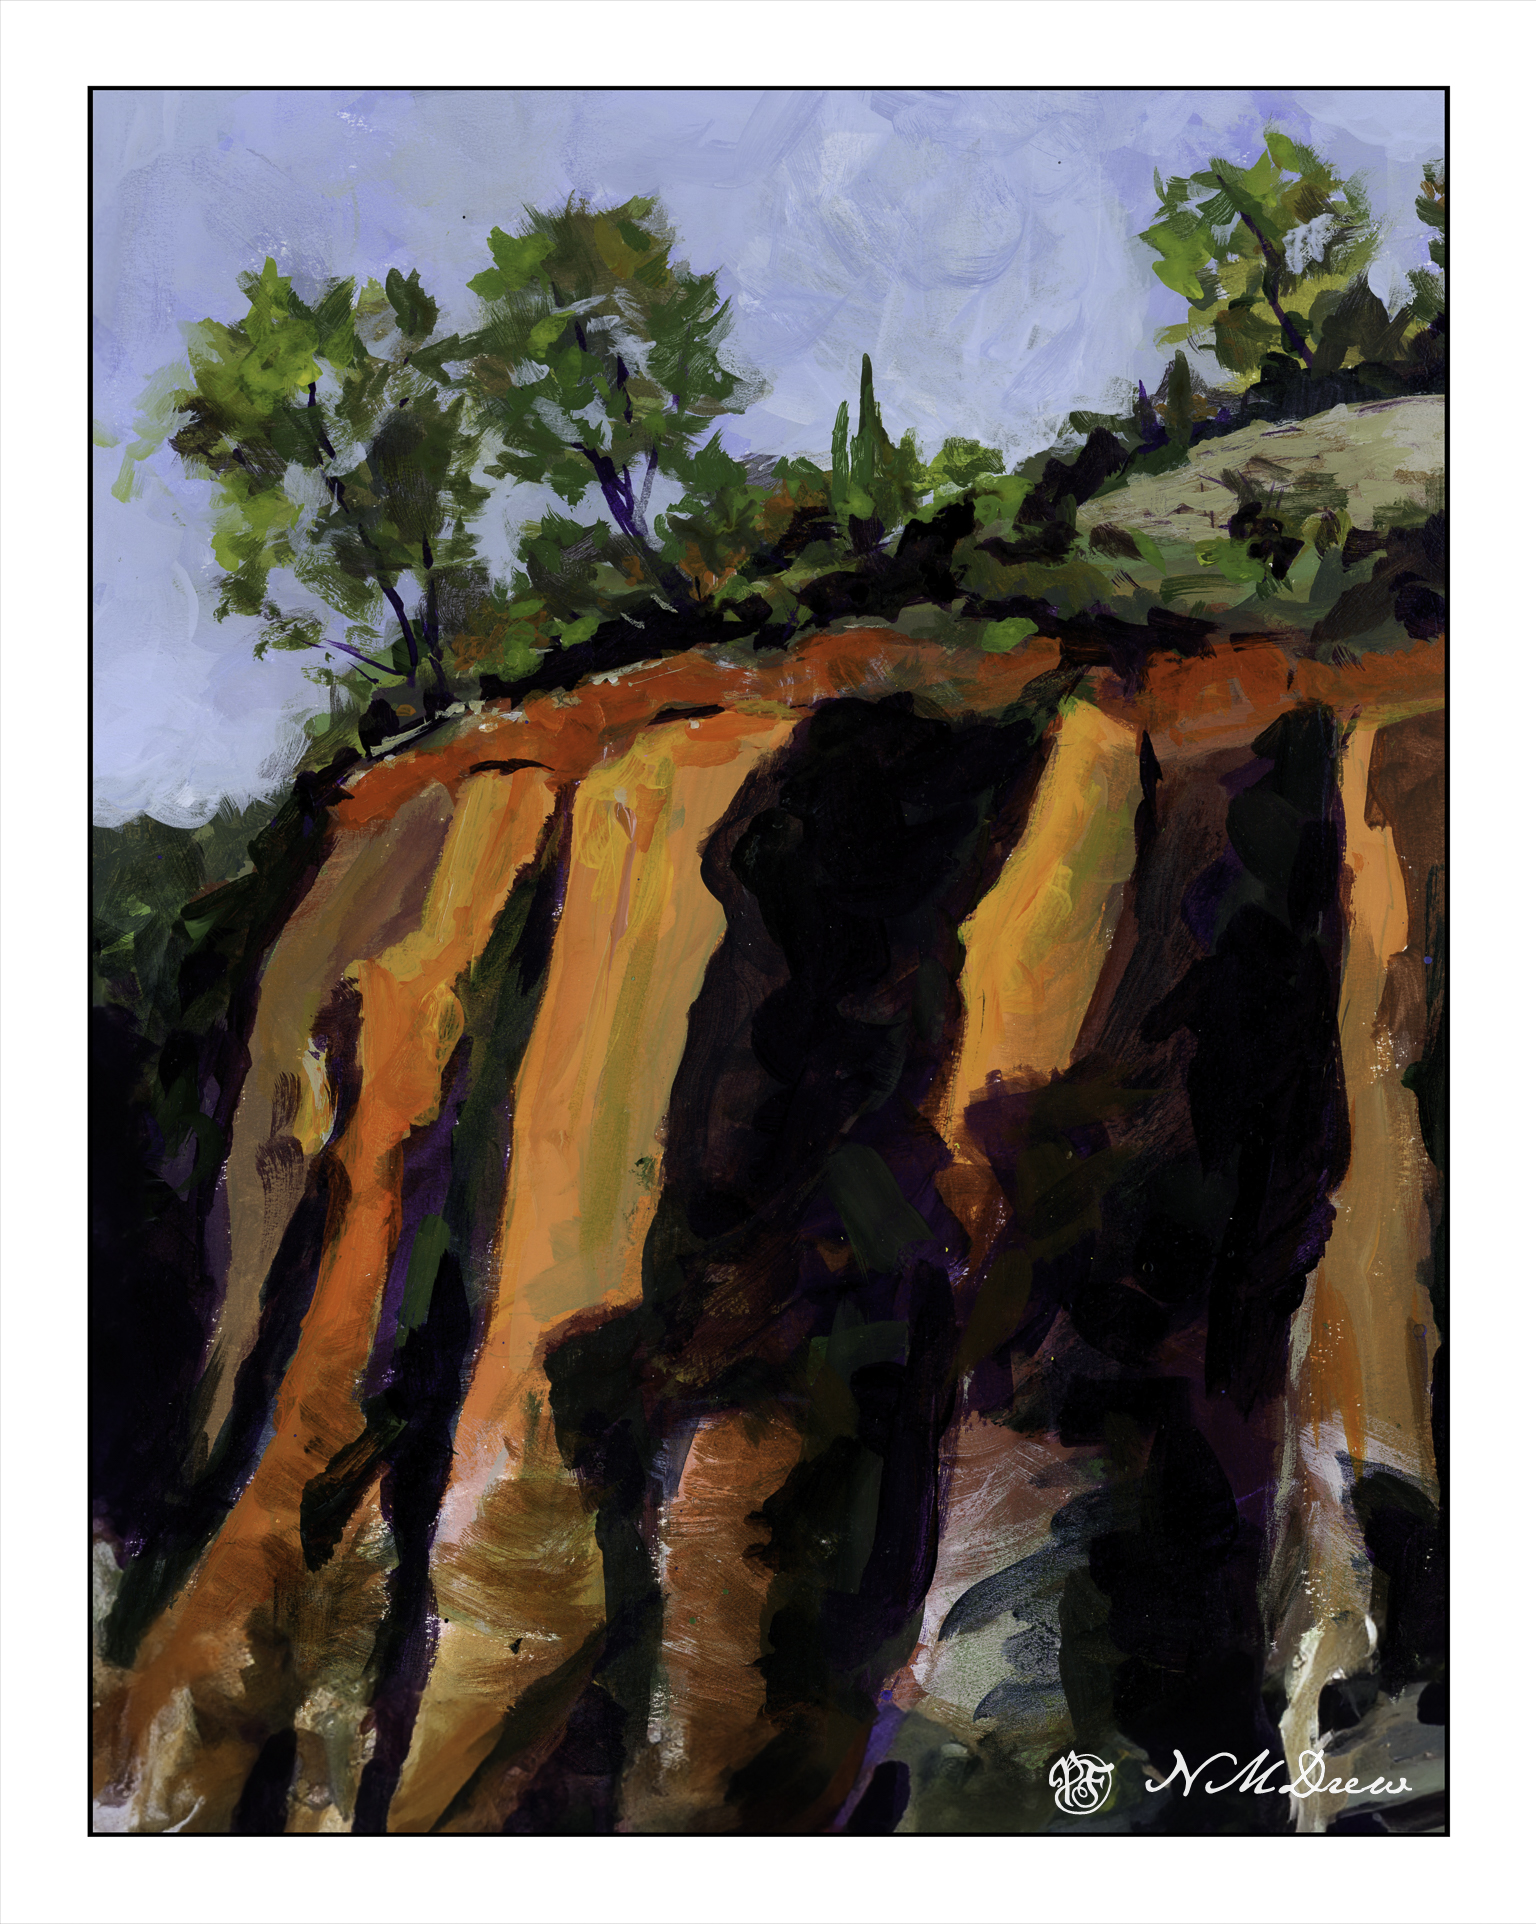
There used to be 4 trees in a row on the top of the cliffs – but then I looked at it and they were all the same shape and height. I decided to paint out the 3rd from the left. I had to paint the sky in a number of times, building up layers to hide the tree. It worked pretty well. I also played with my brush – I tend to dab, using the point of the brush – but here, especially for the tree foliage, I worked on using the sides of the brush. Additionally, I changed between very soft brushes and more firm brushes. These change how the paint moves and blends over the paper.

Practice can be fun – in any art – and by practicing and playing, new doors and experiences add to the skill set of the artist or craftsman.

Dancing Shoes

Today’s painting was smooshed in between this and that, but it was fun! It took a bit to think about what to do, but I finally figured it out. Sketching in fluid acrylic paint on paper was the goal, just to play and see how it all worked out. This way I could experiment a bit, not be “serious”, and explore how the fluid acrylics would react on paper other than my usual 140# CP Arches which I like a lot.

This is the first one I did, referring to a photo off Pixabay. I used 140# Arches Hot Press Paper – it is very smooth compared to the CP, having practically no tooth to catch the paint. I used the paint straight out of the bottle and painted once I did a quick pencil sketch. This rather rough kind of sketching with a few outlines has always appealed to me – partly because I can never get too perfect in anything I do – it just doesn’t work!

The second painting was done on grey toned sketch paper. Again, it is a smooth paper, but it does have a bit more tooth than the HP. Consequently there was bit of a different approach needed. A pencil sketch, then paint. I used a lot of zinc white to create some of the painting, using it as a glaze to tone down some areas where the color was stronger than I wanted. That was a good bit of learning, and a good bit of fun, too!

And now, it is time to sign off!

First Practice in Sashiko

Awhile ago I decided to try my hand at sashiko, a traditional Japanese embroidery used for both practical and artistic reasons. Originally it was used to quilt layers of cloth together, old clothes to make new ones. Patches were pieced onto already patched clothing. Today it is hard to imagine that clothing had to last generations, but this art form was for practical reasons. The artistry of it – the creation of patterns – shows the fact that, despite hardship and poverty, the need to express and create, to add beauty to the world, exists at many levels.

Today, we don’t patch clothes like that, to make them last for ages. We don’t need to for the most part. Instead, we call it “visible mending” and use it to enhance our clothes or show off our skills. It is a tradition that is now becoming a fabric art, much as quilting. However, these stitches are made by hand (although Babylock does have a machine which mimics hand sewn sashiko) and add character to jeans or old denim, or are used as a way to enhance something, such a purse or towel or whatever.

I bought sashiko thread, needles, a palm thimble specific for sashiko, and from there watched a few videos. I have some denim that I am cutting up to practice on. My stitches are uneven and I am trying to find a rhythm first in creating a running stitch. It is far harder than you think. So, first, the rhythm and comfort with the stitches.

Above is my first attempt. I just drew straight lines by hand, but later got out my pica stick and used it. Loops are left so that the fabric does not pucker as the rows are stitched, and as each row is done, I attempted to straighten and flatten out the fabric – a running stitch is great for gathering!

Above is my second attempt. More running stitches, but I tried different ways to begin and end rows. The loops prove to be important is not getting puckers – I got rid of a few with a hot iron, but you can see at the bottom a pucker across the left side.

Securing stitches is important. I tried different ways – many involve stitching over other stitches. I am still exploring that element – I want to figure things out on my own!

Above is the reverse of each of these samplers. The one on the left is the first; the one on the right is the second. The second one is neater as i carefully used a Chaco chalk pen to mark lines as I moved along.

Currently I intend to stick to straight lines and figure out how to connect them in different ways to make patterns. Tradition holds many patterns to be explored – many straight, geometric, circular, a combination of both, and many can become pictorial if you desire. Not all are done in a running stitch is my guess as I have seen some designs with completely solid lines of thread – backstitch or a running stitch then redone in between and in the reverse direction with another running stitch?

Mysteries to be explored!

Mas Flores

Today’s post is batch of flowers done in a Hahnemuhle Watercolor Book instead of the sketchbook for yesterday’s post. Today I am using a “real” watercolor sketchbook that has watercolor paper in it. I could work with a lot more water without getting blooms or having the paper buckle as in the other book.

I also used tube paints that were on my palette, but found that the paint, having been there for awhile, was very dry. It was difficult to pick up paint in large quantities – just like on the pan paints. To fix this, I put several drops of water on each color and let it sit for awhile – maybe 10 minutes. Misting water on doesn’t suffice – I needed a small flood!

One thing I have done here is to focus on negative painting as well as carrying a plane of color with varying colors along the page. I tried to work light to dark, but other times I worked around the light areas to give them shape. All this is play, experimentation, just doing and then observing, thinking about what I did and what I want to do.

Outcome? Thoughts? A few of my own:

  • quit dabbing!
  • use really wet, saturated paint
  • use paint more directly without glazing
  • values

None of these are any good. They show my painting faults to a glaring degree. However, as practice, it will do very well.

Well, gotta run!

Morning Sketch 10 – More Roses

More roses – more C strokes – and then other kinds of strokes to make leaves. For the leaves, brush point on paper, squish down and move, bring brush up to another point. Just as in sumi-e! Then, while the paper and paint are still wet, take the tip of the brush and create little points around the outer edge of each leaf. Some roses have pointy leaf edges, others do not. I don’t think the Rose Police will come knocking on my door, though, so I am safe.

Roses in these kinds of sketches are easy enough to do. However, creating a successful painting of more than one sketchy rose is another story. Light, shadow, shape all begin to play together, and sometimes not very nicely.

Here, a rose with a simpler petal style than the classical tea rose. As a kid in the midwest there were deep red wild roses throughout the countryside, and here in California there is a bush as above along a local trail. There are about 5 petals around a yellow center, and the wild roses are messy things that are such a pleasure and delight to encounter.

Painting a white rose is not easy because white is influenced by light and shadow and shade. Instead, you have to look at the colors in the white – light? dark? cool? warm?

The above little painting was a success, but it is only a sketch. A bouquet of roses will be far more challenging and I really doubt my ability to succeed there.