Composition & Direction

I have my acrylic pear painting sitting on my easel. It is tilted to the right. I rather like it!

This is how the painting was painted and presented here the other day. Now let’s look at different directions and see how a 90 degree shift impacts the painting for better or worse.

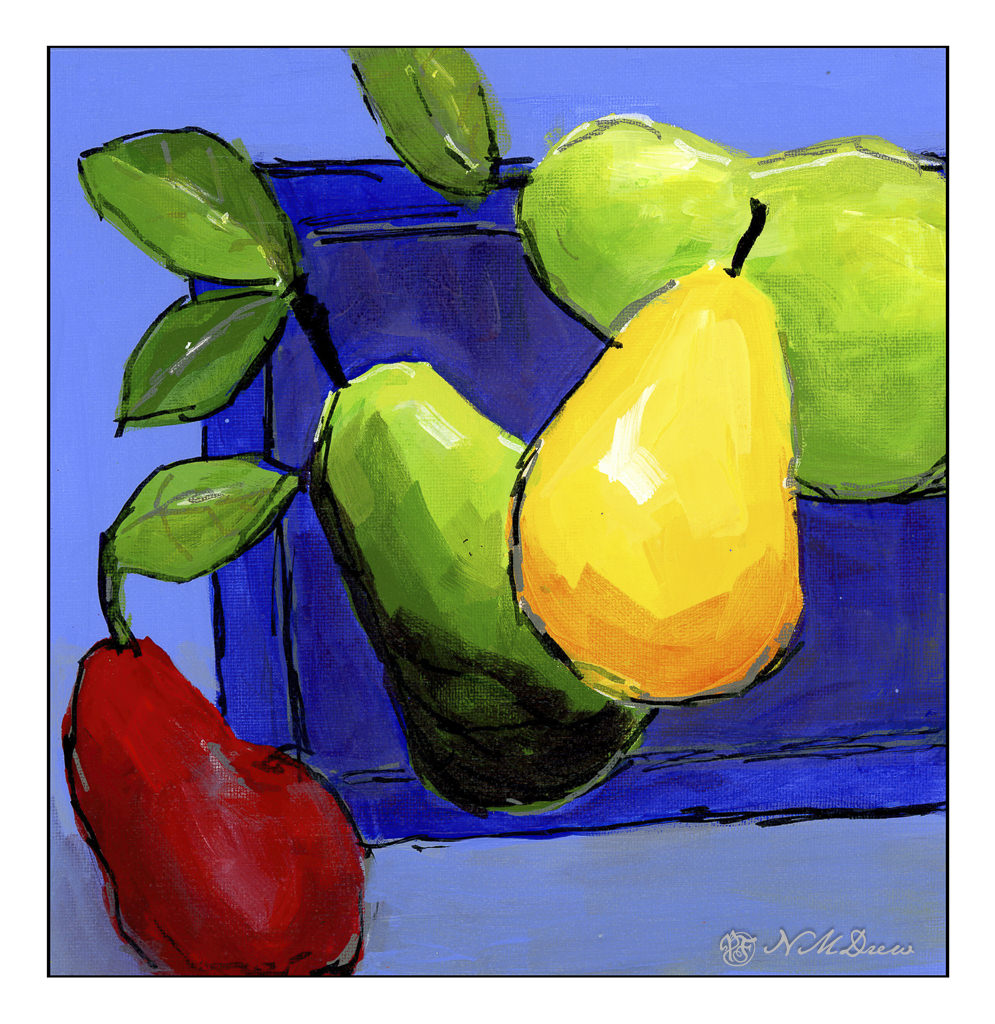
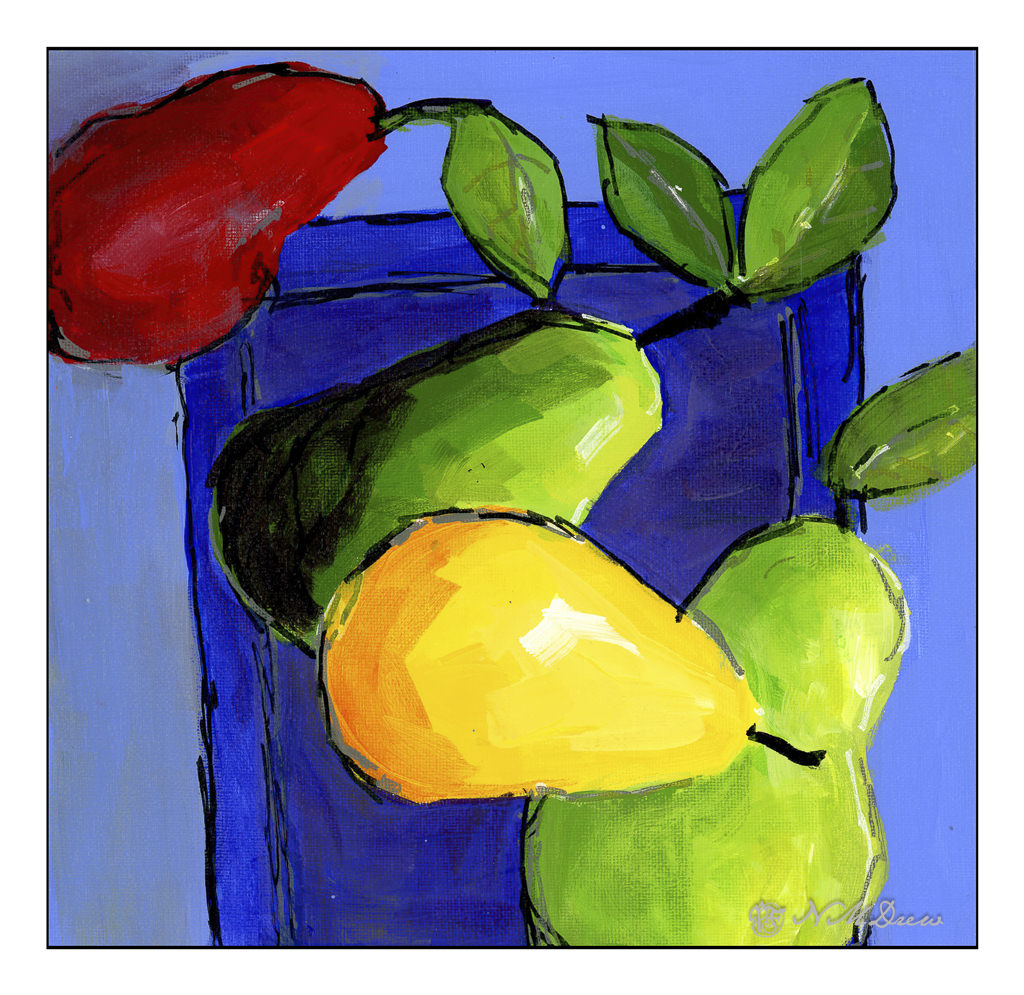
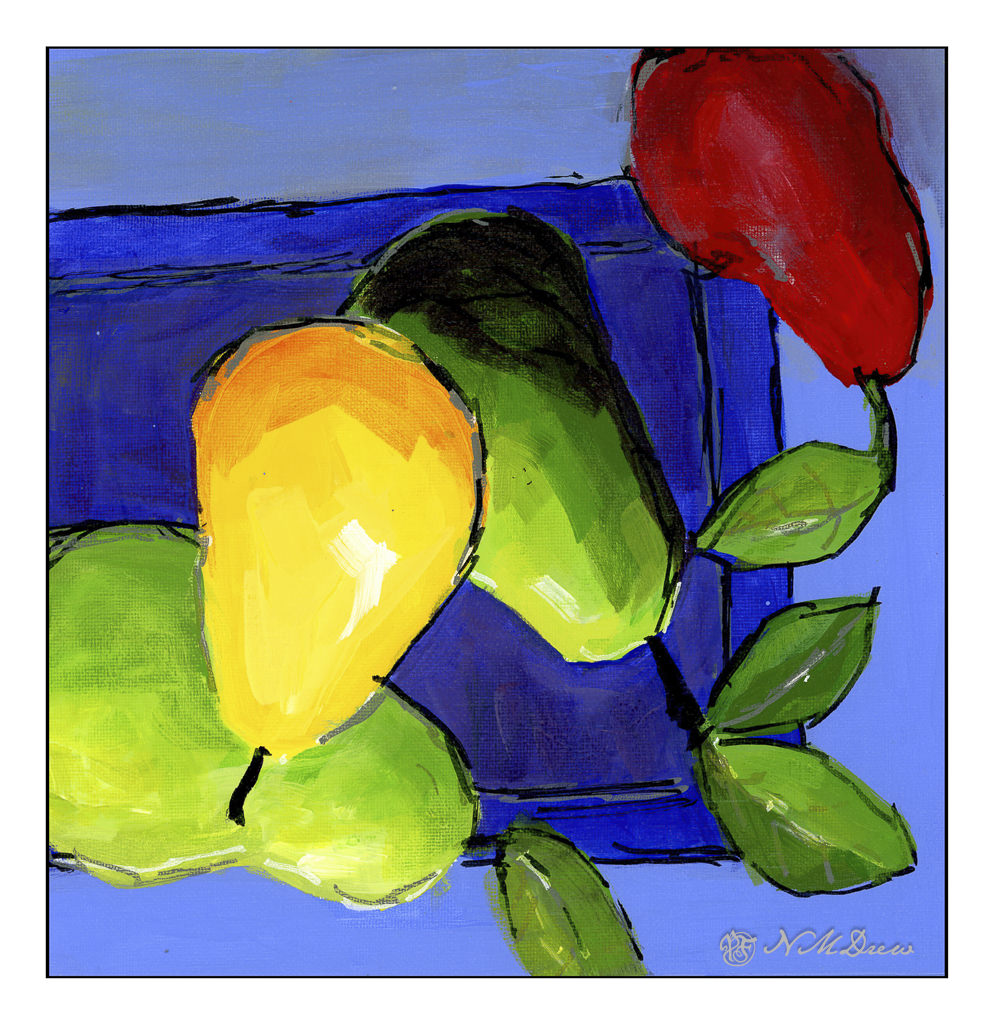
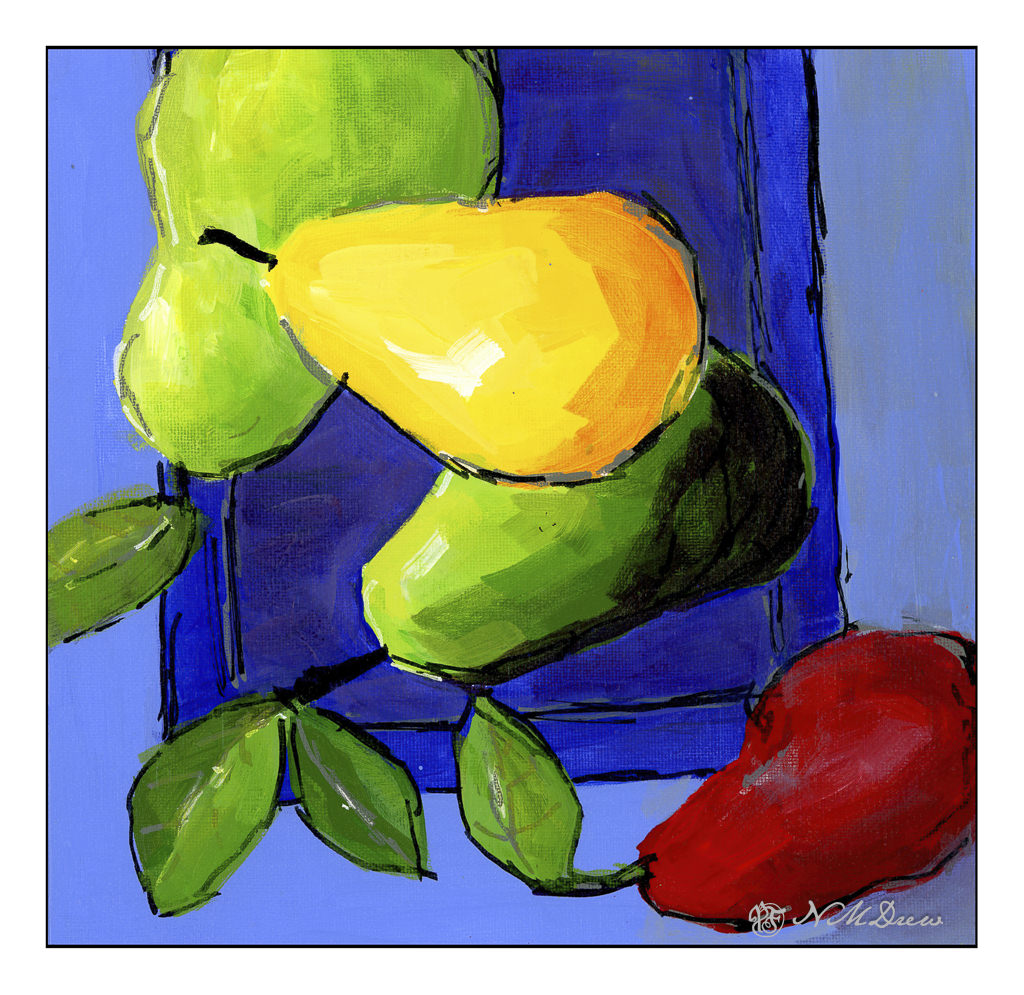
Rotating the painting and adding a signature in the lower right of each image lets you know where the bottom of the image is supposed to be.

The image on the top of these four is the way it is tilted on my easel and what started this idea. I think of the 4, it may be my favorite. The original is conventional, the 2nd is my next; the bottom two are a bit odd for my eye.

This is my preferred variant.

Art for thought! Or, artsy food for thought?

The Strange Edges of the Sea

I got a few painterly goodies for Christmas, and one was a new tablet of watercolor paper, one which I have never heard of before. Of course, it needs checking out. How does it handle wet paper and washes? Dry brush? Bleeding? Etc. It is not an expensive paper – $20 for 32 pages of 9×12 pure cotton paper – but it is actually a decent one. I can lift colors from it pretty easily, too! It is a rather nice bit of paper overall, and while not Arches or Fabriano, I think it will do quite well for studies, and probably gouache as well.

Besides playing with new paper, I have also attempted to lead the eye in the composition to a small area of white. Rocks, waves, clouds, land masses, sand, whatever are all designed to catch your eye. I think it worked out pretty good. I also am rather pleased with the movement of the sand in the lower right hand corner.

9×12, CP 140# paper, watercolor.

Tanglewood Underpinnings (III) and Tree Removal

Above is where I currently stand with my acrylic version of Tanglewood. I changed the foreground and began adding colors to the leaves, hoping to indicate dappled light. The foreground was similar in texture and appearance to the leaves, so I applied paint and mushed things around.

In looking at it, I thought this was looking okay, but so boring. Teacher and I both agreed the trees were too symmetrical and their pattern to repetitive. Time to fell some trees!

Home, the painting was scanned, and then sent to LR or some other program to remove the center tree. I didn’t even need to get out my saw! This definitely makes the painting better already.

More tree removal, but not as well done as the first one. The hint of the upright remains, but in that glimmer of a tree comes some new ideas.

First, the removal of just one tree is my preferred one of the two. The second one shows that suggestion of an upright, perhaps more subtle (i.e. obscured by foliage) works, too. More upright trees in the background, hidden by foliage, will add to the visual interest of the painting without creating a yawn-worthy one.

So, this is where I am right now. Not finished, but getting close. If you have an opinion, let me know!

Negative Painting & Glazing

This morning I decided to do a few things I haven’t been too fond of in the past.  One is negative painting.  The other is using glazes.  That’s what I did here.  The first layer was a warm yellowish wash, very thin.  From there, about 3 or 4 consecutive layers of blues and violets around the main trunks, and then over the ones to the sides, making them bluish.  I then used a rigger brush (for the first time) to create branches.

Overall, the picture works, but the areas I can say shouldn’t have happened are the branches in front of the central trunk.  The other thing I need to do is to create better contrast on the branches, in particular it seems on the right.  I would like to see more blue in there, in narrow strips using a flat brush.  I may do that later.

The idea behind this painting a sycamore tree in moonlight, with the above exercises to accomplish it.  I thought ahead more than I usually do, considering colors and such, as well as the approach to creating what I desired as an end product.

A Quick Thought

To my disgust, I am getting rather obsessed with photography, and trying to take mine to a higher level.  This higher level means better composition, more forethought before shooting (though it may not be possible at times), and better understanding of the post-processing program(s) I use.

Below is the original image of a guitarist in a crowd of people.

Singer for the Dead  - Original

The composition isn’t great, but I needed the entire length of my lens – the Nikon 24-120mm f4 – on my Df. The focal point is the guitarist. As you can see, there are a few people between me and him. While taking this picture, and many others at the Day of the Dead, I thought about composition, and layers – foreground, midground, background – while I shot. During the crops, I thought of the same, and tried, too, to incorporate leading lines and/or the rule of thirds. Post-processing included colors, black and white, and vignetting. I used Nik Silver Efex, LR, and Perfect Photo Suite 9, along with different crops.

Singer for the Dead BW

Singer for the Dead

El Dia de los Muertos 2014 (87 of 421)