Atmospheric Perspective, i

Day 5 into retirement found me with finally enough time to sit down and start my “class” on perspective.  No, not a classroom setting, but rather following the exercises in a book.

The book is The Art of Perspective:  The Ultimate Guide for Artists in Every Medium, by Phil Metzger.  As an individual, I found no web pages authored by him, but I did find numerous books which get good reviews.  I picked this book up because it dealt with not only the traditional perspective found in drawing and architecture, but the perspective produced by color.  As someone working in watercolor – or anyone working in any medium – color and how to use it is so important.

Atomsopheric Perspective has a few rather obvious points.  Metzger says “paint what you see”.  This is sound advice.  The reason it is sound because the natural world is out there.  You actually see atmospheric perspective.  What this means is:

  • colors become more blue the further they are from the viewer.  Mountains are cooler.
  • Bright foliage can create brilliant swaths of color, even at a distance, so this belies the idea of “things become cooler with distance.”  They do have less detail with distance.
  • Things are simpler the further away they are – this makes sense of course!
  • Air pollution of cities makes for browner (perhaps) distances rather than bluer.  What is important here is to note that edges become more soft and colors, while still colorful, begin to fade.  White buildings become greyer unless a brilliant flash of sun is on the building.
  • At times, hills will appear darker than the ones in front or behind them – this could be caused by a cloud passing overhead.
  • Fog softens the landscape or the cityscape.

Exercises

I decided to do a number of paintings.  Actually, I figured I would just do the first exercise, on trees, called “Receding Woods” on pages 18-19.  This is it below.  I followed Metzger’s steps – pale wash, distant trees, mid-ground trees, stream, shadows, details.  This is the result.

I found this to be a frustrating and useful exercise.  I used the palette he suggested:  Alizarin Crimson, Cobalt Blue, Burnt Sienna, Pale Cadmium Yellow.  Drop the colors onto wet paper, and move on.  Next step were the pale trees in the background – light blues and browns.  From there, darker blue trees to suggest shapes.  Mid-ground trees brought in some detail.  Finally, the frozen creek and shadows.  As a wonderful piece of art, I am not impressed with what I did – but I am impressed with the clarity of Metzger’s writing and example.

From this, I decided to go to Pixabay and search for things like fog, barns, marsh, swamp.   The next study is a marshland.  I figured it would be good for water, reflections, and distant mountains.

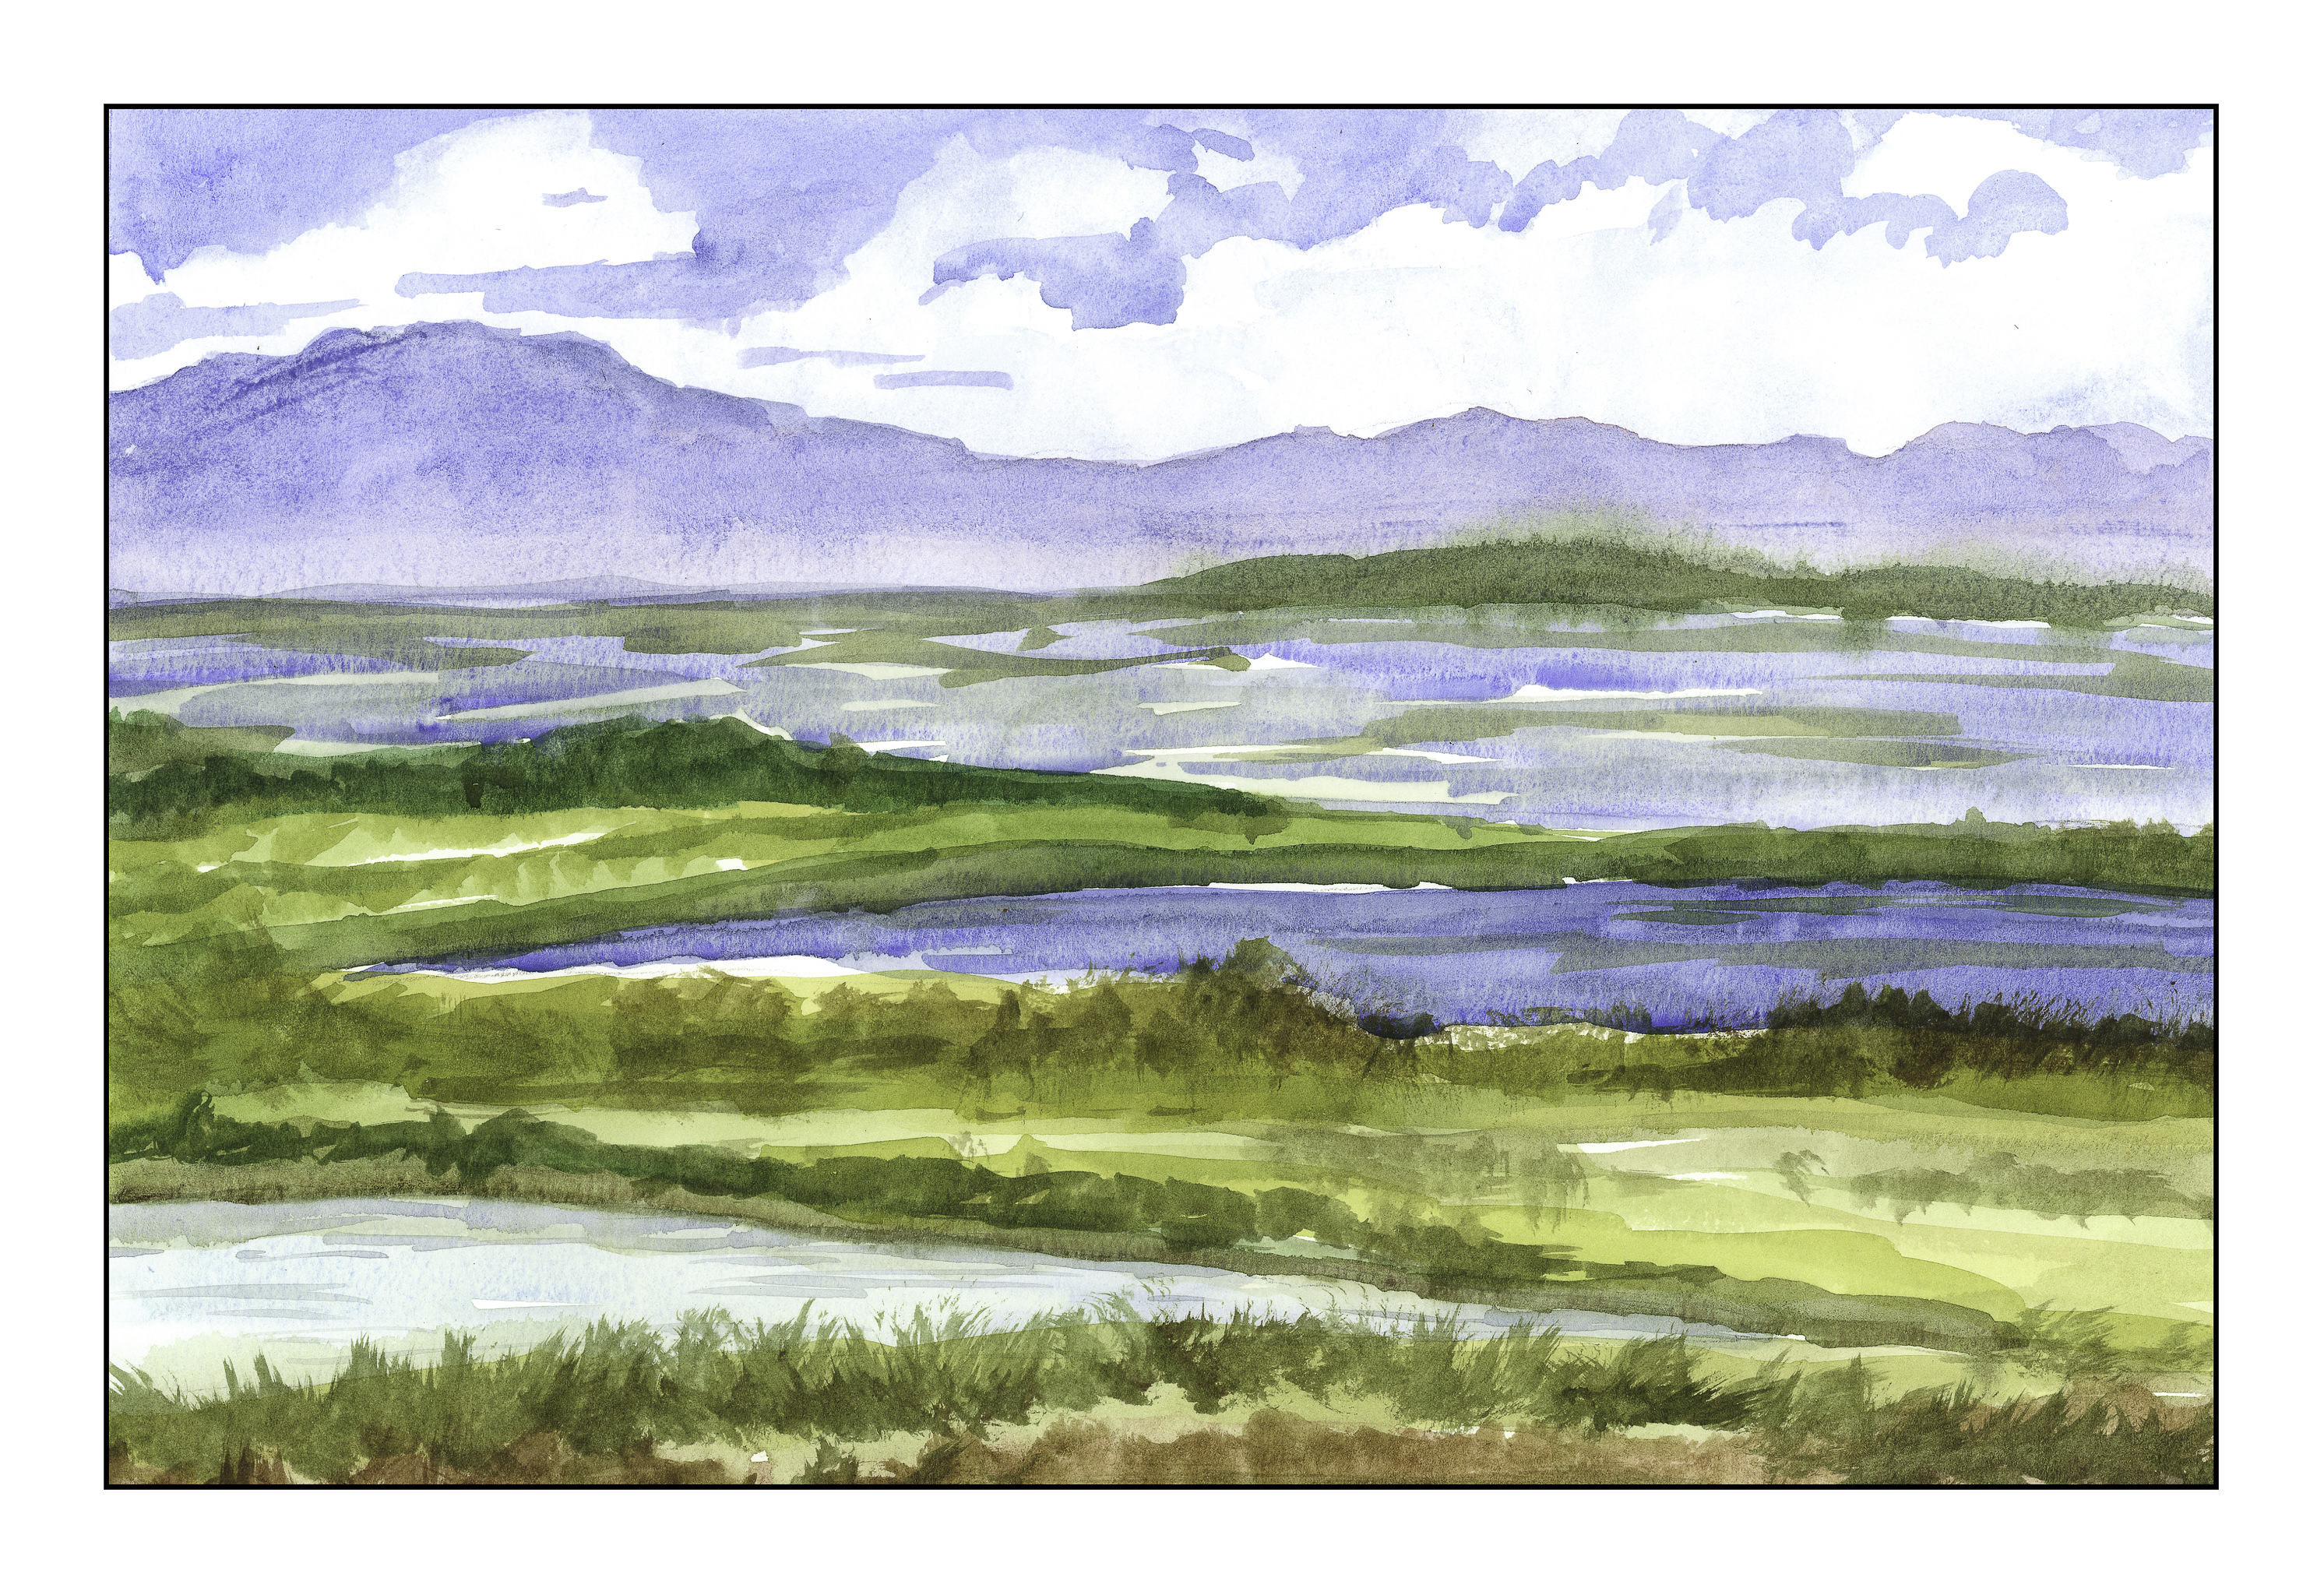
What I liked especially about the picture was the haze at the base of the mountains and the blurred quality of the green hill.  In the photo, it was less distinct.  From there, I tried to paint the values I saw, so the distant water was a midtone, the middle water dark, and the closest the most pale.  I also made the mountains more blue and violet and tried to use warmer colors the closer to the bottom of the page I got.  It worked to a degree in varied areas, and not in others.  Still, having 3 different values of water was rather interesting.

Her is a study on distance and fog.  The image was mostly green and yellow in cast,  The sun is peeking between the two center trees.  The tree shapes show lighter in the painting, as the do in the photo, but I think I could have done a better job with the sky to emphasize this point.  To show distance, I tried to make the further objects more simple and cooler, while working at a bit of detail and warmer values for those closer to the viewer.  Perspective was indicated by the road narrowing and the curve of the furrowed field.

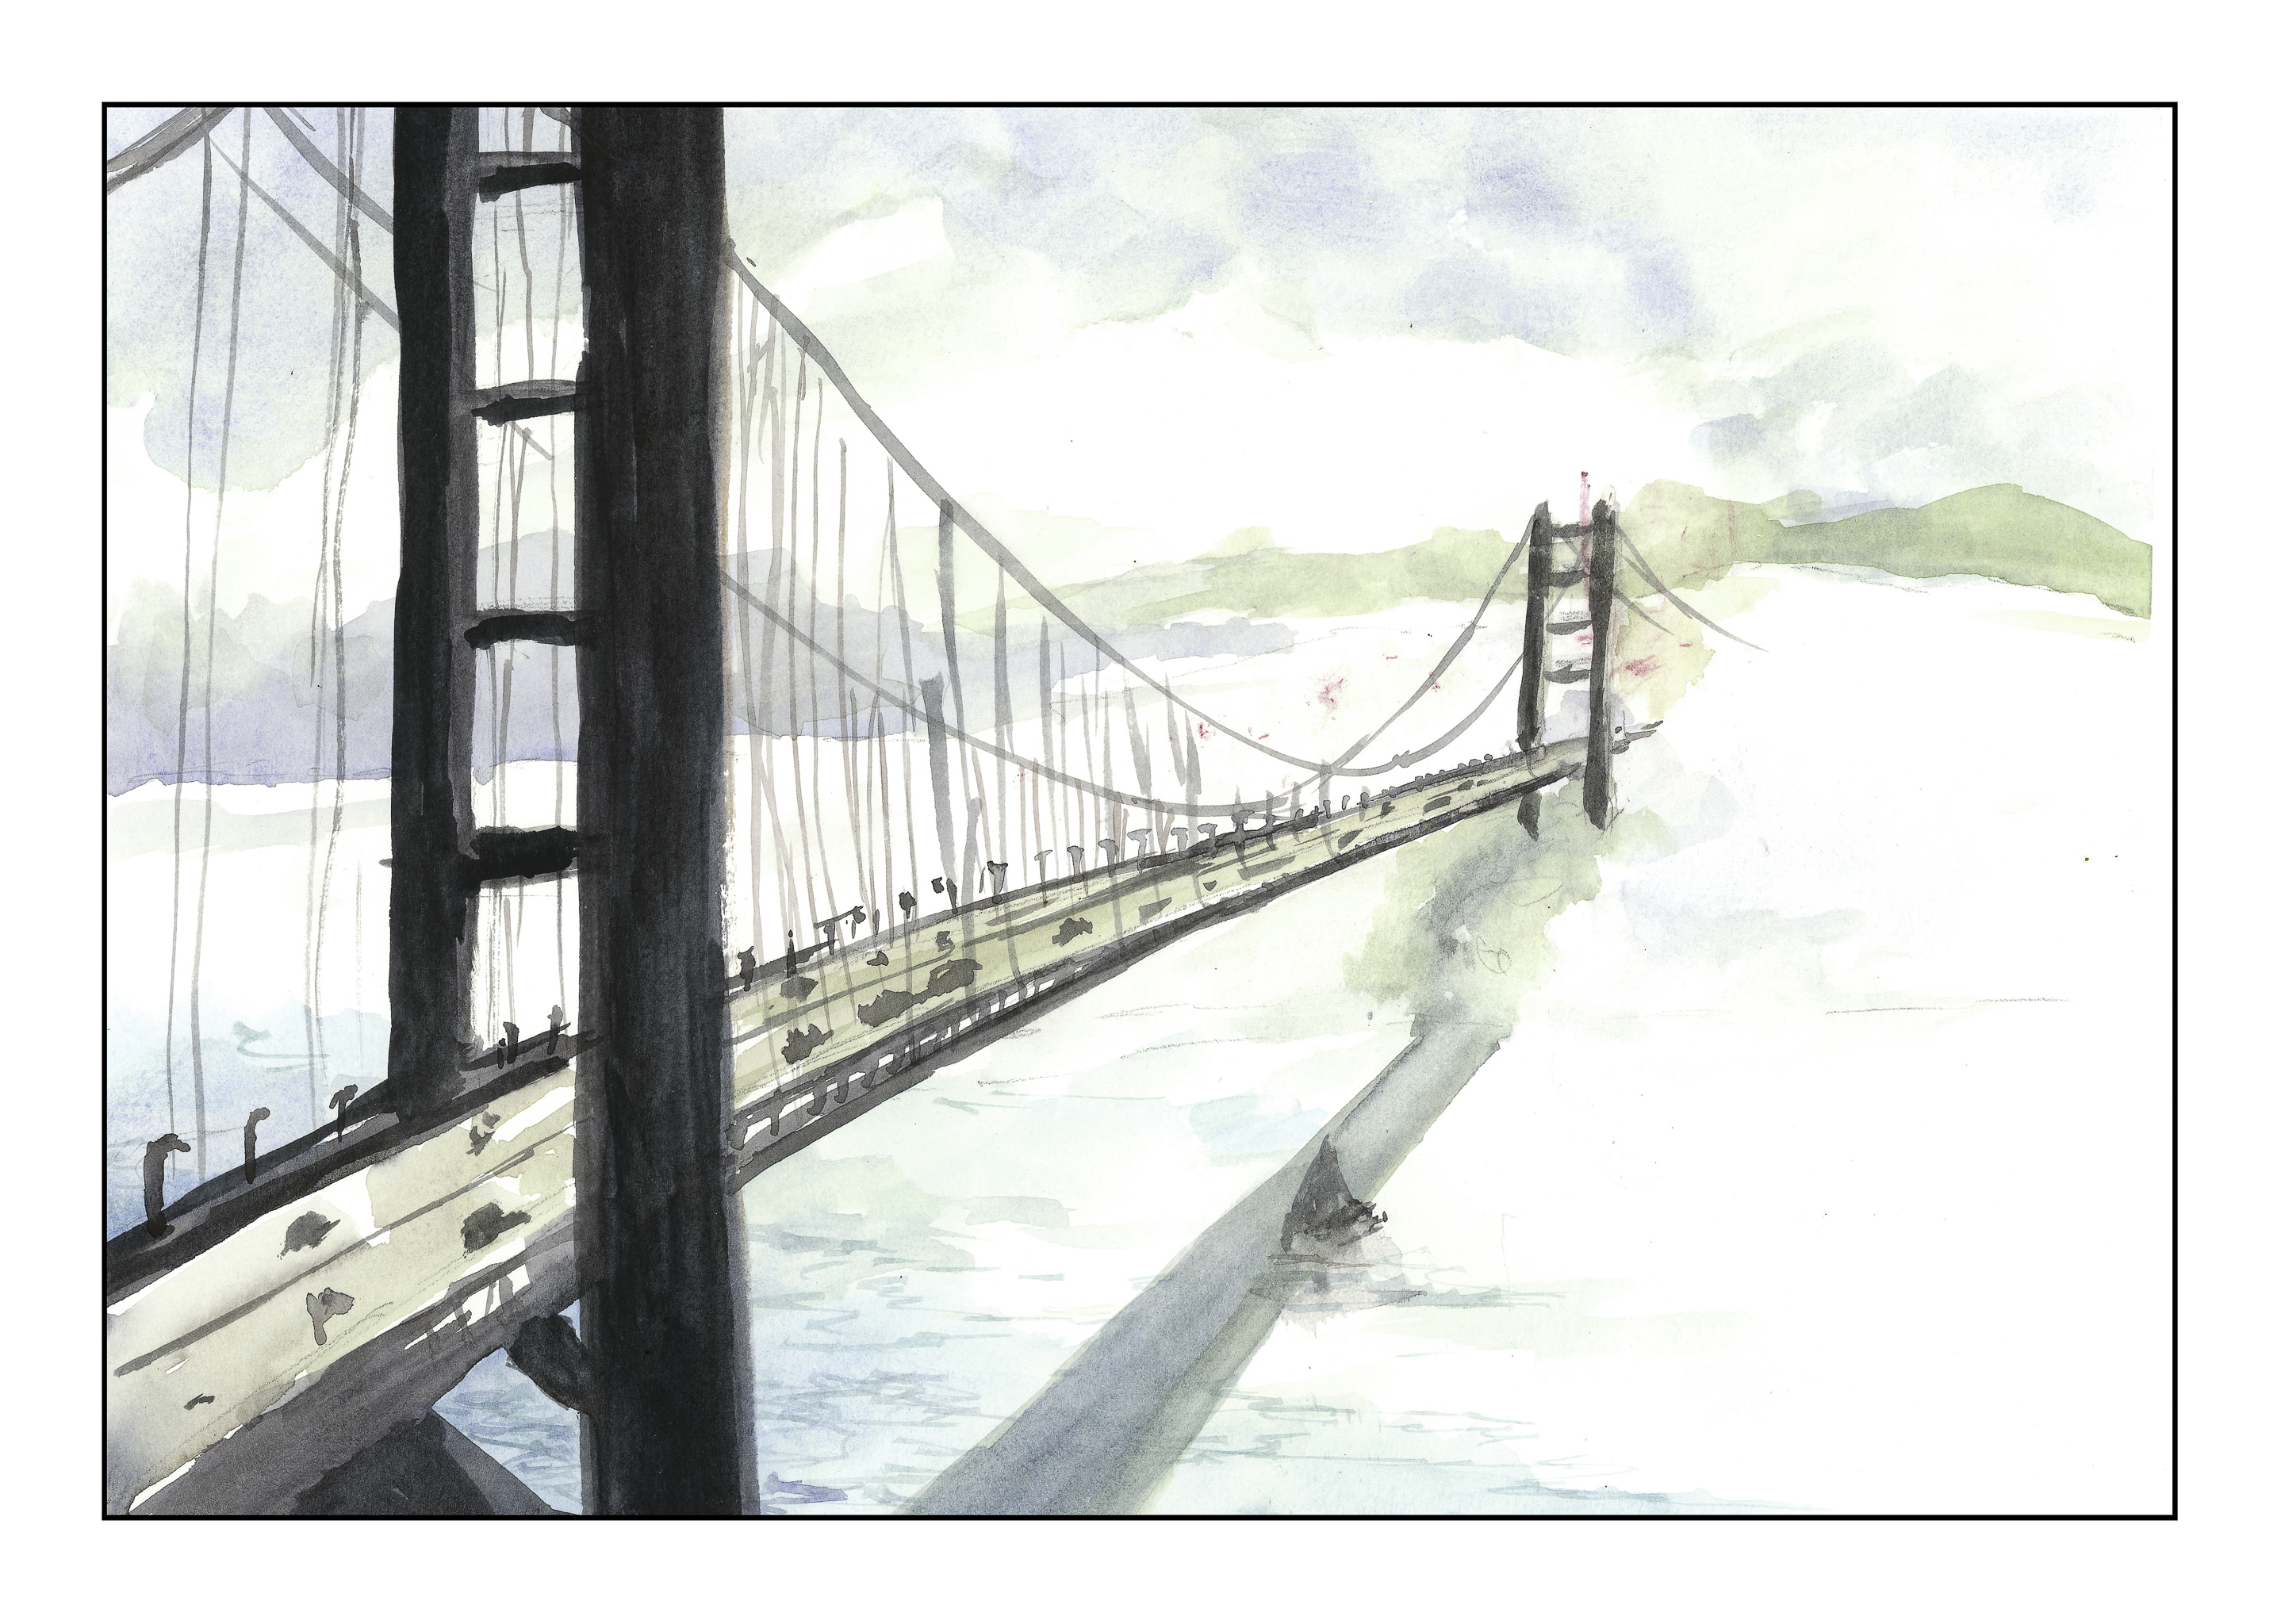
This picture was a challenge!  Me, paint a bridge??!!

Anyway, a bridge is disappearing into a fog bank; a sail boat sails through the shadow cast by the bridge.  The distant bridge vanishes into a thick, white cloud.  Detail softens and vanishes.  On top of it all, this is a bridge!  (I don’t think I would want to drive across it if it were really were in the condition represented by my painting!)  Once more, cooler colors and less detail the further from the viewer; more detail closer to the viewer.  I liked mixing the blues for the water and found out that a rigger brush and a flat brush were my best friends for the bridge.  I like this painting a lot more now that I finished it – not a work of art, but a good practice study.

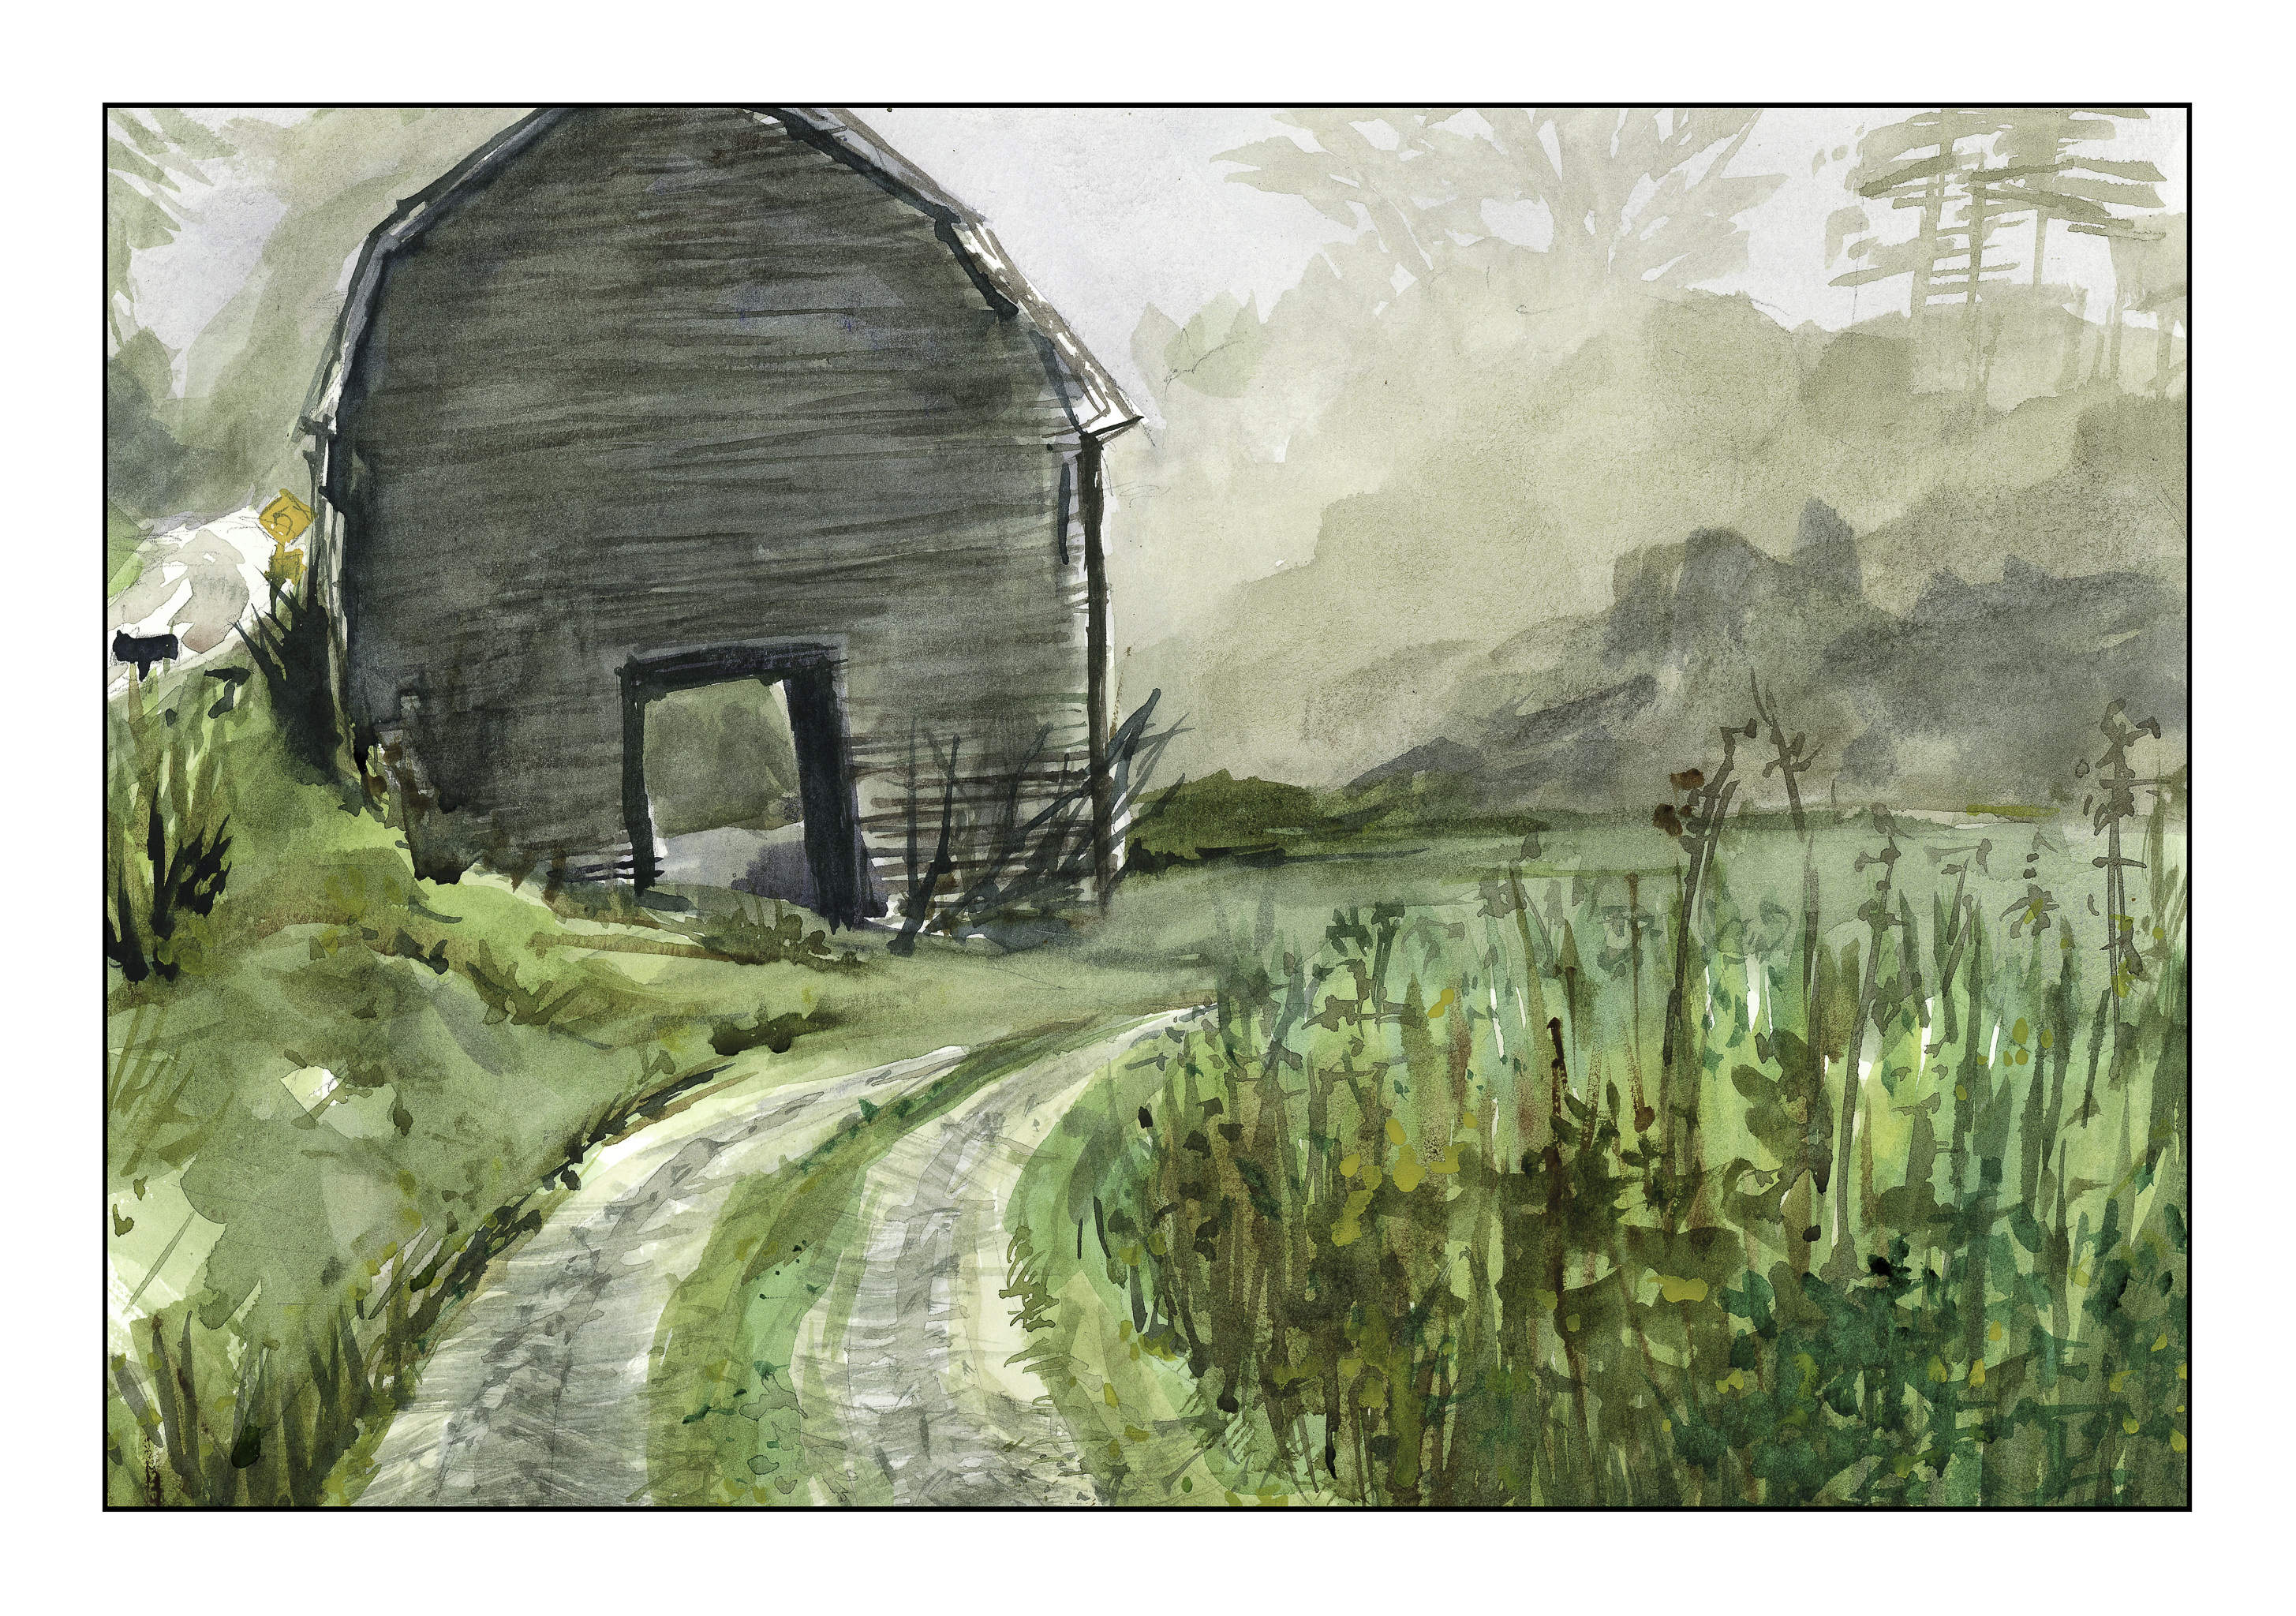
This final painting was a serious challenge.  The paper I was using for all of these is student grade, so washes are tricky and often become hard edged or have blooms.  I solved a lot of those problems by scumbling along the edges; this was good for softening, blending, and blurring the edges.  I also used a 1-inch flat brush for the majority of the painting, forming the blurry vegetation, to the barn, to the road.  Only when I added detail did I use a small brush, specifically a rigger.  While I don’t think this painting has great perspective, the goal of atmospheric perspective was met.  I used to the left and right of the barn, as well as with the weed patch on the lower right.

Some Thoughts

As a first exercise for my “class” I really enjoyed myself!  I started painting at 9:30 in the morning and only finished around 5:00 pm – time to make dinner.  I focused on the atmospheric perspective idea and learned a lot simply by doing.  Sure, I know this basic information, but to put it into practice and think about it is a lot different.  Experience in the real world is, in my opinion, one of the best teachers, and such studies are invaluable.


Pen, Ink, and Watercolor with Claudia Nice

I have always liked pen and ink combined with watercolor.  The contrast between the two can be art in itself, or the two can work together, each enhancing the other.  I came across this book by Claudia Nice, Creating Textures in Pen & Ink with Watercolor, quite some time ago.  It’s detailed and it has some exercises with suggestions as to what to do and notes as to what she did to create the effects.  Some are just ink and colors, others involve traditional “helpers” such as alcohol or salt to achieve results.

Yesterday afternoon I was in an antsy mood, but didn’t want to paint in my usual splashy style, but wanted some “containment” if that makes sense.  I wanted something requiring a degree of precision.  Ink is always the answer there.  Realism, too, is not where I wander naturally, so Nice’s work and exercises always have a magic to them.

The first I chose was her “Old Broadleaf Maple” – detailed, subtle.  And a tree.  I love trees!  This is my rendering of her example.


The second one I chose was a fly agaric mushroom.  I have seen only one like it in my entire life – and even then I am not sure it was the same mushroom.  I was hiking up in the Rockies in Colorado, up high, and came across some huge, red mushrooms, the kind you see in fairy tales.  Wanting more colors than the tree, the red hues of the mushroom were perfect.

The beauty of Nice’s work is that while it appears easy, if you are doing the study, you focus on the small things as well as the overarching picture.  By nature, I am not detailed oriented, and for me, it is a different way of seeing and doing something.  I am always pleased with the results when I take my time.  The biggest challenge is to take these studies to my own world, outside the pages of the book, and look for the details on a plant or whatever, decide what to keep, what to discard, and so on.  It is hard work worth every minute!

Remembrance of Things Past

If I want to be honest – which sometimes I don’t want to be! – I never realized that in watercolor, as in sumi-e painting (which I haven’t done for a few years), the brush is important.  In sumi-e, brushwork is important as it expresses what color cannot – color is not found in sumi-e, only shades of blacks and greys and white, with the subject hinted at, not indicated in boldface!  Playing with leaves made me remember this . . .

Because my chronic struggle in watercolor always seems to be overworking and mixing too many colors together, I decided to pick up a book called Everyday Watercolor:  Learn to Paint Watercolor in 30 Days, by Jenna Rainey.  I figured some kind of disciplined plan could work.  Her style of painting is not necessarily my style of painting, but that was not important as far as I am concerned.  My concern was to stop making mud and to relearn what I have forgotten over the years.  The examples in Rainey’s book are pretty basic, pretty straightforward, and actually, a lot of fun to do.  It has helped me drop that little, nagging, nasty perfectionist who always criticizes.  Rather, it is far better to just do, and quit the role of critic.   She does studies such as shapes, allowing colors to bleed into one another; she discusses design in the abstract exercises with squares and circles.  There are simple exercises in drawing and painting trees with foliage in shadow, and depth, with lighter pine trees in the distance, and darker ones in front.

What do I find the most valuable in this book?  Crazily simple lessons.  Step 1.  Step 2.  Step 3.  Limited palettes of color.  Most how-to-watercolor books are wonderfully full of tantalizing pictures, but few that I have seen really drill down to making it simple.  I enjoy the work of watercolorists such as Winslow Homer – people with a loose, free style which I would love to emulate.  I am not a contained person in the sense of wanting to fill in the lines, like in a coloring book, but I also appreciate the disciplined approach of people like Birgit O’Connor, who paints huge flowers, beach debris, and so on.  I am still struggling with watercolors enough to have no style of my own – I am still attempting to master the brushwork, water, and colors.

Currently, I have just finished Day 11, which is wet-into-wet and some dry brush.  Like in dry-into-wet.  Something like that.  It’s a papaya.

I’m looking forward to 19 more days … sort of a diet!  And to date, no mud!


Book Larnin’

I did some watercolor studies, derived from David Dewey’s The Watercolor Book.  This is the edition my local library has – there is a newer edition, but I have no idea how much different it is from this one.

Dewey’s book came highly recommended from one of my favorite sites, www.handprint.com.  There are others, too, but this one is the one at the local library.  Packed full of text and pictures, demos and a plethora of information, at first it seems like a rather intimidating book.  It is.  There is a ton of information, and to me, it was hard to sit down to look and to read.  However, once I started, I decided my best approach is to begin with some exercises.  Other parts can be read for information – I wanted to get into actual painting!  What really draws my eye to Dewey’s work is the beauty of his washes – clean, simple, expressive.  You can see his more recent work on his website.  Given my usual propensity to messy, muddy stuff, his work is simply elegant – not splashy and spontaneous like Charles Reid, but serene and calm.

Okay, so here is what I did.  This is the first exercise I did.  I used glazes and mixed colors.  This was a drawing from one of Dewey’s exercises in warm and cool colors.

Not an especially inspiring image – and poor photography as well!  However, what I did learn was a bit about glazes and managed to leave some planned white, some bleeding, some patience, and how certain colors mixed.  I did an overall underglaze of Quin Gold.  The sky was laid in with a glaze of cerulean blue, while the ocean was a layer of ultramarine.  I mixed some alizarin and viridian (complementary colors to tone down the red of the alizarin), along with some burnt sienna to create the float of the shack.  The islands were my favorite part – carbazole violet and burnt sienna.  I’ve never used the violet, so it was a fun mish-mash.

Next, water studies, which I feel were more successful than the washes and glazes, but I was also warmed up.  These are also from demos in Dewey’s book.  Here, an underlying wash of ultramarine with a touch of cerulean.  Once dried, ripples in cerulean with a bit of permanent rose.  Finally, the greenish color is a combo of phthalo blue and burnt umber, a blend I’ve never done before.  I really like the colors!

This next image is done in essentially the same way with the same colors, only the ripples are circular.  The photo is crummy, but the results are rather clear.

Certainly no works of art, but successful exercises in a few areas.  First, getting reacquainted with watercolor is rather painful.  Glazing and washes take a bit of patience.  Finally, there is the real pleasure of learning new color blends, as well as having a sense of derived satisfaction with a study fairly well executed.

I am excited to be painting again.  During the week, it won’t likely happen because of work, but I hope that some drawing might occur.  Weekends are likely to be very much taken up with painting . . . yay!

Blues

blues

I’ve pulled out a few old lenses.  This is a Vivitar 30-80mm from the 70s.  I took this checking out the focus, to remember how to use it, as well as check for lens creep.  Knowing all these helps when out shooting.  This lens has lens creep, but it is a really sweet lens to use, with film or digital.  Pure happenstance occurred when I took this – I was focusing on the ridges in this shawl, and didn’t see the notebook next to the folds.  Only when I saw the picture did I realize the coincidence.