Muffins (Recipe) to Devour!

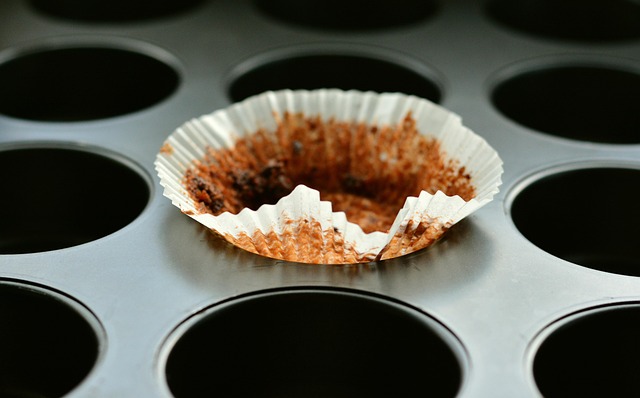
I am not a big fan of most muffins – they are simply too sweet, too big, and bland. One recipe I found years ago was made with honey and blueberries – quite delicious – but no matter what I did, warm or cooled, they always mixed with the paper cups and you got a mess. Yes, I tried silicone muffin cups, but they were not much better, even when coated with butter or sprayed with cooking oil.

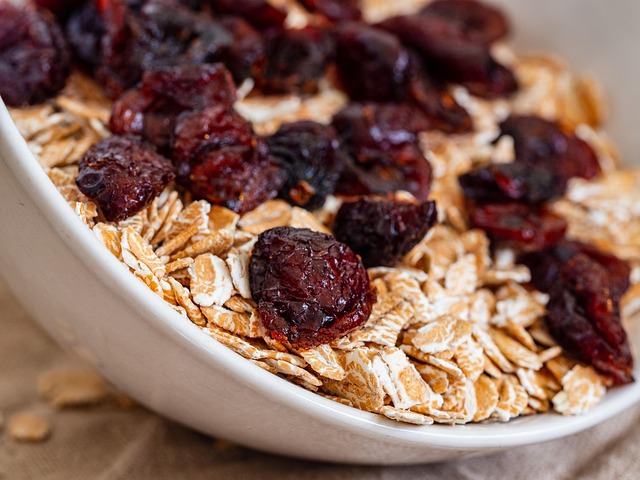
And then I found this recipe for “Nutty Cranberry Oat Muffins” by Getty Stewart. There is sweetness but not too much, texture, flavor, and oodles of good suggestions. I made the version with white flour, as that is what I had on hand, used goat milk kefir diluted with water to get the correct of liquid to equate buttermilk, and used pecans along with the dried cranberries. Other than that, I followed the recipe pretty much. I suggest you go to her link (above) for the details. I really like the flavor and texture of these muffins!

Getty Stewart’s Nutty Cranberry Oat Muffins

Ingredients

  • 1 c. rolled oats
  • 1 c. goat milk kefir (about 1/2 c.) diluted with water to make required amount – you can also use plain yogurt, buttermilk, or thinner kefir
  • 1 c. 3 T. all purpose white flour
  • 1 1/2 t. baking powder
  • 1/2 t. baking soda
  • 1 t. cinnamon
  • 1/4 t. salt
  • 1/2 c. brown sugar
  • 1/3 c. bland oil – I used safflower
  • 1 t. vanilla extract
  • 1 egg
  • 1 c. dried cranberries soaked in hot water for 15 minutes and water drained out after the soaking
  • 1/2 c. – 1 c. pecan halves

Method

  • Preheat oven to 375. Line 12 muffin tins with paper cups.
  • In small bowl, mix the kefir / yogurt / buttermilk with the oats.
  • Heat up hot water and soak the dried cranberries in it for 15 minutes – same time amount as oats – and drain when ready to use in batter.
  • In larger bowl, mix together flour, soda, powder, salt, cinnamon.
  • After 15 minutes, mix together the oil, brown sugar, vanilla, and egg into bowl with the oats-kefir mix.
  • Stir the wet ingredients into the flour. Mix until just mixed – too much mixing will result in cone head muffins!
  • Spoon evenly into muffin tins. These will not make big muffins that flow over the top of the muffin cups. If you want bigger ones, put more into each cup and plan for a longer cooking time and fewer muffins.
  • Bake 15-17 minutes until tops are firm to touch.
  • Remove from oven. Cool or eat as desired. My muffins were cool when I ate them and I didn’t have paper and muffins fighting to stay together. I didn’t eat one when warm, but I wonder if, because I used dried cranberries – which have less liquid – I would not have that paper-muffin war. I’ll try that next time!

Notes

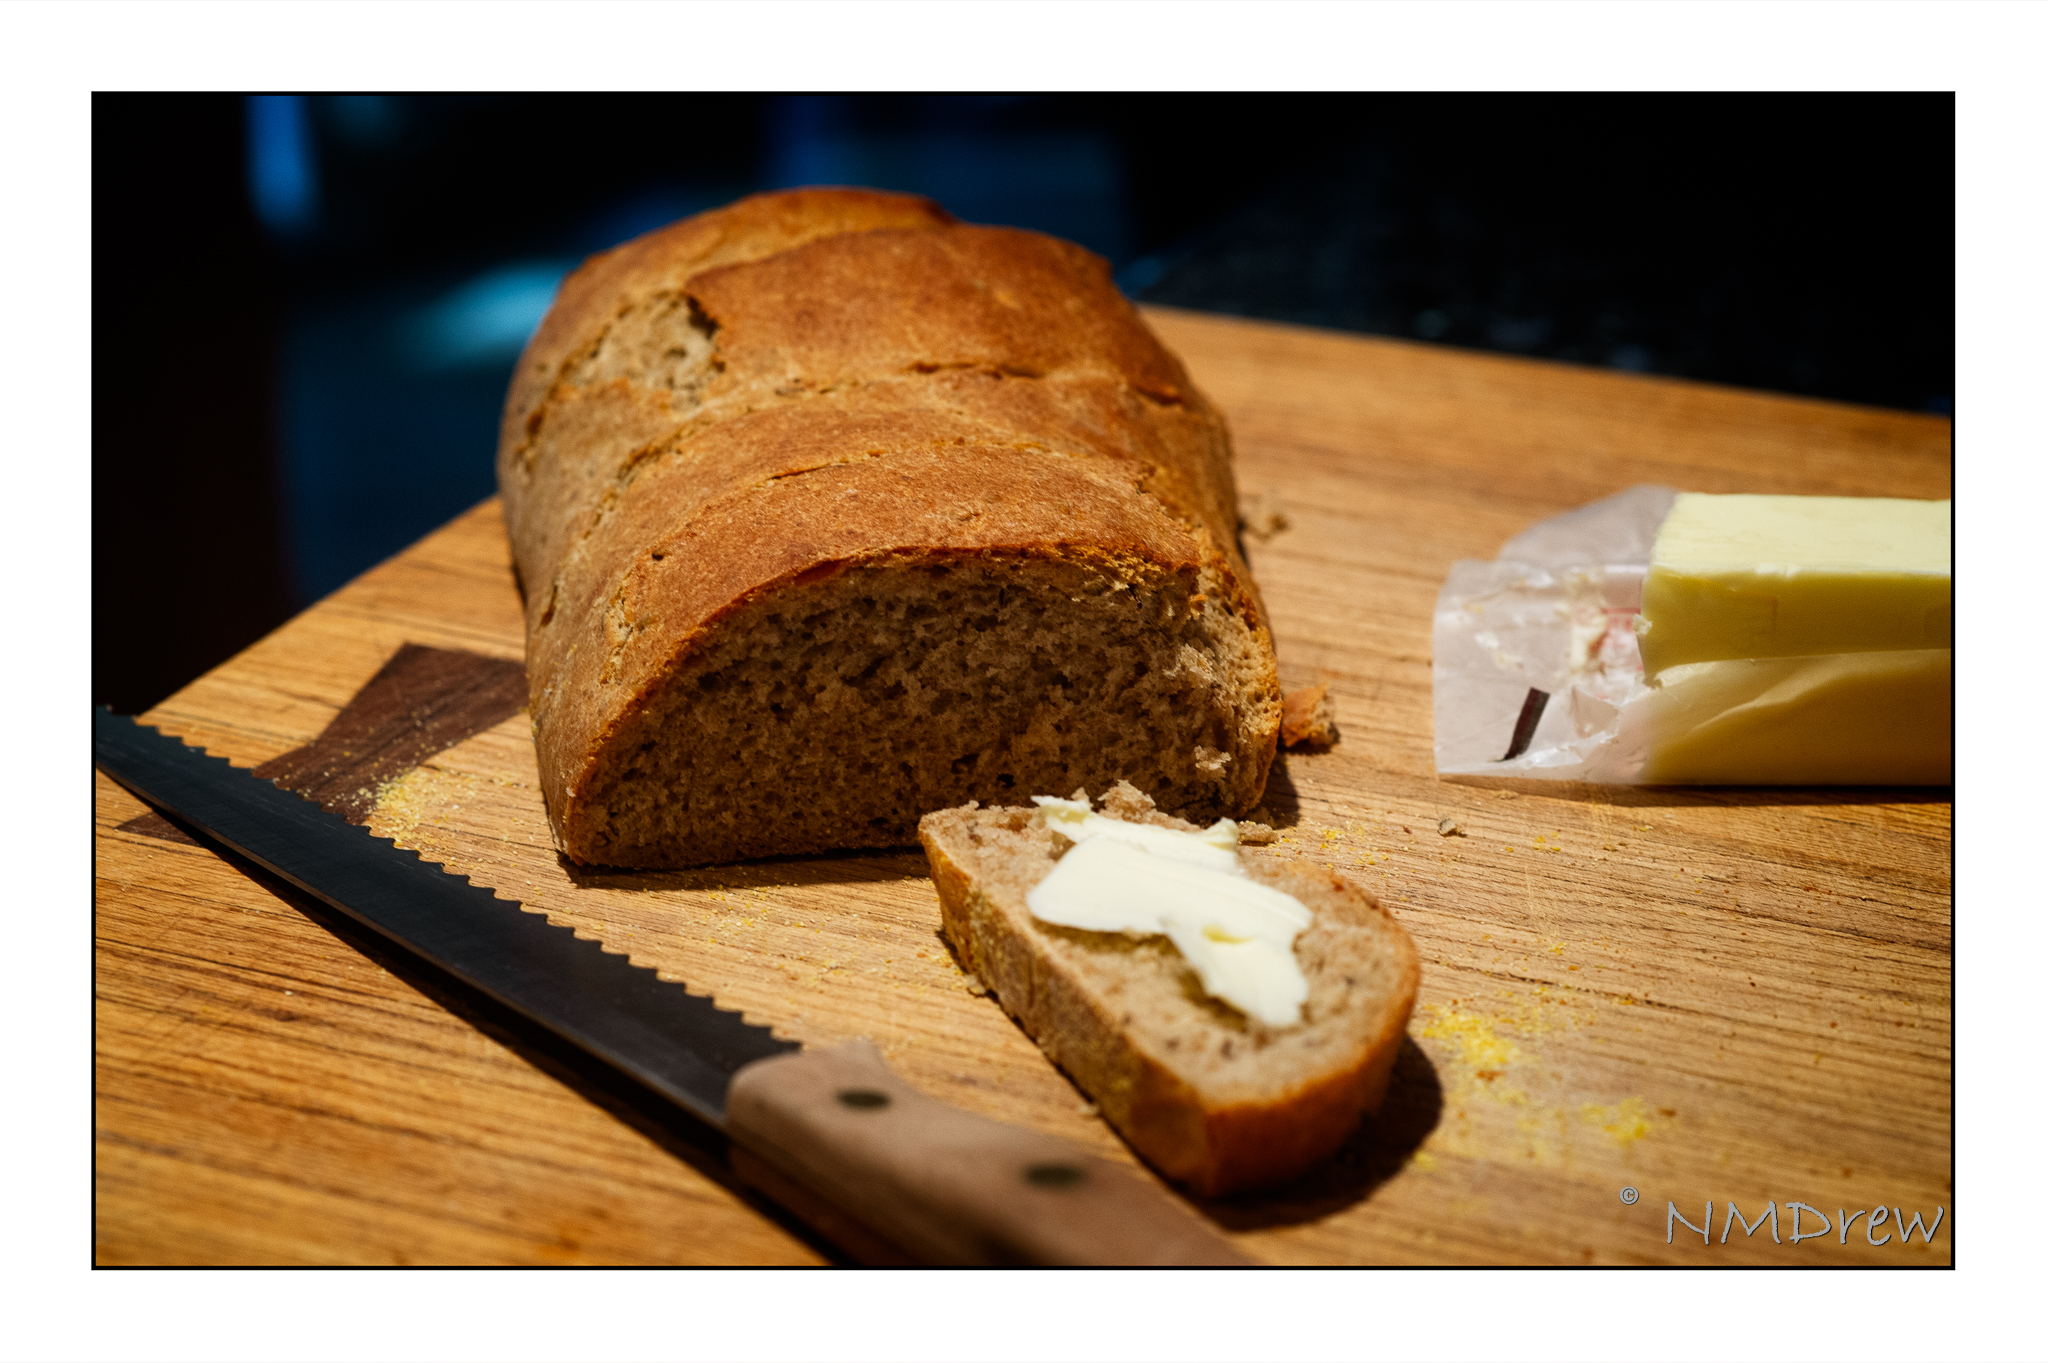
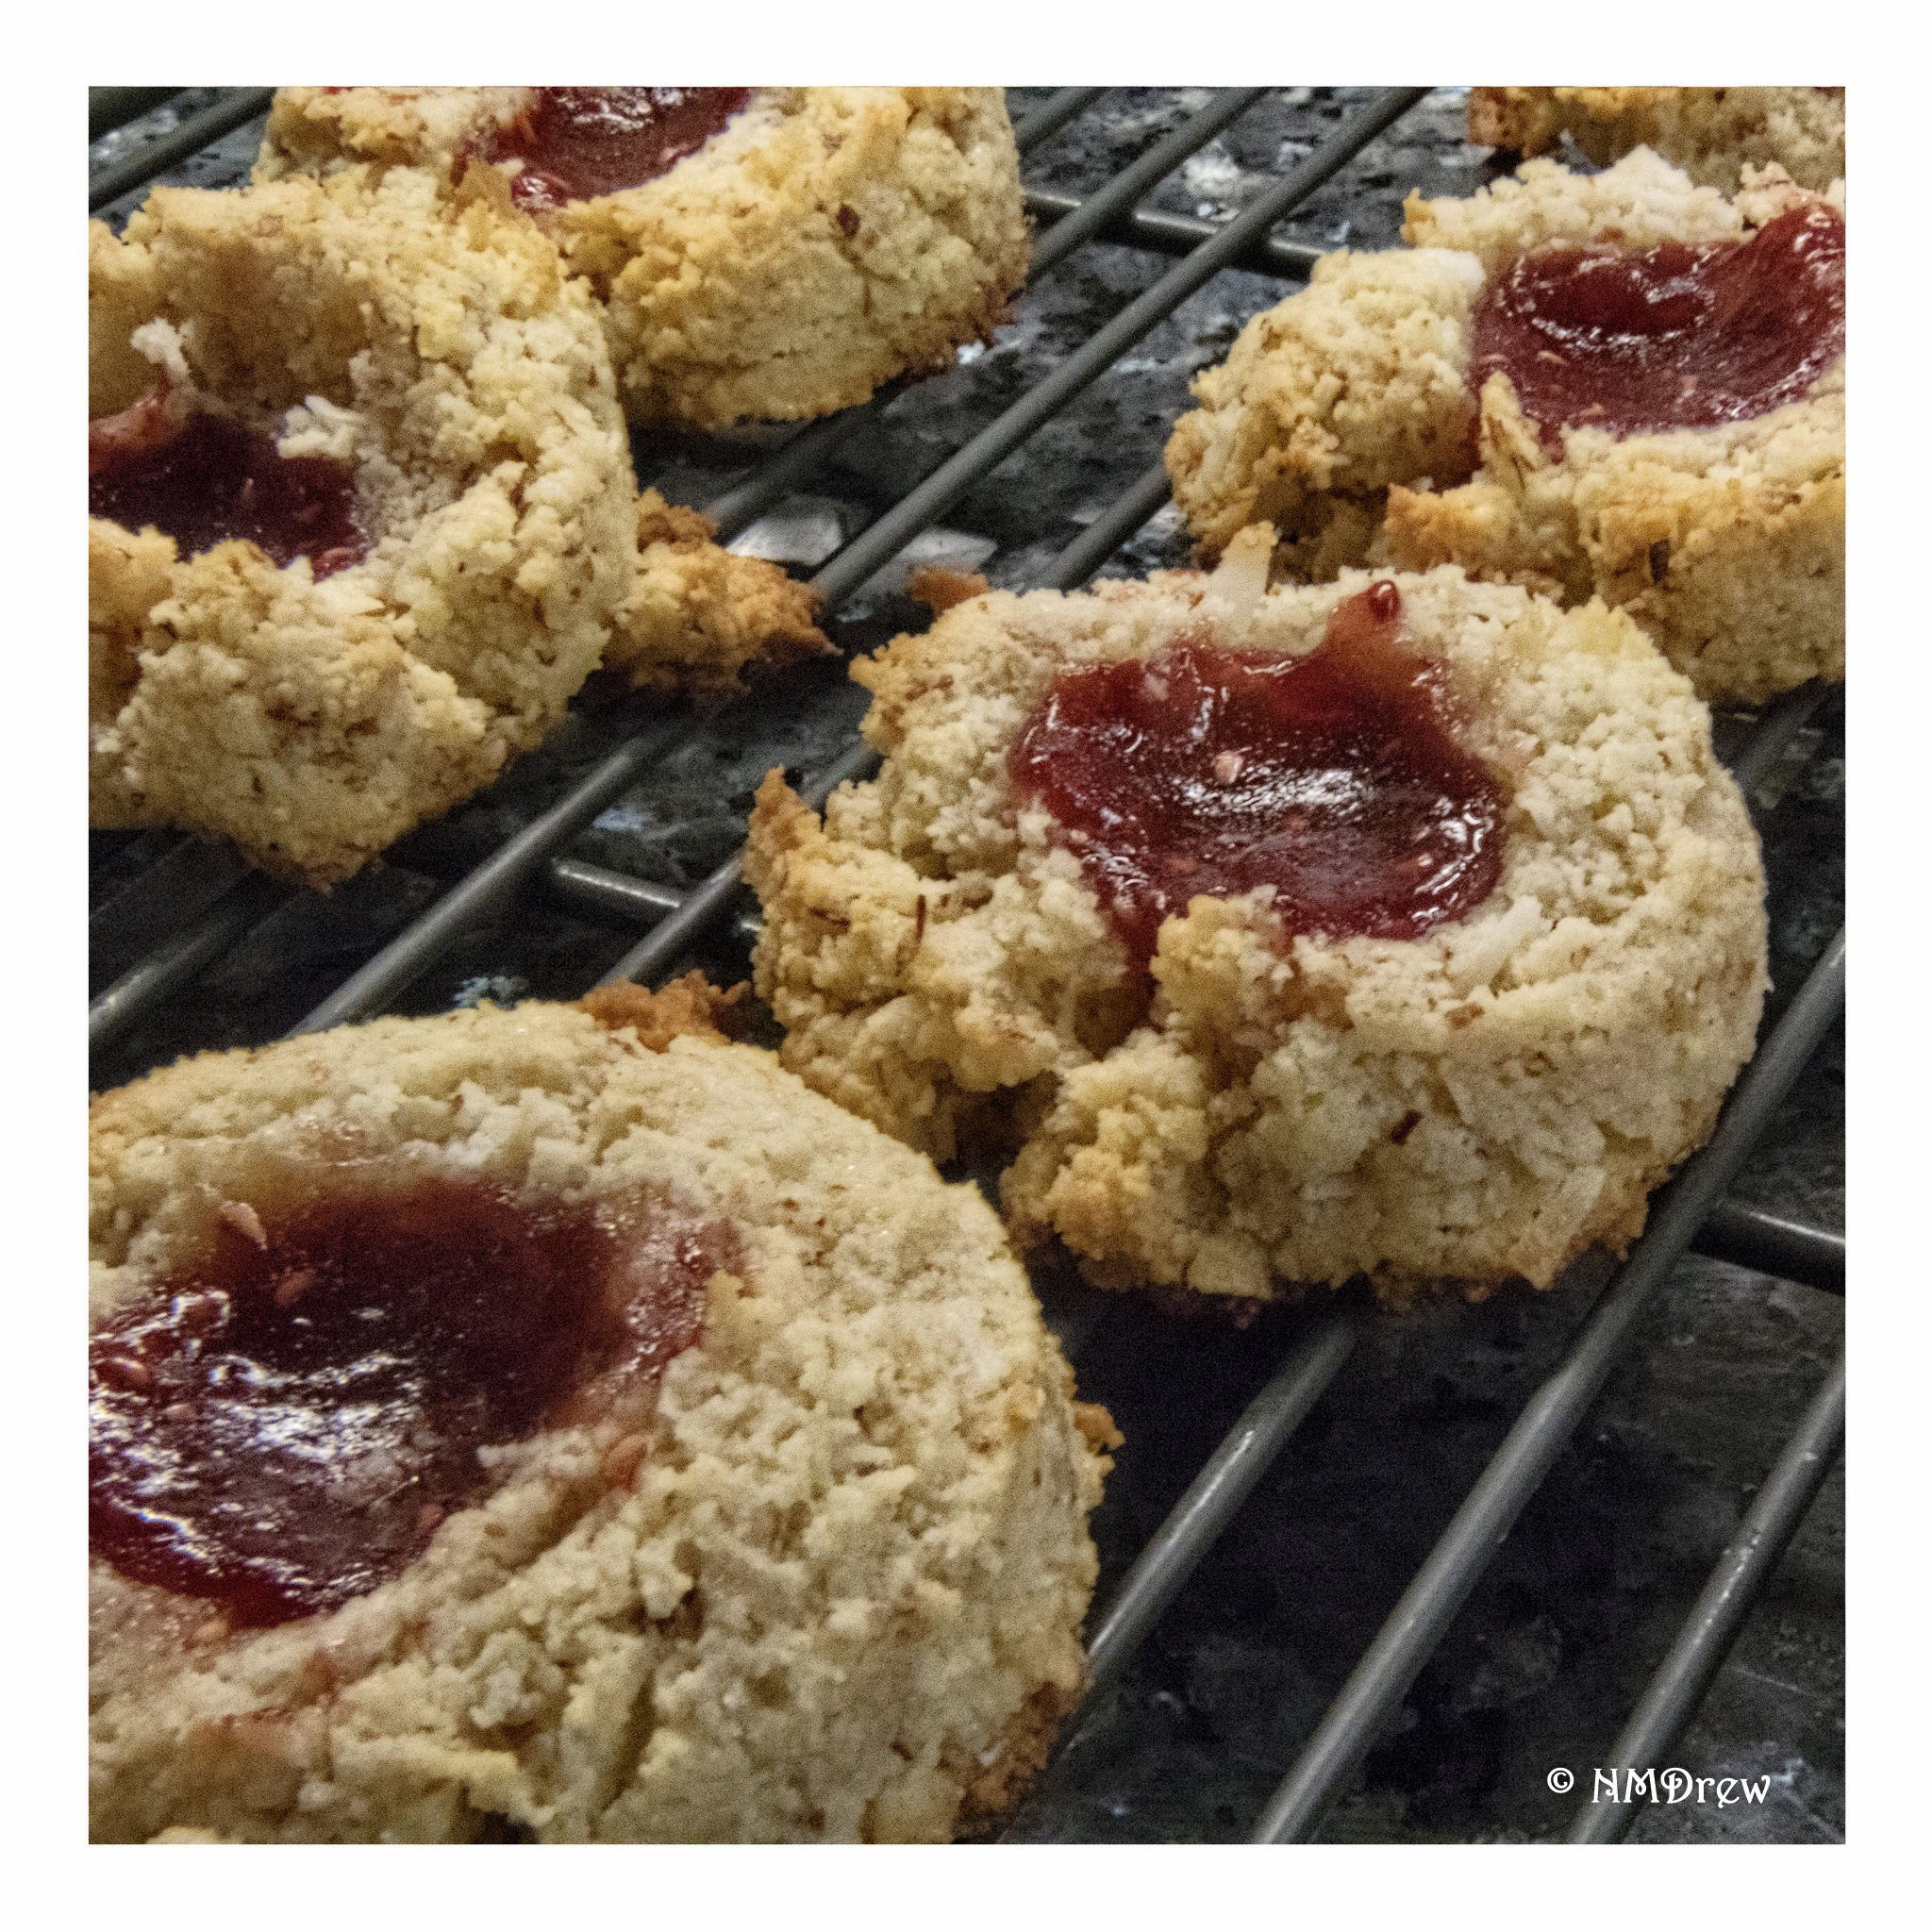
There is a topping included in the original recipe, but I don’t tend to like toppings on my muffins. Instead, I like to cut mine in half and eat with butter!

This is, by far, my favorite recipe to date for muffins. If you like more earthy muffins that are not loaded with sugar or coated with drizzled sugary frosting, these are definitely for you!

What Lies Ahead for 2024?

This past year I have focused a lot on painting and various media for art work. Watercolors, acrylics, portraiture in pencil, oil pastels, gouache, and probably a few others. I started my “Not Taken Vacation” series, which still needs to be completed, with pen and ink. Rewarding as this has been, and the gains I know I have made, I have also missed adventures in other areas. In 2024, I want to continue working on art work, as it is my first love, but other areas for creativity and exploration, have fallen to the wayside, and I miss them.

If I were to just list some of the things I missed doing and want to continue to do, I think I would begin to feel overwhelmed . . . but let’s see what a list will produce.

Sewing?

Knitting?

Gardening?

Photography?

Hiking?

Travel?

Reading?

Cooking and baking?

Exploring?

If I look at what I have been playing with to date, I am knitting, taking a few photos, and sewing. Most of my “reading” is really using an audiobook and listening to it while I knit. I have a number of sewing projects on hold because I have been lacking in time to focus, but that is really silly as I have everything in place and ready to go at the sewing table. I have a tabletop ironing board I can put on a countertop, so why not?

Being a Libra, indecisiveness is the norm. This? That? (Yes, laugh if you like at astrology, but sometimes it is too true!) Experience shows me that just starting something is usually all I need to get out of my slump, whatever form it may be taking and just 

Letting the Fairies Out

In our home, fairies abound. They take things away, hiding them, as well as giving things back, or leaving presents of many sorts, desirable or otherwise. We have Sock Fairies, Cat Fairies, Phone Fairies, Key Fairies, and Amazon Fairies, to name a few. And as today is St. Patrick’s Day, it is worthwhile to celebrate our own Irish heritage by enjoying a shot of good whiskey in the evening and some traditional Irish soda bread.

And letting the fairies run free.

There are very simple recipes of only 4 ingredients for soda bread, to some more complicated. All require the use of baking soda and an acidic liquid – usually buttermilk – to react with the soda to produce the gas which makes the bread rise. So, without further ado:

Irish Soda Bread

  • 4 c. flour
  • 6 T cold butter cut into small pieces
  • 4 T sugar
  • 1 t salt
  • 1 t baking soda
  • 1 c raisins or currants
  • 1 egg
  • 1 3/4 c. buttermilk (can use an appropriate substitute)

Preheat oven to 350-375. Place raisins in hot water to soak for 30 mins. or microwave a minute, soak, drain, pat dry. Line baking sheet or cast iron pan with parchment paper.

Mix together all dry ingredients except raisins. Add butter, cut into flour to make a coarse meal in appearance. Stir in raisins. In a separate bowl beat together egg and buttermilk.

Check to be sure the oven is hot enough. Once you have verified it is to your liking, make a well in your dry ingredients, dump in your wet, and stir with your hand, fingers extended, until you have a soft, sticky dough. Turn dough out onto a floured board, knead a bit as you would a biscuit (but not a yeast bread) working quickly. Shape into a large circular loaf about 1 1/2 – 2 inches in height. Place on parchment lined pan.

Using a sharp knife, slice the bread with gashes about 1/2 inch deep and spread the gashes a bit. The gashes go from one side of the bread to the other, forming a cross. The cross blesses the bread; on a more practical level this allows the center of the bread to bake more quickly. Then, in each quarter of the bread, make a small cut – this allows the fairies to escape and ensures better chances of a successful loaf.

It is important to note that you do not want your bread to sit around, liquid mixed into dry, while your oven heats up. Wait patiently to mix. My oven is a slowpoke and takes a bit of time to get anywhere I want it, and then it often sits around at 350 even with the marker up to 450!

Bake 50-55 mins. at 350. And then, cool the bread on a wire rack. Test for doneness by tapping bottom of bread. Just as with yeast bread, a hollow sound indicates it is baked.

Some people say wait until all is cooled before cutting in for a better loaf, but that can be difficult. Who can resist warm bread and butter?

So here’s to St. Patrick! Slàinte Mhath!

Our Daily Bread

I have been in a funk about photography – bad weather is my excuse about not getting out. Laziness is more the reality. And, a total lack of inspiration. We all go through these funks, but it gets exciting when interest picks up again, often with fresh eyes and thoughts.

I started the Instax Printer Project to just get me to do things. Hiking is really what gets me oot-and-aboot to make pictures. On the other hand, it can be a challenge, and a pleasure, to photograph the mundane. Bread and butter is mundane, but homemade rye bread and butter is a different story! I made some yesterday, and managed not to gobble it down just out of the oven.

Oh, yum!