I bought a set of Schmincke Horadam pan paints, and went a bit nuts with them. I decided to try a set of 48 colors – economical way to enjoy excess colors! I have an older set which has done me well over the past several years, and thought it was time to buy some more. I cannot say I am disappointed as they are really lovely.
I have some poor quality watercolor paper – great for gouache – but not for watercolor. This particular bit is poorly sized, as you can see by the mottled appearance of the blue-greens at the bottom and left of the flower pot. Still, I was not using this paper to test out the paper, but instead to just play a bit with some colors I haven’t used before. I did a few other sketches, but they were all rather poor – not that these pansies are anything great – but I have had fun!
One of the nice things that comes with the Schmincke paints is a sheet of paper which has a bit of texture and can be used to put samples of the paint on them. The sheet itself has room for the number, but I also wrote down the name on the wrapped-up half pans, as I think, “oh, Payne’s grey” not “good old number 789”!
So, more play in the near future, but not with crap paper. I think then the real colors of the Schmincke paints will really show.
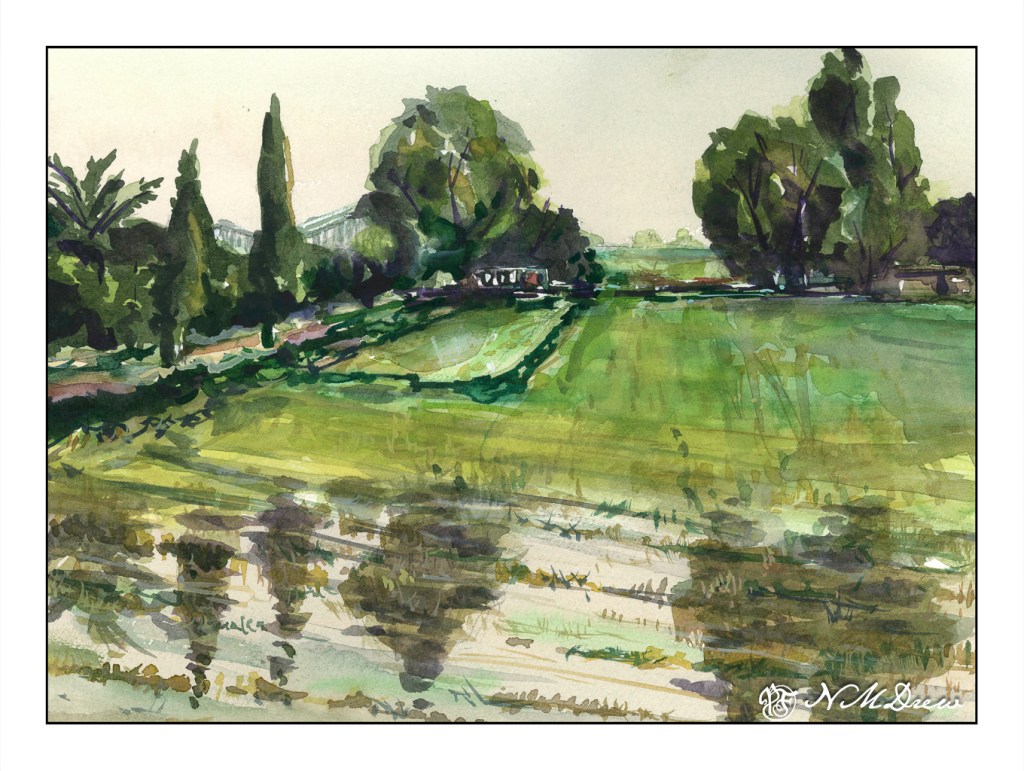
It’s been raining buckets out here, and water is just sitting on top of the ground and slowly sinking in. We have a small lake in our back yard, and it weren’t for a pump, we would really be in trouble. California has seen record-breaking rain, rain, rain, snow, and more rain; now mudslides and other disasters are happening.
While this painting is not of my area – despite the palm tree – I thought it was representative of what we are seeing here. To the west of us is the Oxnard Plain, a major growing area in my county. It is very flat, and water run-off is diverted to culverts and ditches alongside the fields, but areas still stay soggy a bit.
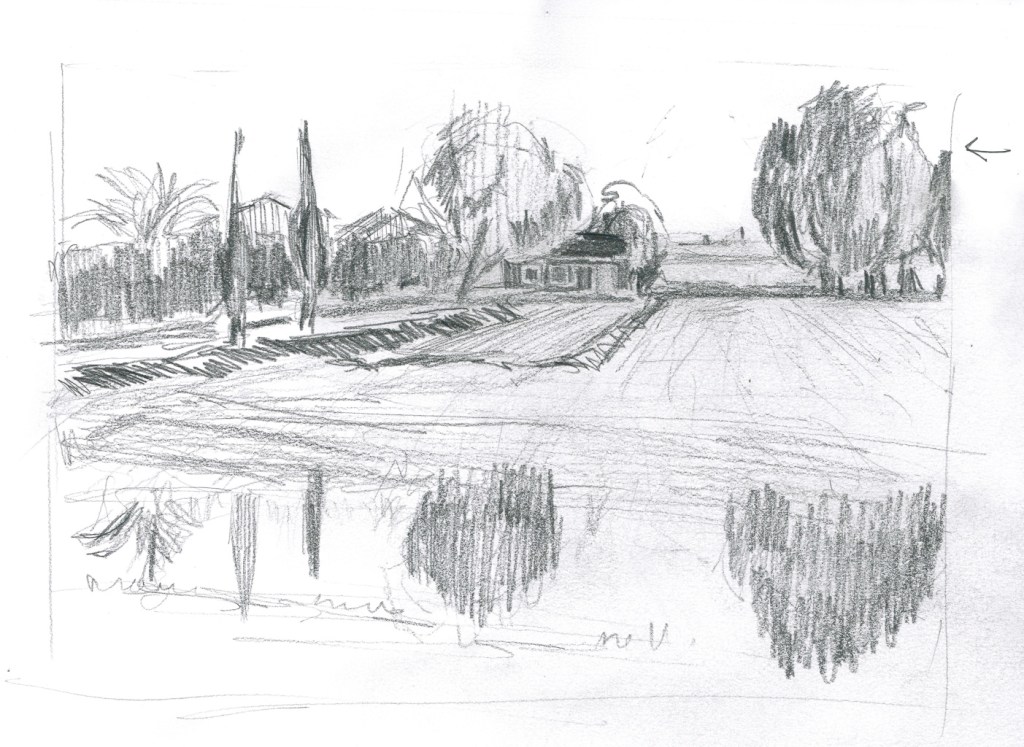
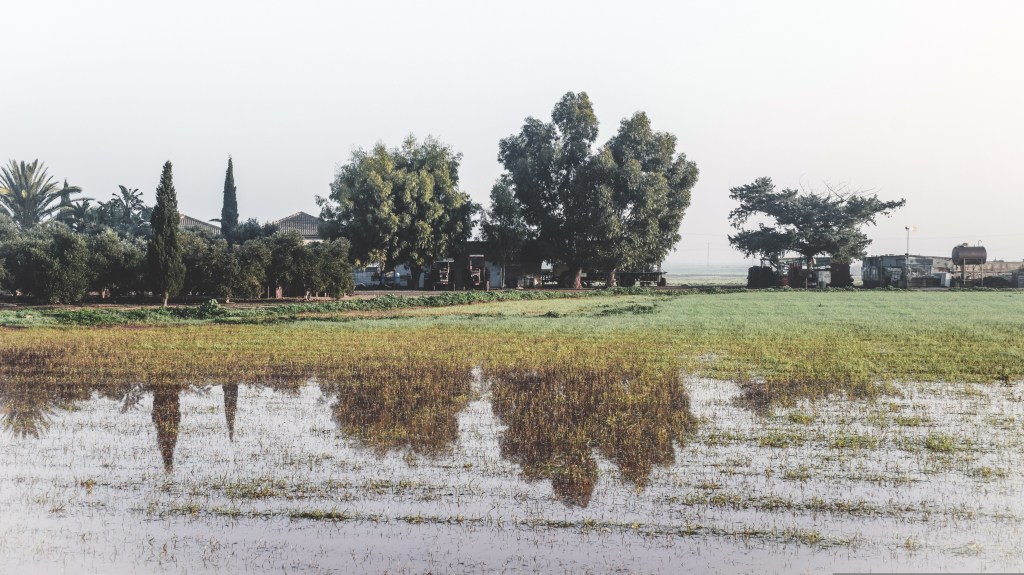
I have also been really disgusted by my last few landscapes, so I decided to make myself do value studies prior to painting. When I do, results are always better, and I am happier. Below is the reference photo from Pixabay.
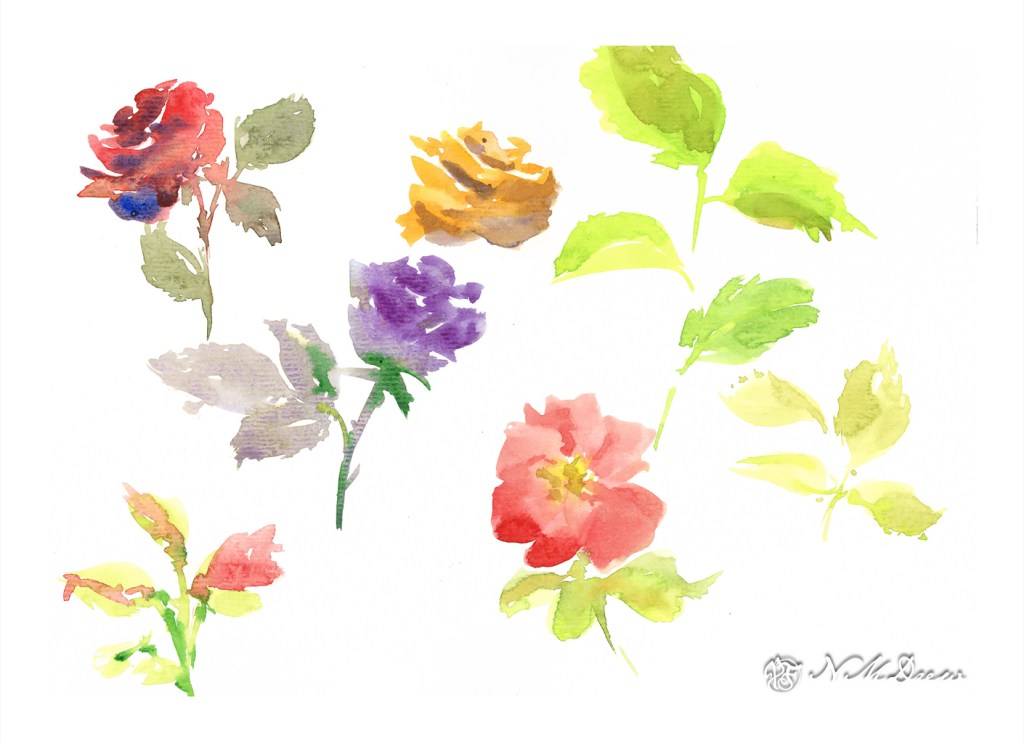
More roses – more C strokes – and then other kinds of strokes to make leaves. For the leaves, brush point on paper, squish down and move, bring brush up to another point. Just as in sumi-e! Then, while the paper and paint are still wet, take the tip of the brush and create little points around the outer edge of each leaf. Some roses have pointy leaf edges, others do not. I don’t think the Rose Police will come knocking on my door, though, so I am safe.
Roses in these kinds of sketches are easy enough to do. However, creating a successful painting of more than one sketchy rose is another story. Light, shadow, shape all begin to play together, and sometimes not very nicely.
Here, a rose with a simpler petal style than the classical tea rose. As a kid in the midwest there were deep red wild roses throughout the countryside, and here in California there is a bush as above along a local trail. There are about 5 petals around a yellow center, and the wild roses are messy things that are such a pleasure and delight to encounter.
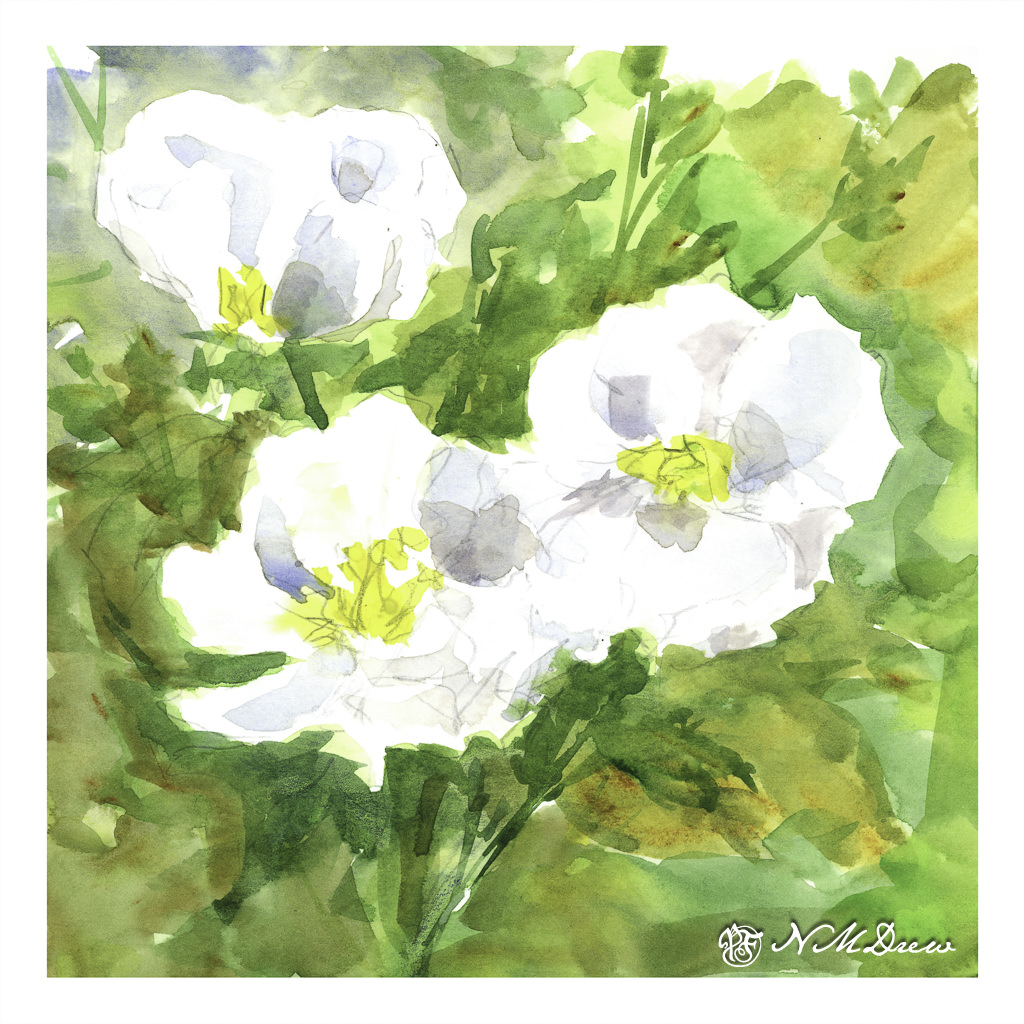
Painting a white rose is not easy because white is influenced by light and shadow and shade. Instead, you have to look at the colors in the white – light? dark? cool? warm?
The above little painting was a success, but it is only a sketch. A bouquet of roses will be far more challenging and I really doubt my ability to succeed there.
Things are made up of shapes, and understanding their shapes and structures should – hopefully! – make them easier to paint.
I have a small rose garden, and it always pleases me to see it in bloom. Most of the roses I chose for fragrance, but some I chose because I like them. So, as my roses come back to life after weeks of rain, it seemed fitting to paint roses.
A few videos later . . . open roses are shaped like tea cups. For me, try a coffee up. Paint them like a series of C shapes, but vary the thickness of the C strokes. These made sense. As well, when looking at the roses, I realized my way of seeing things to paint has shifted over the past year and suddenly they became easier to “see” – if that makes any sense.
In our home, fairies abound. They take things away, hiding them, as well as giving things back, or leaving presents of many sorts, desirable or otherwise. We have Sock Fairies, Cat Fairies, Phone Fairies, Key Fairies, and Amazon Fairies, to name a few. And as today is St. Patrick’s Day, it is worthwhile to celebrate our own Irish heritage by enjoying a shot of good whiskey in the evening and some traditional Irish soda bread.
And letting the fairies run free.
There are very simple recipes of only 4 ingredients for soda bread, to some more complicated. All require the use of baking soda and an acidic liquid – usually buttermilk – to react with the soda to produce the gas which makes the bread rise. So, without further ado:
Irish Soda Bread
4 c. flour
6 T cold butter cut into small pieces
4 T sugar
1 t salt
1 t baking soda
1 c raisins or currants
1 egg
1 3/4 c. buttermilk (can use an appropriate substitute)
Preheat oven to 350-375. Place raisins in hot water to soak for 30 mins. or microwave a minute, soak, drain, pat dry. Line baking sheet or cast iron pan with parchment paper.
Mix together all dry ingredients except raisins. Add butter, cut into flour to make a coarse meal in appearance. Stir in raisins. In a separate bowl beat together egg and buttermilk.
Check to be sure the oven is hot enough. Once you have verified it is to your liking, make a well in your dry ingredients, dump in your wet, and stir with your hand, fingers extended, until you have a soft, sticky dough. Turn dough out onto a floured board, knead a bit as you would a biscuit (but not a yeast bread) working quickly. Shape into a large circular loaf about 1 1/2 – 2 inches in height. Place on parchment lined pan.
Using a sharp knife, slice the bread with gashes about 1/2 inch deep and spread the gashes a bit. The gashes go from one side of the bread to the other, forming a cross. The cross blesses the bread; on a more practical level this allows the center of the bread to bake more quickly. Then, in each quarter of the bread, make a small cut – this allows the fairies to escape and ensures better chances of a successful loaf.
It is important to note that you do not want your bread to sit around, liquid mixed into dry, while your oven heats up. Wait patiently to mix. My oven is a slowpoke and takes a bit of time to get anywhere I want it, and then it often sits around at 350 even with the marker up to 450!
Bake 50-55 mins. at 350. And then, cool the bread on a wire rack. Test for doneness by tapping bottom of bread. Just as with yeast bread, a hollow sound indicates it is baked.
Some people say wait until all is cooled before cutting in for a better loaf, but that can be difficult. Who can resist warm bread and butter?