As we head toward 100 F weather this weekend, I am glad to have taken the time to head out, once again, to the local botanical garden. It is always such a refreshing place to be – new things to see, changes to the familiar. I went out with my Nikon Df, and a classic lens, the Nikon 105mm f2.5 AIS.
While I was there, I brought along my Nikon FM2N and a roll of Ilford HP5 to use with different filters – orange, yellow, and green – to see their effects on B&W film. Hopefully I will develop my own roll this next week! And, on the way out of the garden, I took a wonderful tumble, scraped and bruised myself quite nicely, and had a good mouthful of dirt to go along with my lost dignity. I’m quite sore!
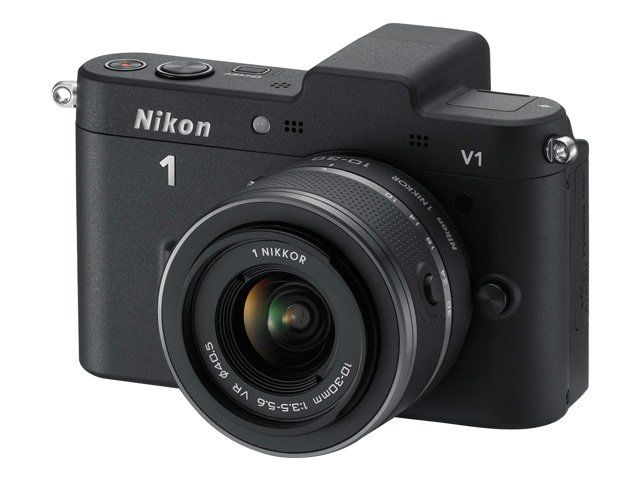
When the V1 came out a few years ago, I thought it looked good; when its price dropped drastically, it looked really, really, good, and I bought one. It came with 10-30mm and 30-110mm lenses. Since then I have added the 6.7-13mm, 10mm, 18.5mm, 32mm, and now the 70-300mm, and the FT-1 adapter. If that says anything, it says I like the system, or else I am just overly acquisitive. (I will leave you to figure that out!)
If you are familiar with the Nikon 1 system, you know it has gone through multiple iterations, and has had numerous models in the S, J, and V series. I am not sure if the S series is still in production, but the J is now up to a J-5 being released in a few weeks. The V3 is the current version of the V series, so I cannot help but wonder if the V4 will be even more interesting.
One major gripe people have about the entire Nikon 1 series is the smallness of the sensor. It falls in the 1″ (2.5cm) category. Does it really matter? Isn’t the image produced the most important thing? To me it is. It also means knowing how a system works, and to use its strengths and limitations to the best advantage. This means using it under all sorts of situations, pushing it, controlling it, whatever.
Besides the Nikon V1, I also have a D7000, and the Df, and a number of different lenses with a different F mount, from vintage lenses from the 60s, to newer ones produced in the last couple of years. I got hooked on Nikon because a friend loaned me his D70 a few years ago, and I haven’t looked back. I also have a Nikon FM2N, which is a cool film camera, and can use lenses on it, too.
So, why another look at the Nikon 1 system? It is because it has sat on a shelf for awhile, until I started seeing work done with the 70-300mm lens (officially labeled 1 NIKKOR VR 70-300 f/4.5-5.6on the Nikon USA website). The lens becomes a 189-810mm lens on the Nikon 1 cameras. The distance that can be covered is phenomenal, and is very petite. A regular 70-300mm lens coupled with the FT-1 adapter works great – but is gargantuan. Because it is small, I went for it.
A lot of birders enjoy using the lens as it is easy to use handheld. Tom Stirr has done a great job demonstrating the quality of images, as can be seen in his work below. He uses the V2 and V3, which are considerably more advanced than my V1, but you get the idea:
Using the lens handheld, I cannot complain. While it is still heavy (in my opinion lots of things are heavy, like national debt or guilt), the VR works well, and I have found for myself, setting it to normal in the camera, and coupling it with continuous shooting, has allowed me to move in closer to things or people or animals I would not otherwise be able to.
Another photographer whose work I like is Aurora Santiago, on Flickr. You can find her work here. She uses the V3 and 70-300mm for her birds, and other shots, too, I imagine.
I use this lens to photograph plants, distances, and finally, the other day, I met up with a friend to photograph birds at a lake in a local park. Unfortunately, the lake was fenced off as clean-up goes on, and reconstruction. So, the egrets I wanted to photograph seem to have decamped, but the geese, ducks, grebes, and pigeons were still hanging out. Waddling birds were easy to capture – they are pretty tame – but swooping flocks of pigeons were amazingly impossible to capture with panning. Floopity, whoosh! I wanted to see how the V1 and the 70-300mm worked together to produce good pictures, still and with my largely unsuccessful attempts at panning.
Below are a number of pictures I have taken recently, using the 30-110mm, the 6.7-13mm, 32mm, and the 70-300mm lenses on the V1.
I have found a few things out in using the V1/70-300mm combo. First, I need to up the iso. Next, if necessary, shorten the exposure time to 1/500 and leave the camera to do the rest. For panning, use the central focal point, and use the continual / burst mode of the camera. Bright daylight also helps. The pictures I like are not all crystal clear, but they are pleasing to my eye. Some might be a bit soft or show some blur. Again, the photo is most important.
Besides the quality of the photo, post production is also important. Some people believe and strive for every picture to be perfect in composition, exposure, and so on, before even taking it. Sorry, not so for me. For me, post means rendering a mood, or shifting colors to something I like. I am not a purist that way. To me, some photography is a crap shoot – point, shoot-shoot-shoot (like when panning) – and pray, pray, pray! And then, look and look again. What works, what does not? Analysis is important, and reassessment of what was done.
And finally, just have fun. I don’t make money off my pictures, and couldn’t care less. For me, the creative process and intellectual process are important, as is simply getting outdoors to enjoy the world around me, by myself, or with friends.
I don’t tend to photograph people, preferring the outdoors and flowers. However, people watching is a great past time, and getting portraits, candid or otherwise, of family or strangers, shows the diversity of the world in a face.
The other day I went shopping deliberately for fruit to shoot. Food photography can be fun, but it does require more of a set up than I use when I am shooting pictures as I work in the kitchen. I bought pears, tangerines, and apples from Whole Foods, checking the produce out for perfect fruit, and because I really think they have the best fruits in the autumn and winter months. I used flash with the MagMod, backlighting from my eastern-facing studio window, a Lastolite scrim, along with silver reflectors and white foam core. Not everything was used in every shot, but I did enjoy playing around. Camera was the Nikon Df and the Nikon 24-85mm f2.8-4 lens.
The purpose of this study was to work with equipment and to work with software. Just practicing a studio set up and then working with the light – which was done in the morning given the eastern window – was fun. Shooting outdoors is not the same as shooting indoors. Doing studio work helps me focus on thinking about light, shadow, texture, composition, color, ad infinitum. It is a good way to focus more than just the camera – it creates a consciousness of the environment, one which I can control to a certain degree.
Besides the learning curve of studio work – and the fun – I really enjoy still lives of plants, food, fruit, and vegetables. For me, it brings the beauty of the natural world and an appreciation of its diversity to the forefront – something easy to forget in the face of just the busy-ness of everyday life.
For Christmas, there were a few photography accessories on my list, one being the MagMod 2.0. I must have been a good girl, because I got one. It is an attachment for your speed light, and allows a grid to be added to the flash, along with colored gels, to focus and change the light of the camera. It is made of rubber – or a rubbery substance – that stretches to fit the speed light. I put it on my SB600 as well as the SB400 (which is smaller than the SB600) by stretching the MagGrip.
From there, using the MagGrid 2 and the MagGel 2 systems, I could change my image’s character. Coupled with extra lights from the side, or backlighting, the results were rather nice. What I liked was the fact the MagMod 2 is very easy to use and is modular – hence the “mod” in MagMod. The grid reduces the divergence of the light spread from the flash and focuses it to 40 degrees, per the MagMod website; add another, and it reduces it to 20 degrees. (Will a third halve it to 10 degrees?) In looking at this site, it appears they are now developing a bounce and a diffuser, but they are not yet for sale on the MagMod web page.
Images taken using the MagMod 2 Grid and Colored Filters
The MagMod 2 is easy to use – and rather fun! The magnets do have north and south poles, and they will remind you of that when you line them up wrong. Quality seems to be very good. I am not sure how the filters are made. There are air bubbles in them, which move around, but they do not affect the image at all from what I can see. Also, a few months back, I emailed them with some questions, and I was very pleased with the promptness of their replies. For the price, some people may find this an expensive item, but the kit is a good place to start, and from there, you can add what you want. Modular they are, and you can buy pieces individually.
Finally, here is a video done by someone in the studio, using a number of them.
And here, you can see all their products in production and available for pre-order. Altogether, this is a rather exciting product, I think, and look forward to the continuing development of the MagMod system.


")
")
")
")
")
")
")
")
")
")
")
")

")
")
")
")
")
")
")
