Although it doesn’t look especially bright or pink, the second thread I added was a carnation pink. However, I did not have any “real” sashiko thread in pink, so I decided to use a pink DMC embroidery floss.
Initially I sewed the floss as it was – 6 strands of thread – but found it to be really challenging and far more difficult than the sashiko thread in red with which I began. The sashiko thread I have is thinner than the 6-strand floss, so a fatter thread means more work! I picked out what had done. Then I separated a strand of the DMC into two 3-thread strands. These made for thinner thread, and I used it for the top and bottom designs of the swatch above.
However, I felt the 3-strands were just not quite right. So, for the middle design, I used a 4-thread bit of thread, pulling apart the floss into a 2 and 4 strand bit. The 4-strand is thicker and, I think, looks better. However, I never liked separating floss into thinner strands as it tangles up on itself as it is separated. Being lazy I have decided that traditional sashiko thread is more to my liking, and I will leave it at that!
A couple of thoughts . . . the denim is fairly loosely woven, but the floss is heavier than I would like to deal with – I really had to pull to get it through the fabric. For a more loosely woven fabric, I think the floss would be perfect. Sashiko thread seems to come in both thick and thin weights, and I have been using the thin on the denim. Would it be too thick on a more densely woven fabric? If I used thin sashiko thread, would it be too thick and need to be separated, much as the floss needed to be? I guess we shall see on future projects with different fabric.
This heat is really getting to me – and it is not as hot as in Texas or Florida, and we certainly don’t get the humidity, either. But, I have been staying inside or going to places I know with air conditioning – heat has always not been my best of friends.
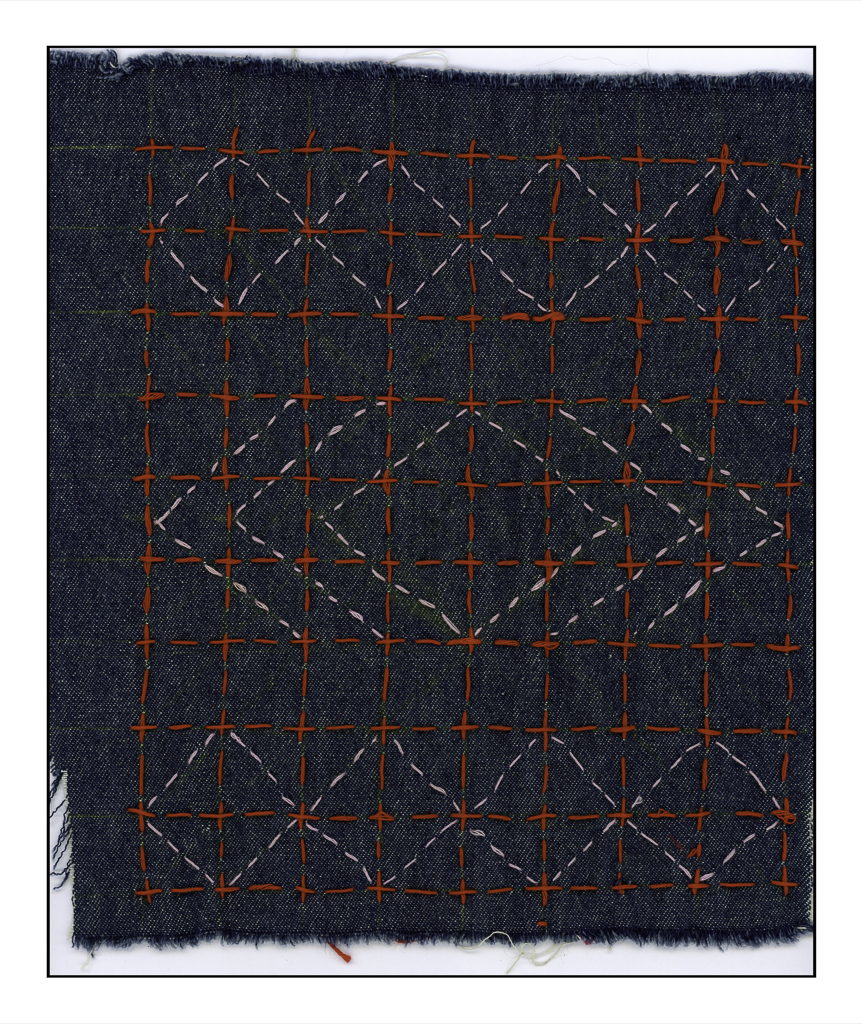
Given that there is only so much you can do lounging around a house, it can be good to just watch a movie or show and do something a bit creative. As the sashiko has been ignored, I figured today would be a good time to do some. The same denim as Sashiko #1-5 was ironed and starched, and a grid laid out.
If you look, you will see that the intersections are little + signs, and then there is one stitch in between each plus sign. I am not sure where I am going to go next, but I have a few ideas. The other question is what color thread or threads? I am not quite sure what I have – maybe a pink or bright green against the denim? Not sure.
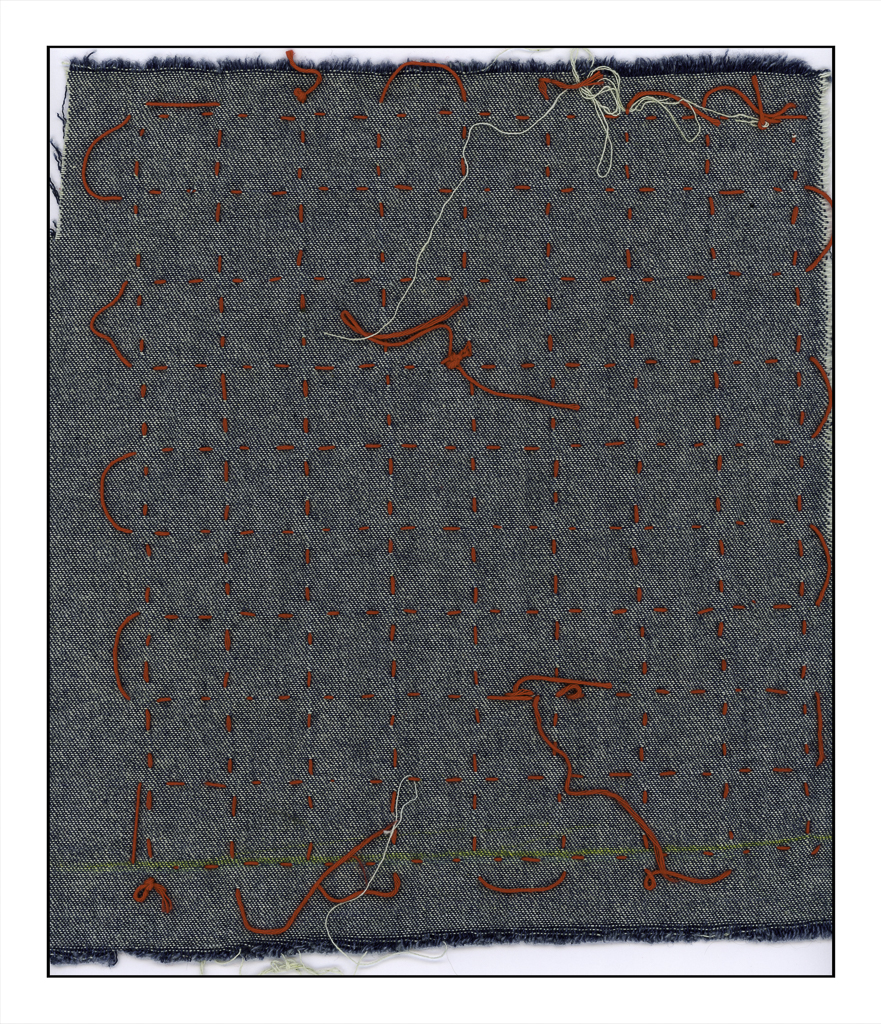
Anyway, below is the reverse side, just because it is so interesting. Oh, I was going to do the stitching on the reverse, but with the plus signs, my mind was not cooperating, so that will be for a simpler project.
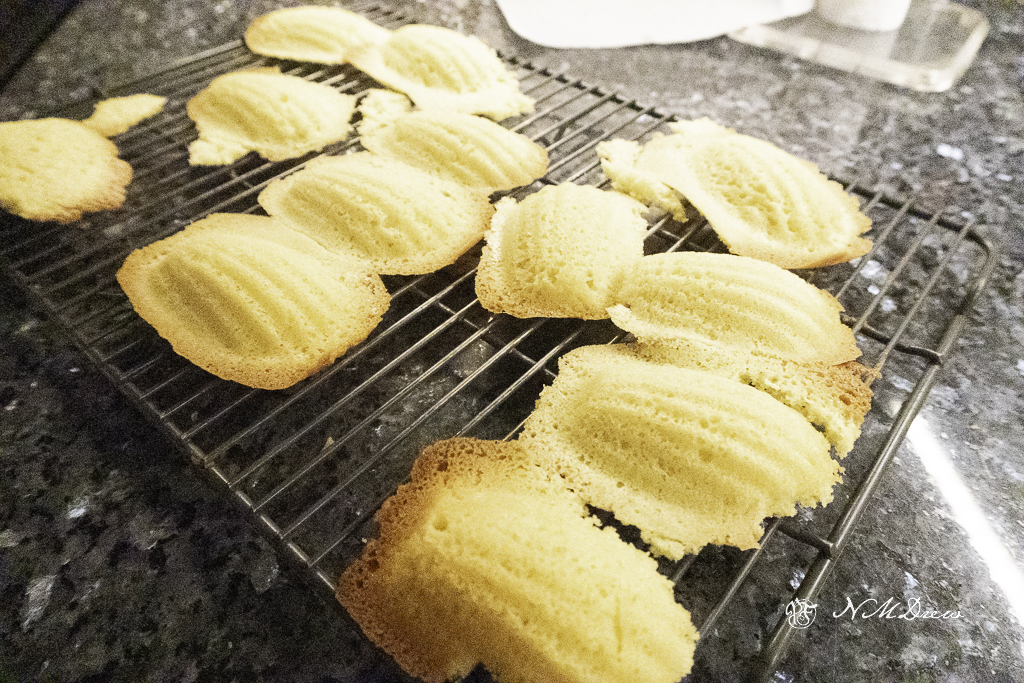
No, not the Good Ship Madeleine, nor sister to the HMS Pinafore, but the Delicious Cookie Madeleine.
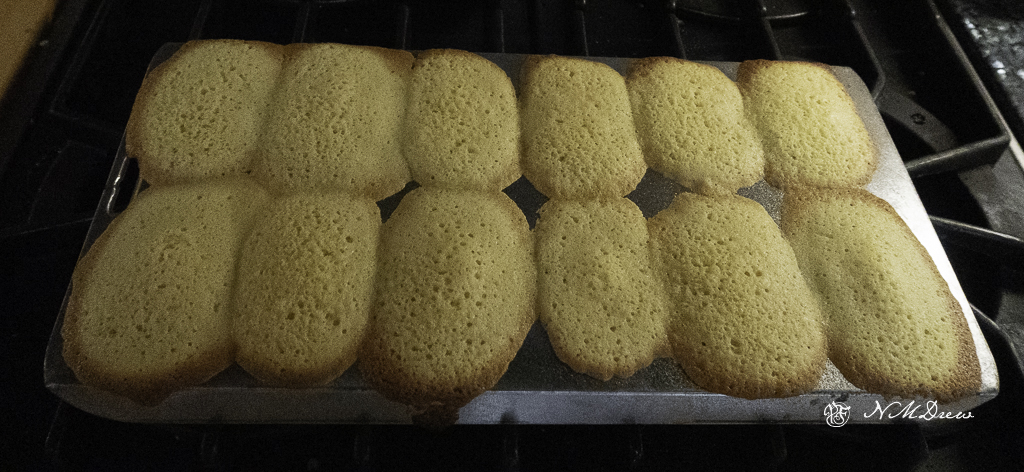
A madeleine is a French cake-like cookie, essentially a genoise, known for its shell-like shape from the pan side and a blump on the reverse. A good recipe is to be had at Preppy Kitchen – it produces a lovely, light, delicate cookie with a subtle hint of lemon. However, a couple of things – bake at 350F, and use a pan which makes smaller madeleines than mine does! I have one pan and I filled the madeleine molds full, like really full, and the batter runnethed over the tops of the molds and the cookies flowethed unto each other.
As you can see, my madeleines are robust and hardly delicate to look at. They are baked blobs of blobs of batter.
And, how to get them out of the pan? Well, I had thought of trimming their edges, but then the brown around the sides would disappear, and that little bit gives a crunch to the otherwise soft, airy cookie. And, if they sit in the pan, they get soggy. So, what to do with a hot pan and a cookie mess? Simple – dump them all out on the wire rack. This way, too, I could see if the cooking spray I used to grease the madeleine shapes would work.
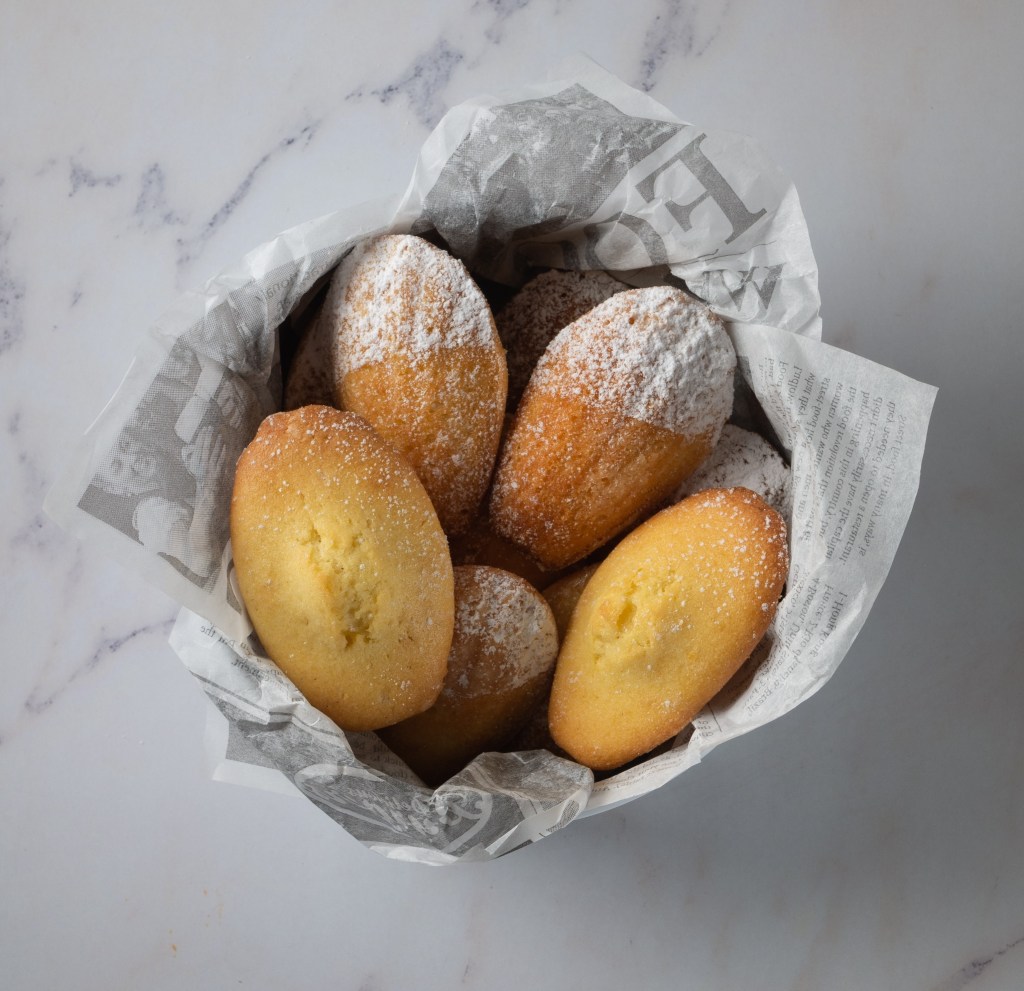
And the spray worked beautifully. Now, I have a pile of weird-looking cookies that don’t look especially appetizing – certainly not as lovely as our very first photo, which is a royalty-free one off the internet. However, be not dismayed! They are delicious! Good dunked in coffee, and most likely tea, and if you are familiar with M. Proust, you know of which I write.
Make yourself some madeleines, at least once in your lifetime. Make a test cookie or two in your pan – don’t overfill, but don’t underfill, either. I used a heaping tablespoon of batter for my pans, and it was too much. Here is the recipe below – refer to the link above, too, to get some good info that is not included here, and below is the recipe from a devilishly good and delicious website:
Madeleine Cookie Recipe
Ingredients
7 tbsp unsalted butter (100g)
2 large eggs at room temperature
1/2 cup granulated sugar (100g)
1 teaspoon lemon zest
1 teaspoon pure vanilla extract
3/4 cup all-purpose flour plus 1 tbsp (100g sifted)
1/4 teaspoon baking powder
1 pinch salt
Instructions
Melt the butter either in your microwave or in a small pot over medium heat. Browning the butter will add a lovely depth or flavor to the cakes but is of course optional. Once melted or browned pour the butter into a bowl and allow to cool.
Sift the flour, salt, and baking powder into a bowl then whisk together and set aside.
Add the eggs and sugar to the bowl or your stand mixer fitted with a whisk attachment or a large bowl if using an electric hand mixer. Beat on high until the mixture is a light yellow color with a thick silky texture, about 8-9 minutes. You’ll see the beater leave trails when it’s ready. Mix in the vanilla and lemon zest toward the end.
Fold the dry ingredients into the egg mixture and mix until just combined. You can sift the flour mixture into the eggs while you fold to avoid getting lumps or over-mixing the delicate batter.
Drizzle the butter into the batter and gently mix until just combined.
Cover and chill the batter as well as the buttered tins for 1 hour then scoop one tablespoon of batter into each scallop-shaped well. Bake at 350F 8-10 minutes.
Serve with a light dusting of powdered sugar.
Notes from the Baker
Making these cookies needs a light touch. If you can, weigh your ingredients within a gram or two. Make sure you whisk your dry ingredients together and then sieve or sift the dry ingredients into the egg-sugar mixture. Fold it in with a light touch.
After you drizzle the butter over this, again, use a light touch. Turn your bowl as you fold. The butter will eventually work into the batter, but do it carefully.
Be sure to refrigerate the pan and the batter – I had mine in about 90 minutes. This stiffens the batter a bit and preserves the air beaten into the egg-sugar mix.
The recipe says to bake 8 minutes – which I did – but when I saw how big they were, I did another five, touched the center for a springy firmness, removed the pan from the oven. After letting the pan sit for a minute, contemplating what to do, I just turned the entire pan over and watched the cookies peel away from the pan, helping some as needed.
Make some batter. Make some test cookies. Enjoy no matter how homely they may look.
I was feeling rather depressed by my rather poor watercolors of the other day – so, time for a break. What to do? Well, how about a bit of serious cleaning up of stuff that this gal has accumulated? What I am talking about is my bill and finance drawer. Need I tell you what was in it – nay! But let us say I shredded up about 4-5 fifteen gallon trash bags worth. Now there is a lot of room in the drawer, it is organized, and I have made the resolution to shred unnecessary items about every other month.
Okay, stop laughing. There is a definite pack-rat gene in the family, specifically on the paternal side (sorry, Dad!). De-pack-ratting requires a break, and a break from watercolors means using something else. Enter revisiting pastels. I did an apple.
I was doing pastels a few years ago and really enjoyed the medium. It is a combination of painting and drawing, both of which I like. Apples are rather generic and very recognizable, and cheerful, too, if you like bright red. I do like bright red, and so here we are.
I think I am going to be doing pastels for awhile. I need a bit of a break and a change from watercolor, even though I am really trying to work hard at it. The only drawback to pastels is the dust, but I wear an N95 mask and clean up the dust with a damp cloth afterwards. Here, Nupastels and Rembrandt soft pastels, and a touch here or there with a pastel pencil. I have some fixative arriving tomorrow which supposedly will not darken the pastel painting much. The paper is Mi-Teintes, reverse surface, painted upright.
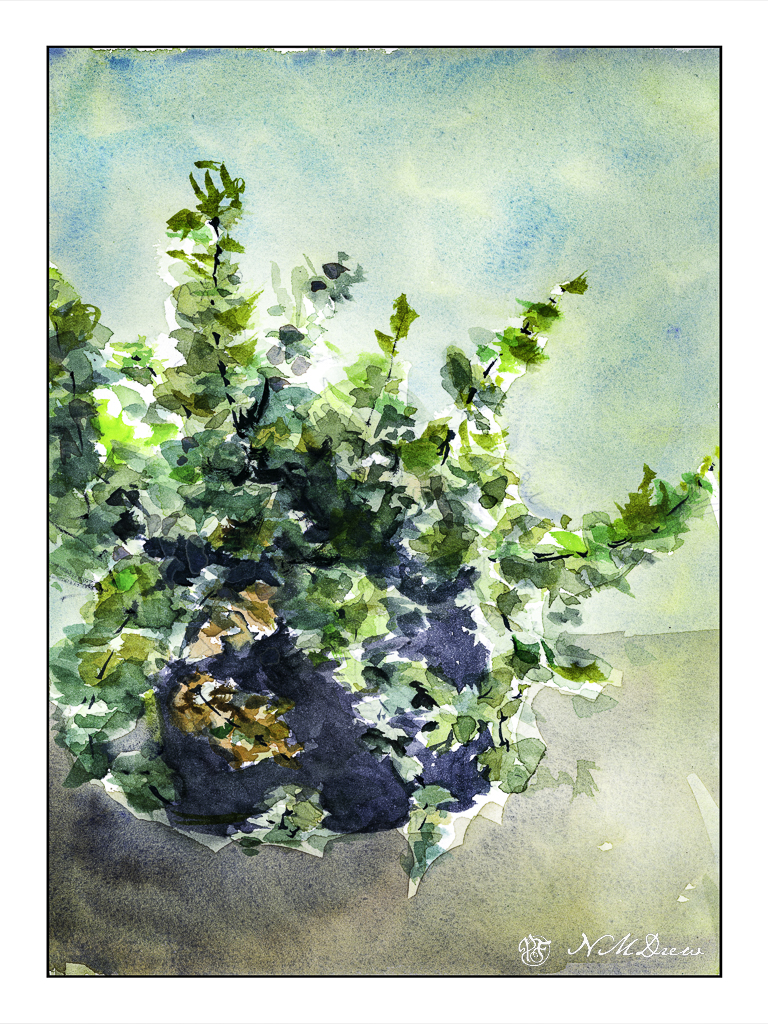
Well, that is true for me in the world of trying to make my watercolor paintings more simple in painting style though not necessarily in content. Of late, rocks and plants.
Let’s start with my painting of Greek oregano, growing like a weed in a pot on the patio. The leaves are simple enough, shaped somewhat like an egg (but flatter 🙂 ) on long, straggly stems. The color is sort of that dull, sagey-olive green that plants in the Mediterranean climate often have. In sunlight, a bit of warm yellow shows up. In shade, the greens are darker. Pretty logical, right?
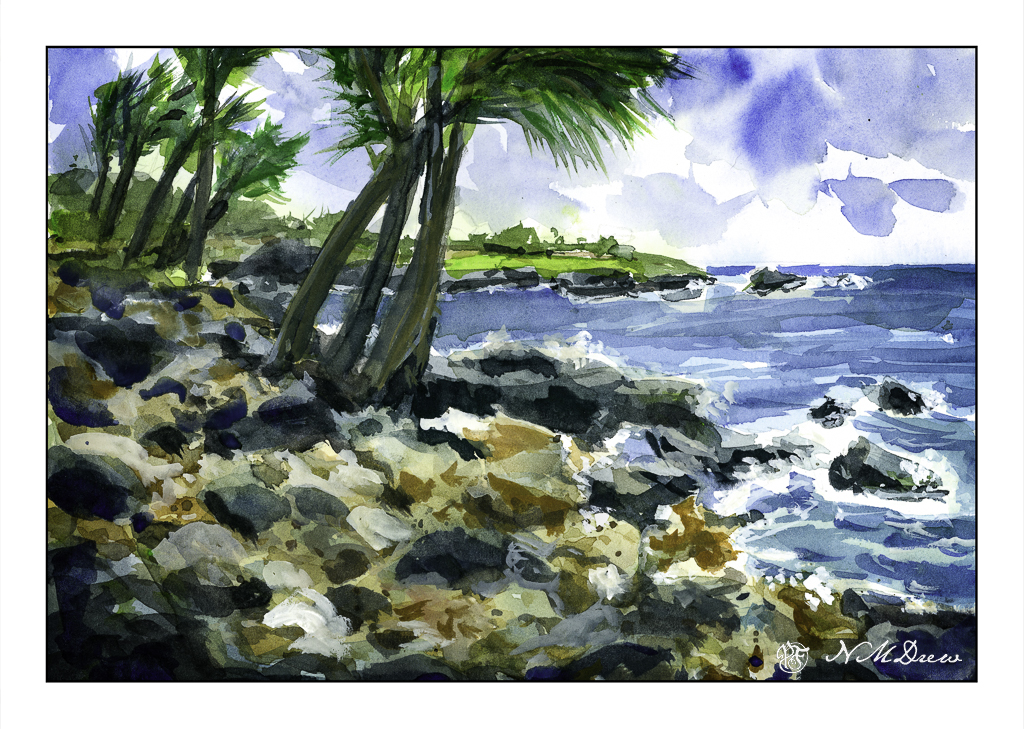
And then there are the rocks I have been thinking about since I did the much more successful cliffs of the other day. The rocks in the fort in the VI was okay as a rock building study, but not so hot as a painting. The beach scene below is of a rocky beach of lava stones – many black ones in particular, but with softer sandy rose colored stones in between. And a few palm trees. And an ocean. And a spit of land sticking out. The rocks were the primary focus as that is the rocky subject I am approaching. Simplification of shape and shadow – some successful, some not.
I sat outside yesterday, using reference photos of lava rock beaches around the world, and then using the oregano plant a few feet away on the concrete. Good to be outside. Good to work on two opposing pages of the sketchbook, waiting for one to dry and working on the other. Back and forth. I was amazed I was out there for at least two hours, with more indoors. I am spending more time on painting a picture than I have before . . .
Success? It comes in steps. A lot of crap with a few successes.