Shades of Grey?

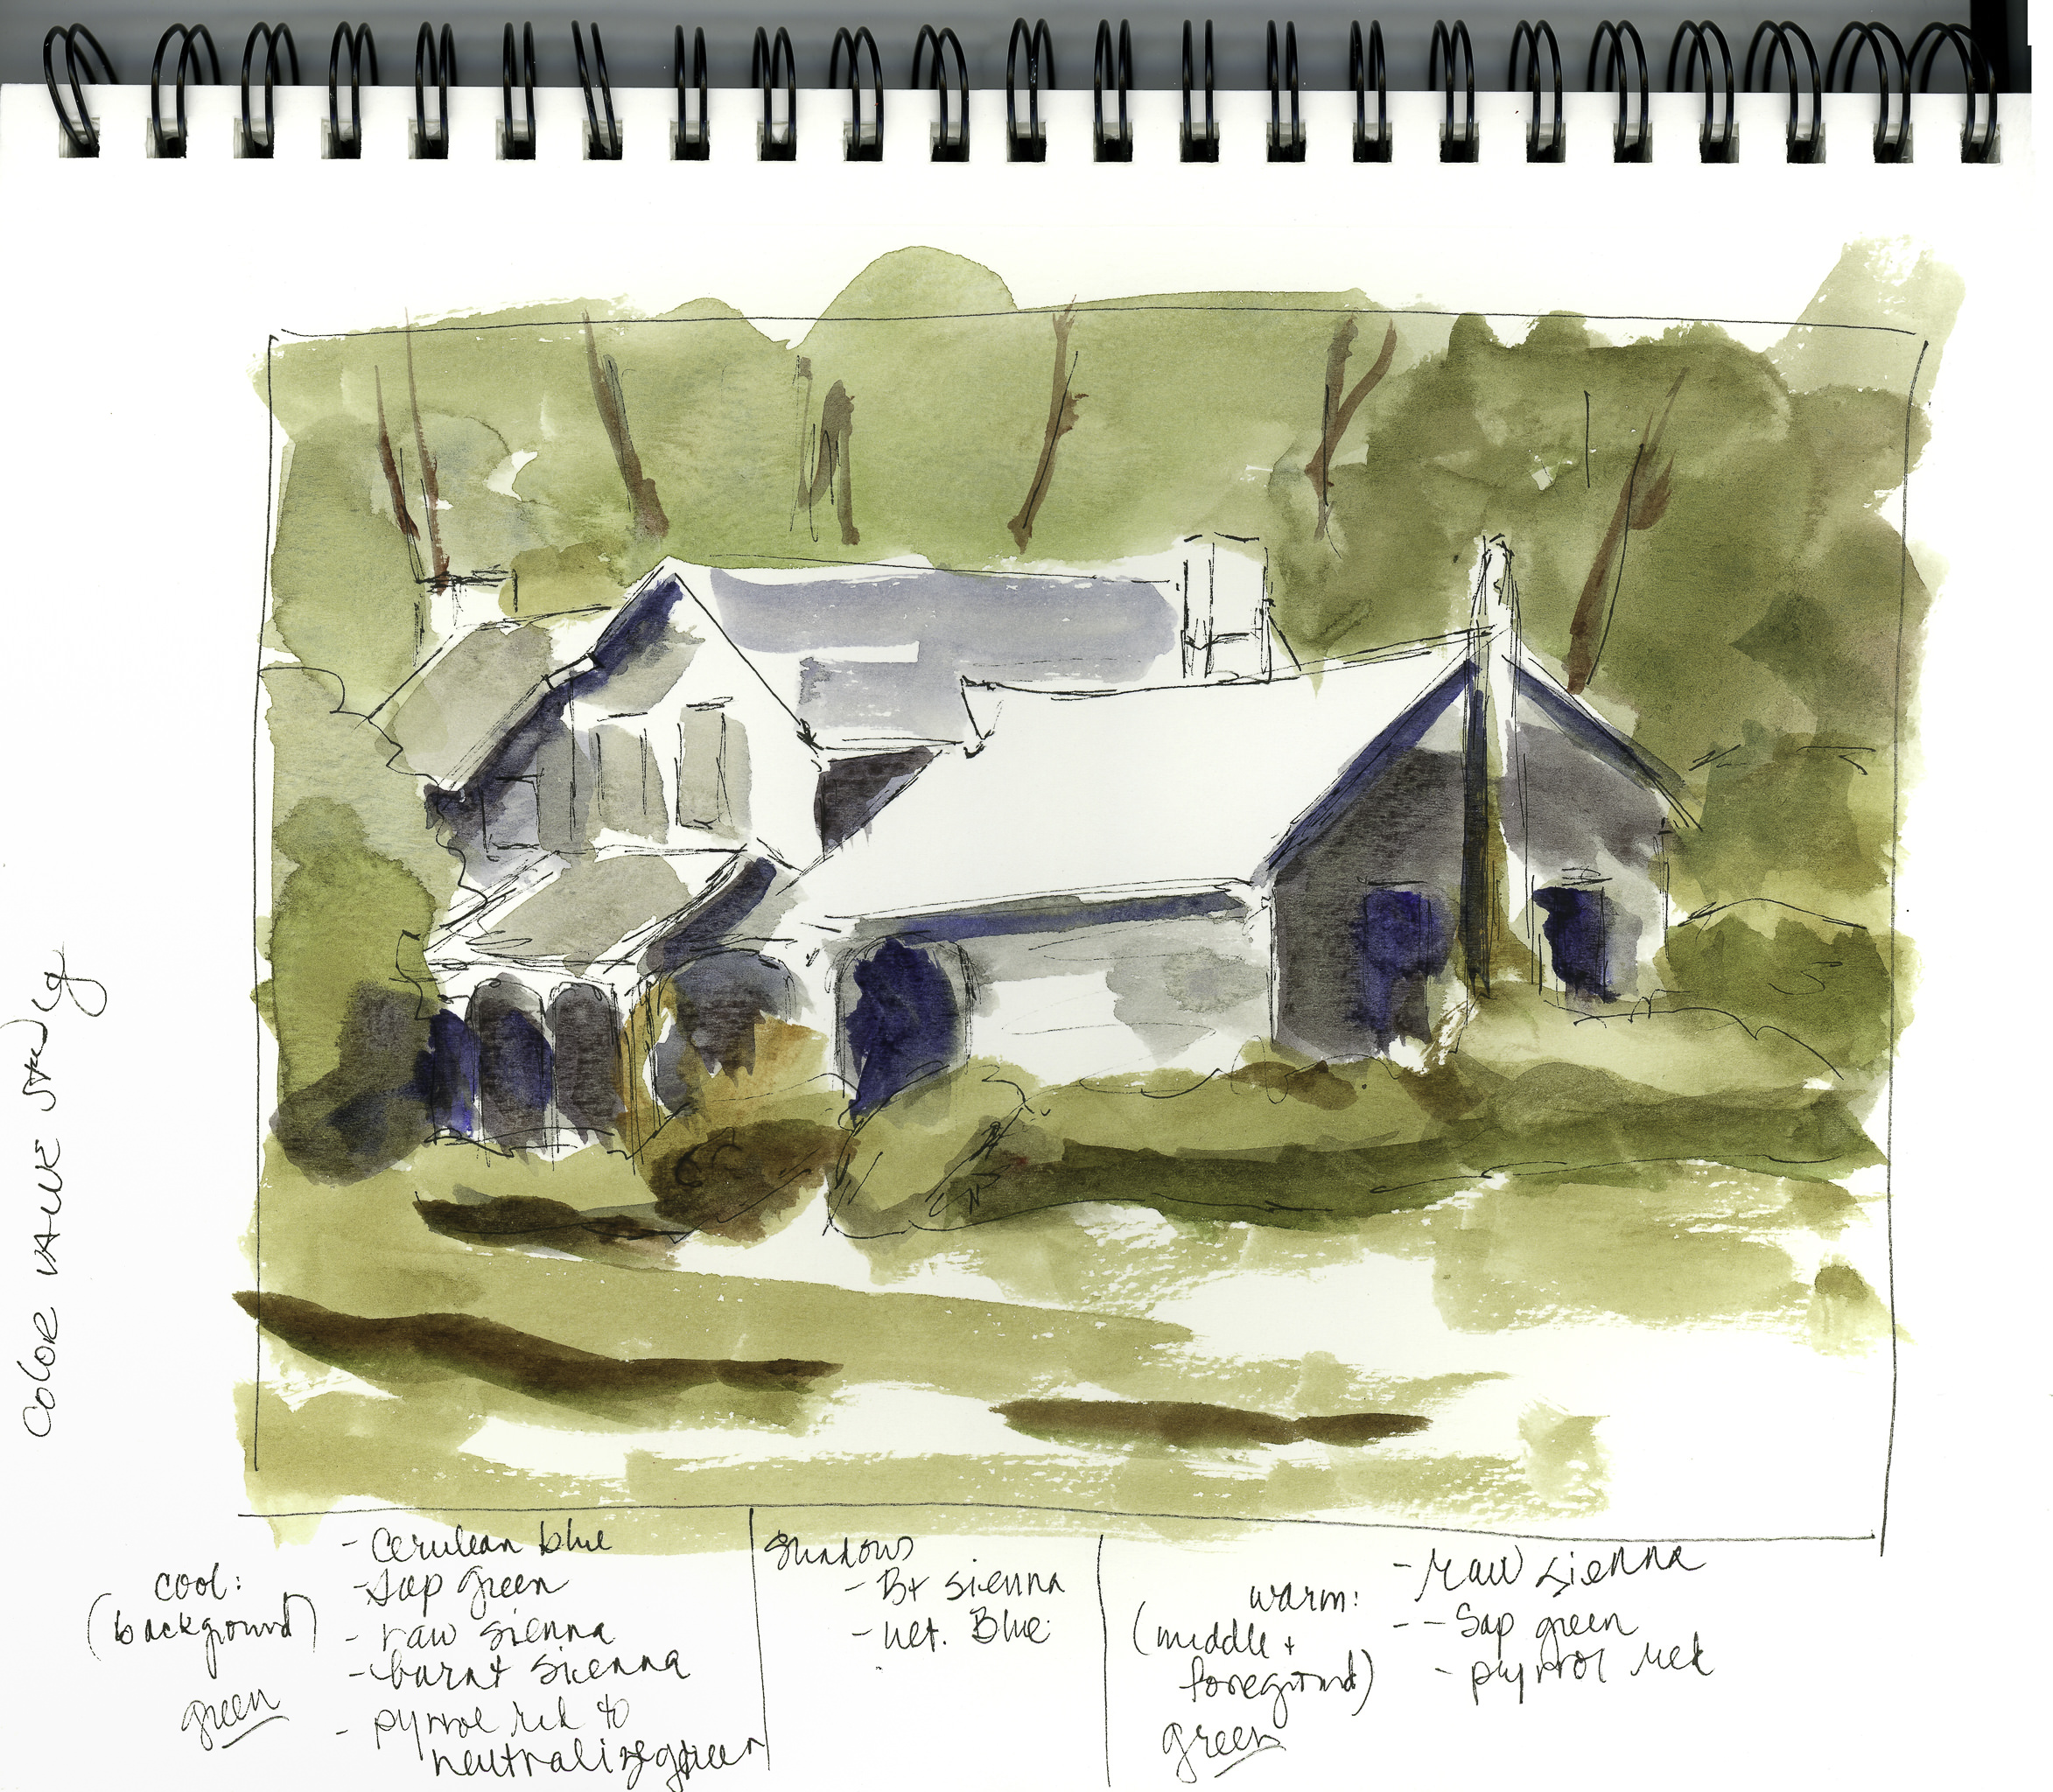
Recently it has brought to my attention that my watercolors have very intense colors with strong contrast – too strong colors and clashing contrast. It is an interesting thought. Often I feel my colors are a bit over the top, but after working hard to get rid of mud and blandness, I worked to have more pure colors. Now that I can do this, perhaps it is time to scale back a bit. This means, the way I see it, is to create more middle tone values in general throughout a painting, and then have areas of light and dark.

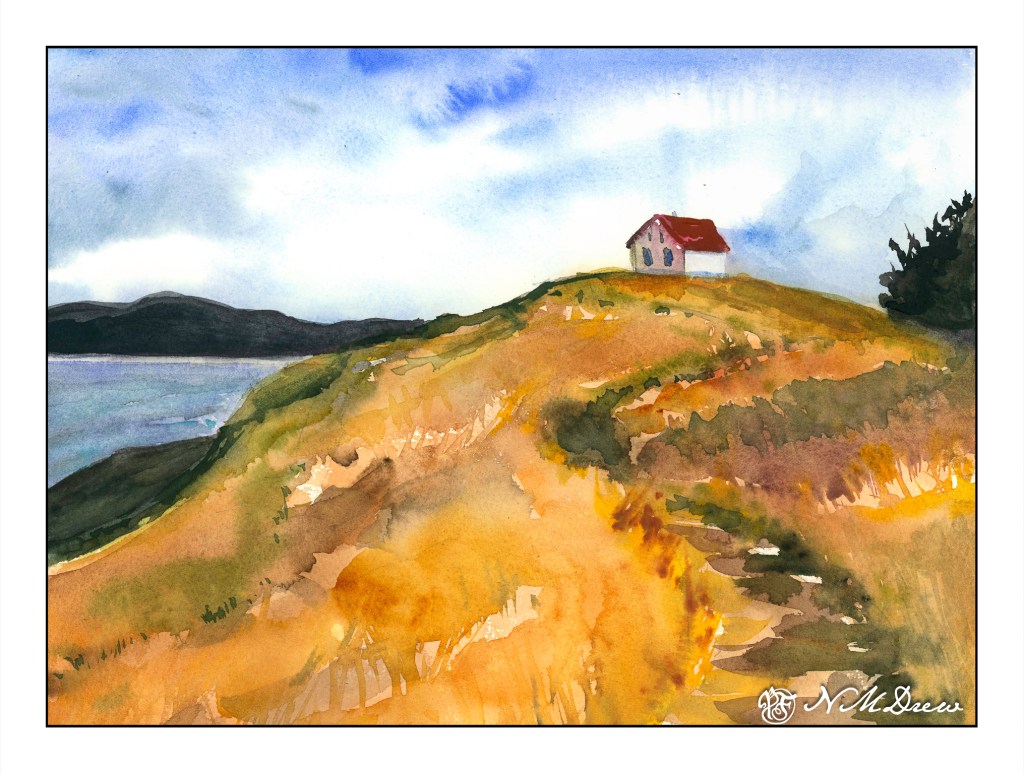
So, let’s begin. On Pixabay I downloaded an image which was not too complicated but, in color, provided a pleasant array of colors and a few areas of bright and dark while the overall tone was middle values

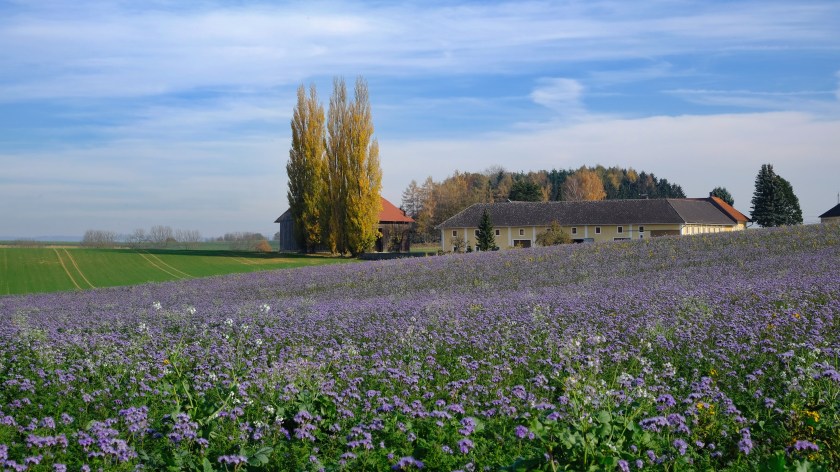
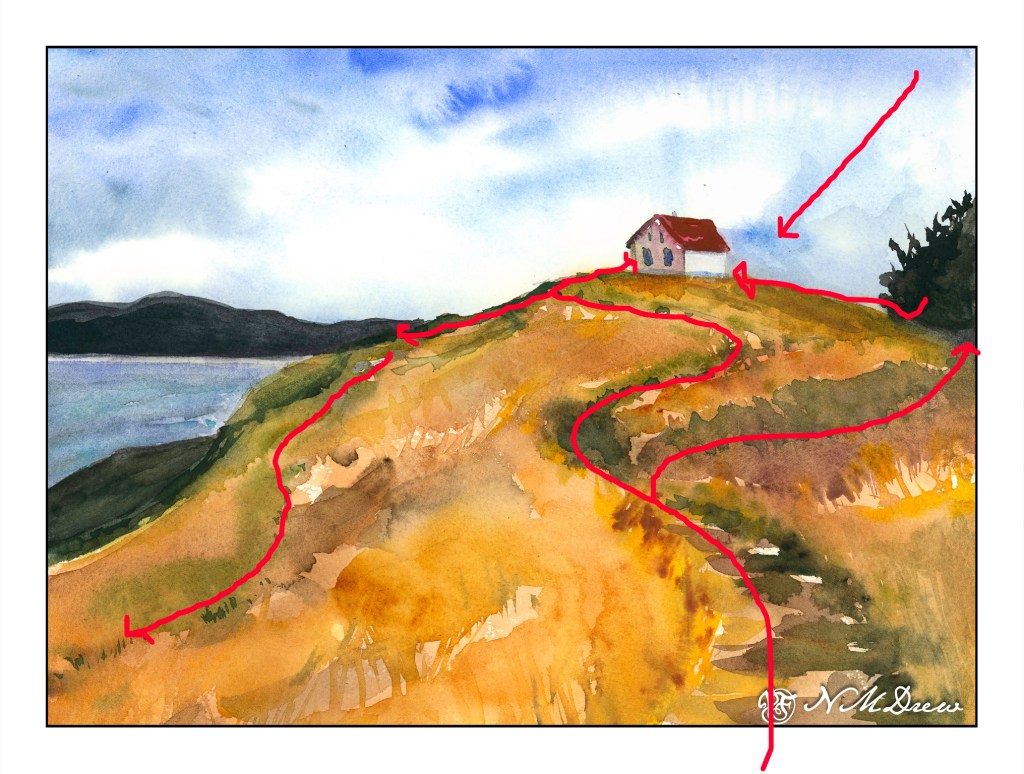
As you can see, the shadow in the left middle ground is strong, as is the tree on the right, as well as bits of the buildings and trees. I converted this to grey scale to see how well it held up to my perceptions in color to actual black and white.

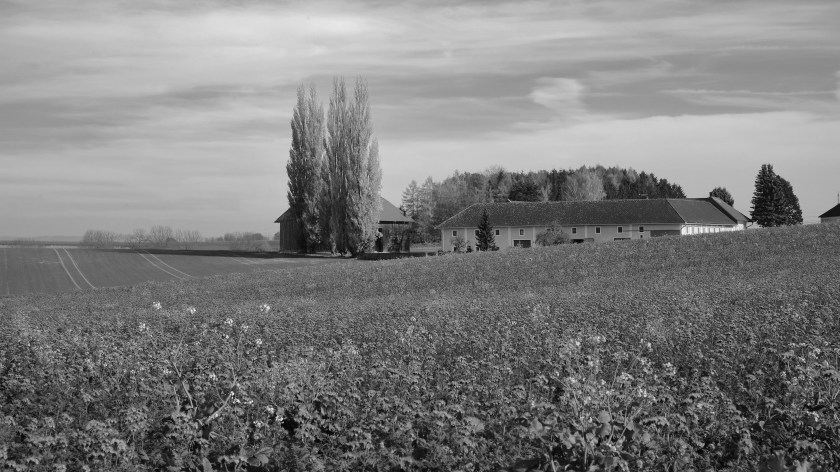
My suspicions were confirmed! My eyes did not deceive me! And, if you are interested, I simply desaturated the photograph by reducing the vibrancy and saturation in Lightroom Classic.

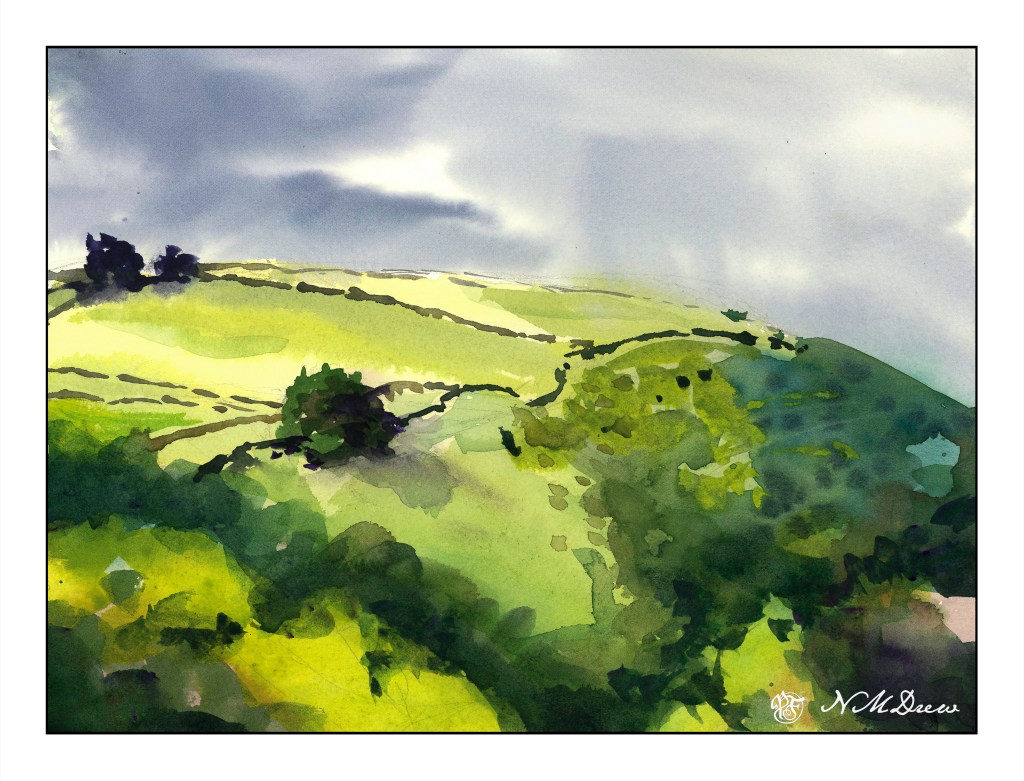
From here, on to my watercolor. I chose a limited but coherent palette of about 6-7 colors – yellow, green, red, blue, browns. Which ones I chose, I don’t recall, but I worked to create secondary and tertiary colors while I painted. My painting is meant to replicate values in the painting as well as make it recognizable without painstaking details. Below is my color rendition.

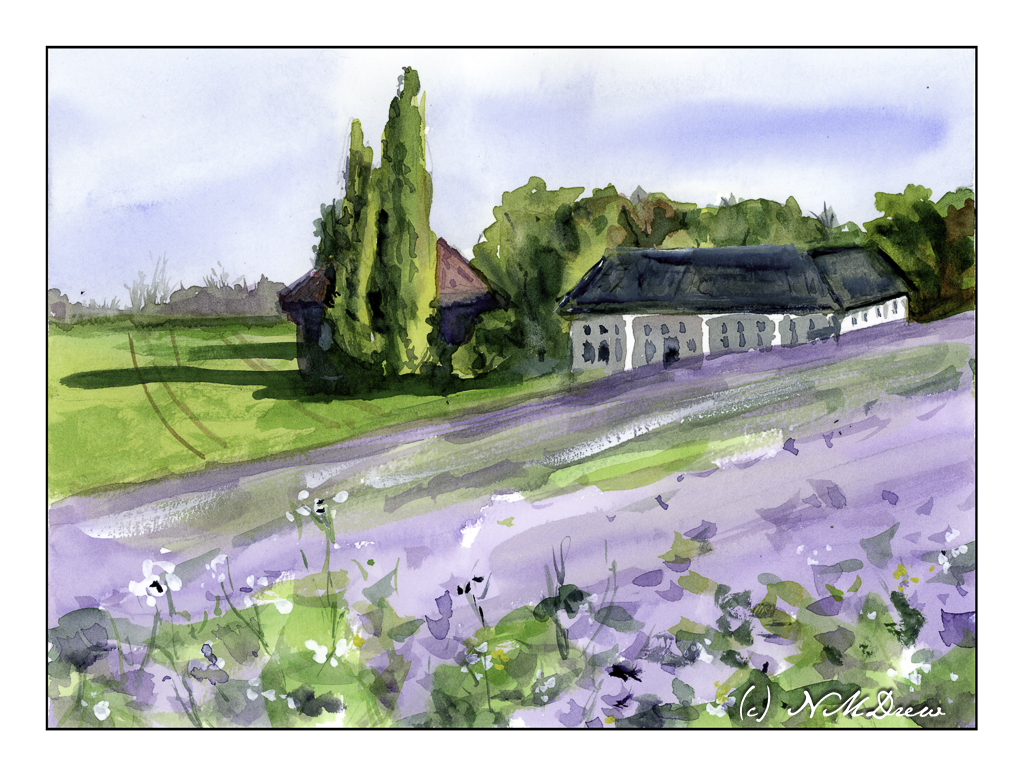
My painting looks a bit more dynamic than the photograph, I think, but it is interesting to see how it looks in black and white – again done in LR by reducing vibrancy and saturation.

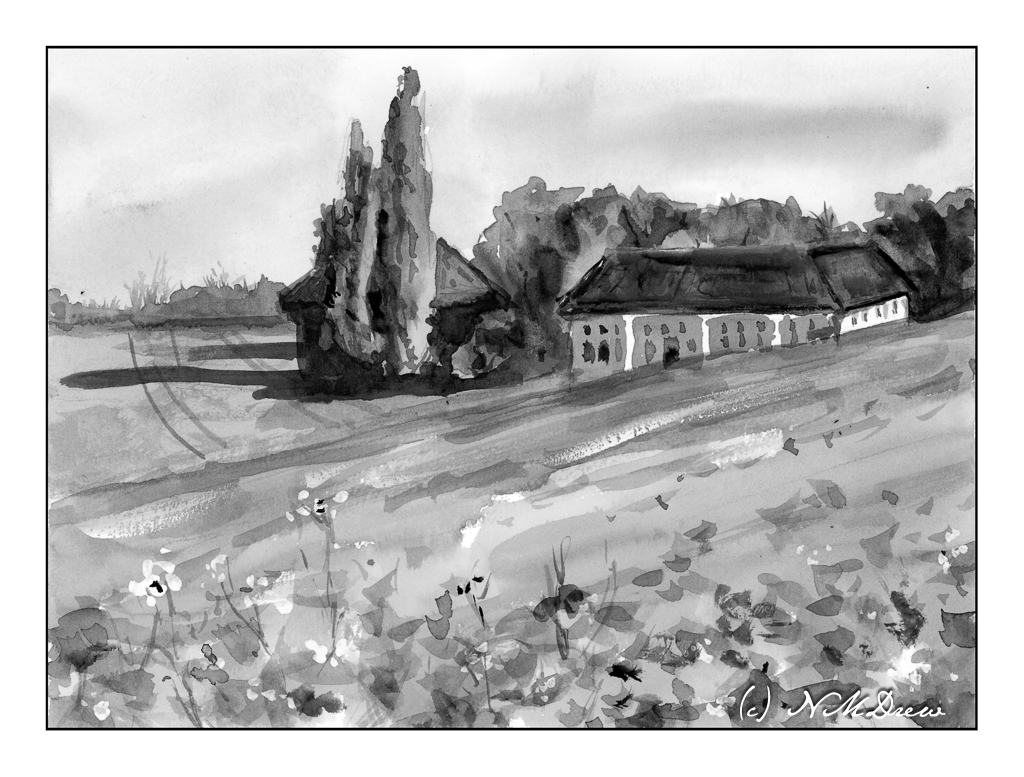
Overall, most of this painting is in middle values of grey with some areas of bright and dark. So, I did achieve what I set out to do. I plan to work on this a bit to see if I like my paintings better – and, I expect I probably will. Working with color is challenging as colors distract so easily from value!!

Thoughts?

Watercolors, Hahnemuhle CP paper, 9×12.

Greens Against the Sky – 2

I was not especially pleased with yesterday’s painting. After leaving it alone, looking at it again, it seemed to have all the same values for the most part. Today I decided to look at shapes and values a bit more in depth.

One thing I did was to change the elements of the picture a bit. I cropped off a lot of the left side and then made a composition out of that. Left side, middle value sky against light land and dark trees. Right side, darker land against lighter sky. In the middle, land and sky of similar value, mainly middle.

Obviously, the right becomes darker, and what I attempted to do was to create a shape of dark values with connections throughout the painting, connecting with right side to bottom and then to the left. Darks were connected throughout with the stone walls and into the trees. The dark trees in the upper left shift into a darker middle value with the sky.

I also tried to work with shapes – dark shapes with the middle ground tree being the focal point. The lighter shape is the land and the slope down the hill from the same tree. I have been reading a bit about how to work values to create focus – such as light and middle values as focal points surrounded by dark. The same can be light and dark to focus, and then surround that by middle values. Maybe that is what I was doing with the tree and shadow on the hilltop.

Anyway, my head is spinning. I know what I was trying to accomplish – shapes, values, warm and cool colors. Words are not easy to find to describe, so I will leave you for now with my mental and painterly chaos!

Up the Hill: A Plane of Color

One of the things that is often a point of contention for many who work in watercolor is when to stop – when not to paint any more – when is overworking the painting happening. Today’s study is of a lone building on Saturna Island in British Columbia. It sits on a hill, silhouetted against the sky.

The building itself is not well done – it is overworked. That, though, was not the point of the painting. The point of the painting is the hill up to the house – paint it, work the colors, create depth and dimension and a sense of the vegetation. I worked wet-in-wet; put a few glazes on; re-wet the paper and painted again when I needed to add some detail, such as the shape of grasses or vegetation. I also wanted to create a way to get the eye up the hill to the house, and the pathway itself does the trick.

Composition is also something I was considering. How am I leading the eye to that little building? Above is a an overlay with some of my eye-deas. I can think of more, too, but I could also go nuts analyzing things. The darks acted as a balance on either side of the hill, but the tree on the right is too big as far as I am concerned. It just kept growing – spring??

Finally, values. Lights, darks, mediums. Is my contrast working? If I look, I see the zig-zag of the darker path leading up the hill, but more subtle is the light zig-zag to its left. The darker values on the right of the hill repeat the zig-zag. Various areas of light and dark point your eye toward the building.

I am pleased with the hill in this painting, and that is what I wanted to focus on. It is an oddly shaped mass of color, but within it are variations of all sorts – warm and cool, dark and light – that give it shape and depth.

My current focus on watercolor is planes and dimension. I am trying to break down my ability to create structure, and for me the natural shapes of hills and trees are far easier to work on for now, although buildings will come in the future. Negative painting was a first study, but that surrounds as well as creates other planes and dimensions.

Let’s see what is next!

Tanglewood Underpinnings (I)

Back to “Tanglewood” – done already in gouache and watercolor and pastels. Now it is time to do it in acrylic! (If you want to see these, and the photo, click on the tag “Tanglewood”.)

Here I decided to work on setting up values – light and dark, warm and cool. I thought it might be fun to set up areas in complementary colors, but who knows. The whole thing could end up very odd looking, certainly for me and my boring outlook and driveness to reality. I am seeing this as an adventure. The photograph itself is rather dark and murky.

Colors used on Fredrix canvas pad are cobalt blue, Naples yellow, quinacridone magenta, and zinc white. These are applied atop 2 layers of gesso and then a substrate of yellow ochre mixed with Marigold (Holbein’s cadmium orange).

A Class with Rick Surowicz: “Abandoned” (Day 2)

Today I moved forward a few steps, in part because I’ve been busy with other things.  However, I am determined to work every day on this class, to keep myself from forgetting things.  There is a lot to learn, even though it may not appear to be such.

Moving from the value studies, the next step is color value studies, for light, medium and dark, but also for warm and cool greens and neutral colors.  To me, this is often an issue.  I don’t perceive colors as “warm” and  “cool” visually – I see them intellectually, meaning I know some formulas for mixes.  This section of the course, then, is very important for me – it’s a road map for future work.

Cool green are achieved by using sap green with a tinge of pyrrol red, raw sienna, burnt sienna, and (to my surprise) cerulean.  In the video, Rick mixes these colors and uses them for the trees in the background, behine and beside the house.  Warm greens are created with raw sienna and sap green, with a tinge of pyrrol red to neutralize the sap green.  These greens are used in the foreground grasses and bushes in front of the house.  I can see the differences in my color study, but they are subtle.  However, painting is a skill and learning such things, and memorizing them, adds to the basic skillset of painting.

Finally, using burnt umber and ultramarine blue (supposedly a warm blue!), dark values were created.  These two colors often are used in painting to replace what we may consider to be black visually.  Now we have a color study with values of light, medium, and dark.  These should help with the final painting when considering what to do!

Besides explaining the usage of color, Rick states he does not mix his colors on the paper, but on the palette, getting the consistency he wants before applying it to the paper.  Other painters take a color directly to the paper, and then mix as they go along.  Both techniques have their points.  I find my colors are more pure when I take them directly to the paper, but easier to turn to mud if not carefully done.  The palette method of mixing colors allows for testing swatches of colors on scrap paper.

Looking at the above study, I think I want the trees behind the house to be a bit darker (more contrast?) along with the windows on the far left, second floor, of the house.

More tomorrow!