Well . . . I prefer the land, the tree, the ocean, the field. I prefer not people or buildings.
But, I must put aside my prejudices to progress in painting. Andy Evansen’s watercolor course has challenged me to such. I did people, reviewing proportions and where the elbow ends and the knee. People are 7.5 to 8 heads tall, depending.
Buildings and people – crowds – hmm. I usually avoid them, being the reclusive and exclusive and somewhat misanthropic. Nonetheless, they exist. So do buildings. And value studies! This is like trying to fit my tiny foot into a tinier shoe – painful, painful.
I tried this painting in watercolor by starting out on used paper – the reverse of other studies or failed paintings. Cheapness does not do me any good. I was not getting anywhere except PO’d.
I do not like being PO’d.
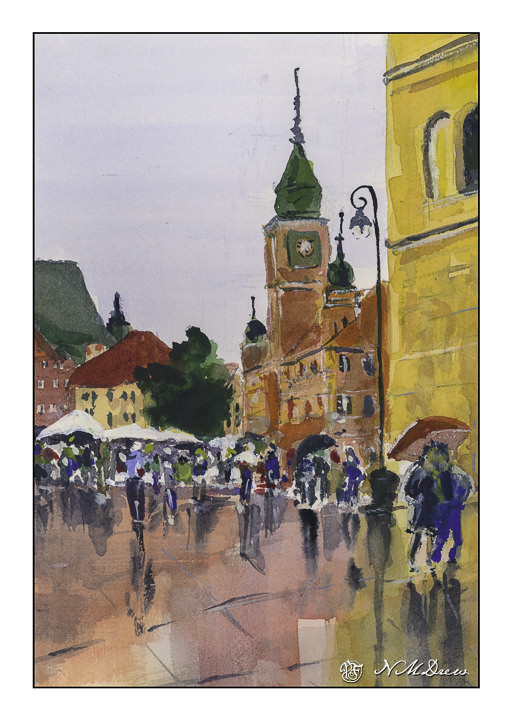
A new sheet and voila! Life, while not sweet, definitely improved. And I did a crowd of people, and buildings in a plaza, and only one solitary, lonely tree suffocating in the midst of civilization.
This was probably the most challenging painting I have done so far in any class . . . but I lived! Any good? Who knows.
I never paint people in any form. Draw them, yes. Now it is time to add them to paintings so that I can pretend to have a social life!
Watercolor is the first area to which I am adding them. The reason is that watercolor in many ways is very forgiving. As well, there are a lot of photos with people in them in Andy Evansen’s class, so I figured I better stop being intimidated.
And you know what? After watching a lot of videos, and hearing that the general shape of people in a crowd is that of an elongated carrot (supposedly said by Frank Clarke), I had a laugh, and then it began to be fun, not a horror story I had to live.
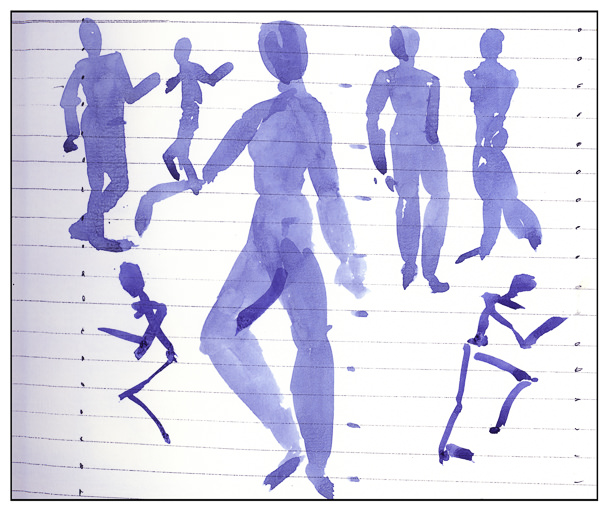
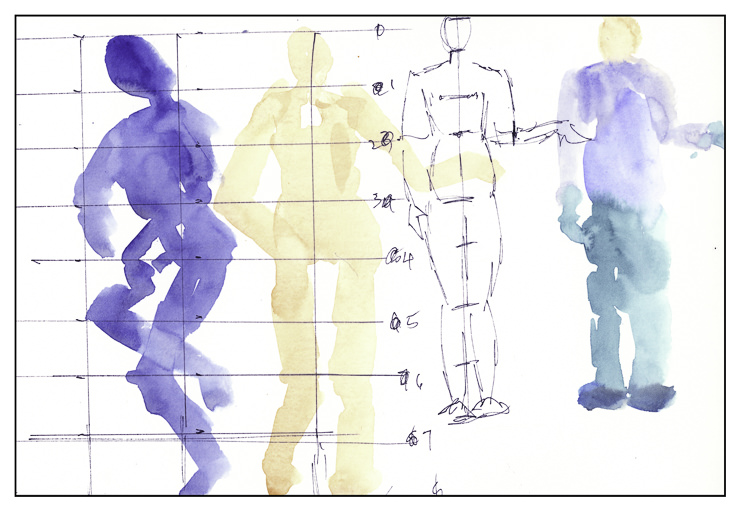
Before beginning though, I felt it was important to get an idea of where things belong. Yes, I do know the general proportions of the human body – 7.5 to 8 heads tall, depending on your source. But where do elbows go? What level is the wrist? And so on. A bit of research and then the fun began.
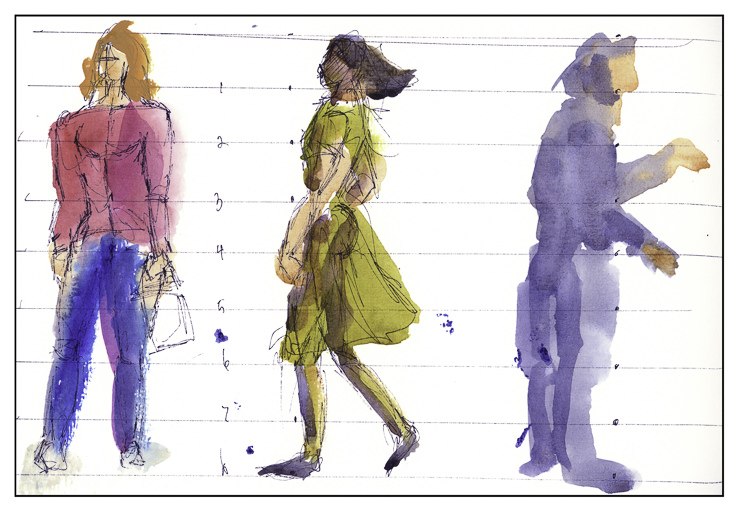
Different ways to portray people, too. Blobs of color with some suggestions added, such as darker color to separate figures. Negative painting to show off highlights, back lighting, or light-colored fabric.
And so, people are showing up in my watercolor life. It was a lot easier than I expected it to be. Proportional formulae help and just playing around, letting go, and practicing.
One thing I really get sick of is googling “honey cookie recipe” and finding recipes loaded with sugar and a tablespoon or two of honey added. The point is, I want only honey for a sweetener. I could easily walk around glued to an IV of pure sugar and be happy – and addicted. Honey does not have the same addictive quality as sugar as far as I am concerned.
Oatmeal Cookies made only with honey for sweetening!
So, I came across a recipe at last at Amy’s Healthy Baking blog. I am totally delighted. No, they are not super sweet, but they are soft and chewy. I think my cookies came out a bit less soft than hers, but part of it is my oven – it tends to run hot – or cold – depending on its mood and time of month. She says 325F – and mine was up to 347 and 364 at times. I’ll get it down. The other issue could be I didn’t weigh my ingredients, but just did a rough measure. As a result, it could be my dry ingredients were in greater quantity than she calls for. But who cares? The results are tasty! I added walnuts, too, and more raisins, but I am something of glutton in that regard.
INGREDIENTS
1 cup (100 g.) instant oats (I used a mixed oat hot cereal mix that I have been eating up)
¾ cup (90g) white flour (you can use whole wheat, gluten free, etc.)
1 ½ tsp baking powder
1 ½ tsp. cinnamon
1 tsp. nutmeg, mace, allspice, cloves, or any combo thereof
⅛ tsp salt
2 tbsp (28g) coconut oil or unsalted butter, melted and cooled slightly
1 large egg, room temperature
1 tsp vanilla extract
½ cup (120mL) honey (could use maple syrup or agave, too)
1/3 – 1/2 c. raisins, rehydrated
1/2 c. chopped walnuts
INSTRUCTIONS
Whisk together the oats, flour, baking powder, cinnamon, and salt in a medium bowl. In a separate bowl, whisk together the butter or coconut oil, egg, and vanilla. Stir in the honey or agave. Add in the flour mixture, stirring just until incorporated. Fold in the raisins. Chill the cookie dough for 30 minutes.
Preheat the oven to 325°F, and line a baking sheet with parchment paper or silicone mat
Drop the cookie dough into 15 rounded scoops onto the prepared sheet, and flatten slightly. Bake at 325°F for 7-9 minutes if your oven runs hot; 11-14 per Amy if your temperature is spot on. Cool on the pan for 10 minutes before transferring to a wire rack.
Yield: 14-15 cookies
Notes
I highly recommend you go to Amy’s page – link is above – to get specific info. I need to work a bit on this recipe, but it is a keeper in my opinion. It is a real cookie! So much could be done with it, too, as a basis for other cookies, too. The lack of sweetness may need a slight increase in salt to round out the flavor. Also, I didn’t chill the dough.
I did test cookies, too. The first two were baked for 10 minutes. They held together well and were nicely browned, but not as soft as I might like. The second round were baked for 7 minutes. As per Amy’s instructions, I let them sit on the pan for 10 minutes before removing to the wire rack. They seem a bit raw in the middle, and are crumblier than I would like in a cookie. Maybe 8 minutes would be better.
Using honey seems to mean needing a lower cooking / baking temperature, and perhaps a longer cooking time, too. Mine were dryer and my oven was variable, so the results were different – but still delicious.
We have milkweed planted throughout the yard as well as in containers. The other day – just about 3 days ago – I found a new chrysalis hanging from a flower pot. I watched it change from pale green to darker shades.
This morning, I went out to look at the chrysalis, but as I had hidden it behind some other plants, to keep it moist in the hot, dry wind, I didn’t really get a good view of it.
Then the gardener came – and blew everything everywhere. When he left, I looked, and the chrysalis was empty. I hoped the butterfly had not been blown out of its home before it could become a butterfly . . . actually, I was really upset! I was sure I had been stupid not to tell the garden to stay away from that area. I was convinced the butterfly-in-waiting was dead.
And then I bent down, and before I knew it, a monarch butterfly fluttered to the ground. It was her – definitely a her as there are no scent markings on her wings!
In time, I got her to climb onto a milkweed branch and carried her to a bigger plant. She sat there for a few hours. I took this video and some pictures. A bit after doing something in the house, I went back out. She was still on the bush – but then she flew off, over the fence and into the sky.