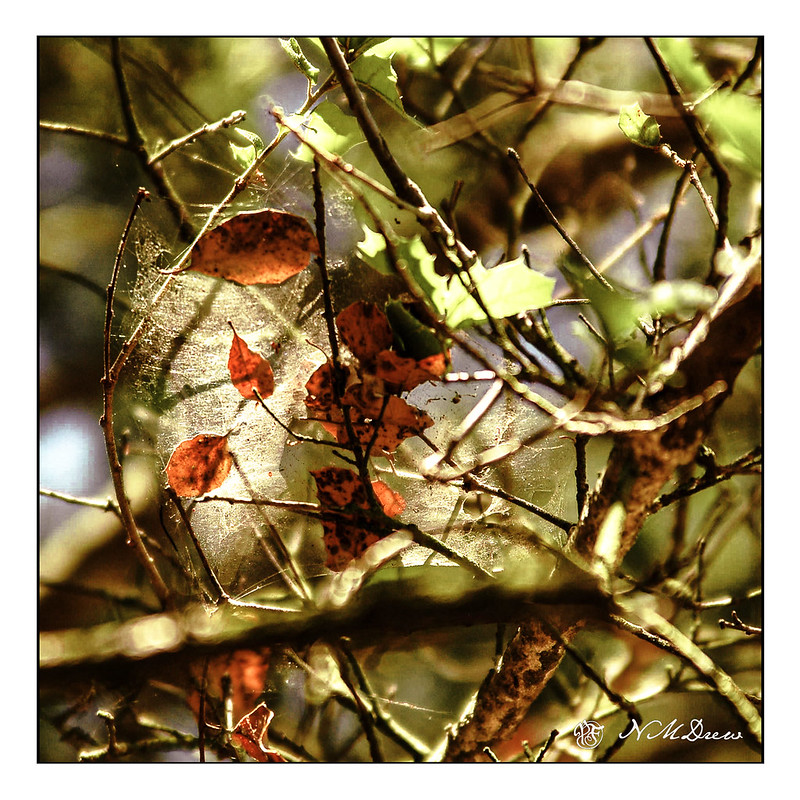
Another one from the archives . . .

Another one from the archives . . .
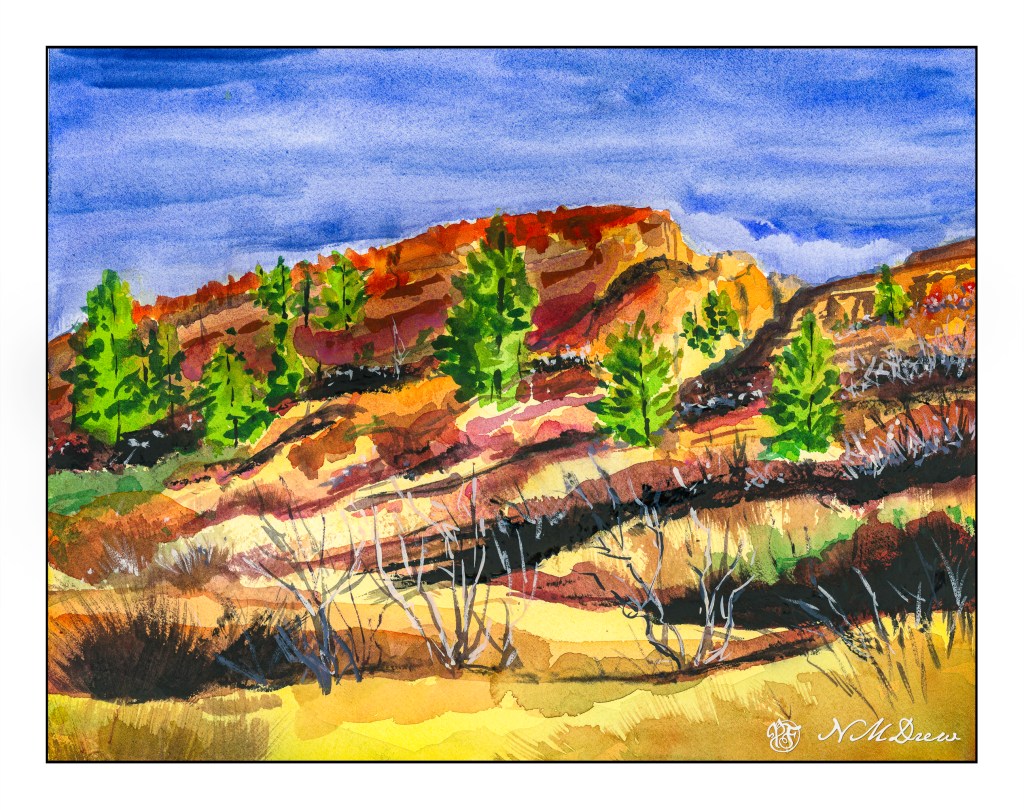
The summer months bring rain to the American Southwest. Skies become dark, light bright and fleeting; a sudden downpour, and then it vanishes. The clouds clear and once more the intense light returns. Everything becomes more vivid and alive during these brief showers and scudding clouds with lightning often adding to the drama. To me, this is the desert at its best – a harsh beauty in a harsh land.

Another abstraction of roses.

More going back through the photographic archives!
This morning I came across some images from 4/2011 when I was using a friend’s Nikon D70. I think this may be a Pope John Paul II white rose in my front garden. I took a number of images with an exposure long enough to let me blur the image, but short enough not to make a mess. There are about 10 that I did, some which are rather nice, I think. I like this one because of its softness, but also as I was looking at them, I was also thinking they could make for some rather interesting paintings.
I just recently realized that I can use Photoshop to help me create shades of grey in a photograph. This is particularly useful when trying to render a portrait into a painting. Portraits are very difficult to produce with any reliability as a painting because the face is subtle in construction, and thence, subtle in gradation. My skills are lacking in this arena.
To begin, I found a portrait on Pixabay. From there, I imported it in PS and applied an “artistic” filter, using the “cutout”, keeping defaults. I then printed out the photo, sized to 5×7, and gridded it out to a correspondingly sized piece of paper.

Once done, I chose gouache as the medium to use – already out on the desk, and easy enough to use without making myself crazy. First done was all the darkest values on my drawing.

I just lay down the black in most of the areas that looked darkest to me. I missed a few areas, but since gouache is able to be applied over previous layers, I was not too worried. Also, as this is the first time I have ever done this, I was not too concerned about perfection – the experience was more important.
From there, some white was mixed in with the black to produce the second darkest shade. Truthfully, I did not mix in enough white as it was nearly the same shade as the black when it dried. That is the nature of gouache – it dries darker than it goes on. I had to lay on a second and third layer.

Next, the third shade of grey. This I tried to push into being lighter than I thought I needed. From there, the highlights as light as I thought I needed. Again. the white was really a light grey that dried rather darker than expected.
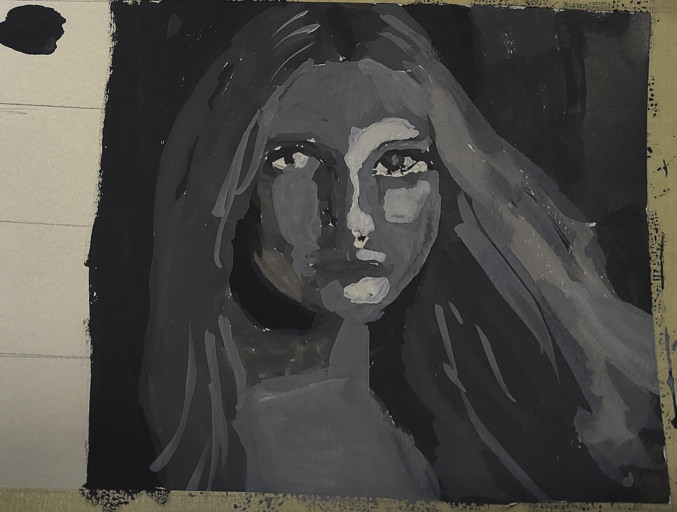
Finally, I increased the white, using titanium white instead of zinc white (the former being more opaque than the latter) and did some touching up and adding of detail.
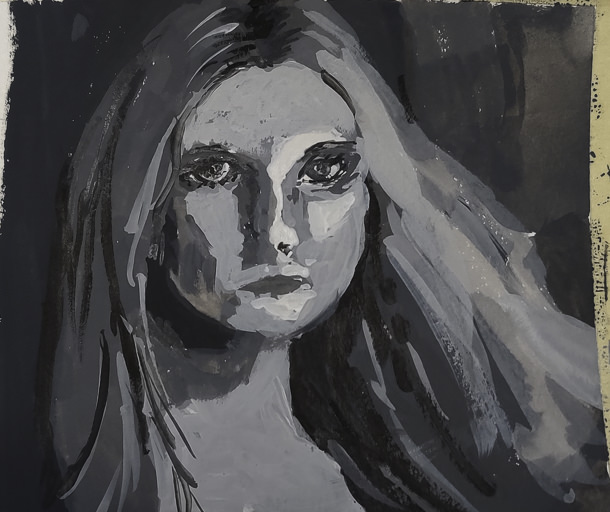
This is the final image. The paint is cracking a bit as it is really thick in some areas. Given this is 5×7 or less, the detail is not too bad, but I wouldn’t like to have this a portrait of myself! The goal of doing values is what is key here – light to dark, catching the face. Much room for improvement, but what I set out to do – a value study – worked out.
I plan to use this method with PS to do more portrait studies. Tools like this aren’t cheating – they help you see what is in front of you more clearly. Gridding the photo onto paper helps keep proportions relatively correct. I would like to do this on a bigger surface with acrylic, perhaps limning in only the white and black values, and from there adding the different shades of grey before moving into a final white.
