The Heinisch Project, i

R. Heinisch Shears, Size 3 1/2

I’ve begun sewing again, and in the midst of it all, started looking at scissors and shears. There is quite a bit of history! In the U.S., two names seem to come up most often when it comes to the older manufacturers, J. Wiss, and R. Heinisch.

Most Americans in my age group are familiar with Wiss. They were the most popular scissor, as they have been made for many years, and were owned by the same family until, I think, the mid-1970s. Historically, J. Wiss came to the U.S. in the 1800s, and began to work for R. Heinisch making scissors and medical instruments. Eventually Heinisch’s enterprise failed, and Wiss, having been laid off by Heinisch and starting his own business, bought out Heinisch around 1917. Wiss is a household name, but I had never heard of Heinisch until my curiosity was piqued by seeing some very old vintage shears that were beautifully refurbished and still in use by tailors.

So, off to eBay, and a high bid brought these into my life. Sadly, they won’t cut fabric at all, and will need to be restored to sharpness. Thus, a project, with some elbow grease and some research. First of all, these shears are about 12 inches long – about 30 cm. They have a wonderful balance to them, and are easy to manipulate despite their size. The bolt is in good shape, as, it appears, are the blades. The japanning on the handles is gone. The first step to renovating these shears is to clean them up with steel wool. I will clean up the blades and handles with 00 and 0000 steel wool, being very careful not to work at all on the cutting edges of the blades.

I took a lot of photos of the shears, as they are now, and will, over time, post more. If you have any knowledge of restoration of old shears, please get in touch with me!

Distractions & Toys

A couple of weeks ago allergies flared up, turned into a sinus infection, and now I am enjoying the enforced silence bronchitis brings about.  Talking makes me cough.  The funny thing is that I don’t really feel sick, and never really was down.  I am staying home for two days because I have to talk when I work, and coughing fits are hardly conducive to good instruction.  I am glad, though, that I hied myself to the doctor, and with modern chemistry am probably well on the road to recovery.  I also broke my toe last night, stubbing it on a bed post.

_DSC4734

That said, I have taken off on quite a sewing tangent, and have really been enjoying it.  The problem is that everything else gets tossed to the wayside, such as knitting projects and photography and painting.  I pulled out all my machines, and did various things with them, played with attachments and drive bands and such, but then settled down to do some sewing, some serious sewing with specific goals in mind.  It’s really fun because I am not sewing out of desperation or for an eighth grade home economics class.  Instead, I am being mindful of what I am doing, with the focus on accomplishing certain goals with each project.  This may mean paying attention to little details, such as clipping curves and staystitching, to overcoming longtime fears and frustrations.

Doing all this sewing has made me really value having good equipment.  Equipment does not have to be fancy, but fancy stuff does spoil one, such as the automatic needle down / up on the Janome machine.  A good iron and ironing board, room to work, and lighting are equally important, as are good quality pins and scissors.  Another plus is I am actually quite pleased with my work because it is good.  Not perfect, but I feel pretty skilled compared to the stuff I made in high school!  And the results are blouses I am not displeased with.

_DSC4799

In the midst of all this sewing, it turns out that my primary mechanical machine – meaning an electric, open-arm, larger-than-a-featherweight – was no longer functioning. This machine is a Viking 19e, dating from the mid 1960s, and is the one I learned to sew on. It went in to be checked out at my favorite sewing machine repair place, Art & Jenny’s in Ventura, California, and was found to not be worth fixing. I decided I wanted to replace it, as a back up and for the open arm. My final decision, after weeks of research, was a Bernina 930e, which I won on eBay, and which arrived last week in excellent shape. It came with a lot of accessories, but no dust cover; today, I made one out of a remnant of quilted fabric!  Of course, the Bernina was put to work to make it.

_DSC4797

This machine is really nice. It handles thick and thin quite easily. No complaints so far. Using it and my other machines, I have made four blouses in the past three weeks, with another one cut out and begun, this time to be done completely on the the Bernina, except for the buttonholes. The Janome can take care of them, or I’ll try one of my mechanical ones out . . .

The Flamingo Shirt

Flamingo Blouse

This project took me a fairly long time to complete, much longer than my normal shirt-sewing excursions.  The reason is simple – I took my time, and did things as I knew they should be done.  The result is better than my usual rush job, and my sense of satisfaction is certainly there.  I also finally have a new, 100% cotton blouse that is well made.

To complete this project, I did a number of things I have not done in the past.  The first is I sewed bias tape to all the seams except the shoulder seams; since I had forgotten to do those, I zigzagged them.  I worked on the sleeves slowly, and they turned out without too much stress.  The buttonholes, though, required a lot more work.

Collar with Bound Facing

Bound Seam

How many of us have ruined something through inexperience, fatigue, or impatience?  For me, buttonholes have always been a point of sheer frustration, and the cause of a garment in ruins.  Consequently, I often have made loop buttonholes instead of ones cut into the fabric.  To conquer this, I pulled out all stops – I have my old Singer buttonholer with the bight and width adjustment.  I also have a clamp-on for straight stitch machines with templates.  I have another clamp-on with templates for use with zigzag machines.  And finally, my high-end Janome MCP 6500 has a buttonhole attachment.  In the end, I decided on the latter, and practiced making buttonholes.  I think I made fifty or so.  But, the blouse does have buttonholes on it that I do like, but the reverse side always looks better to me . . . maybe I’ll just do them upside down next time.

Buttons for the Magpies

Retro with Flamingos

Like I said, I have gotten the sewing bug.  And a taste for a bit of nostalgia.

Yesterday, I went to a local Joann’s and came home with a couple of really fun prints to make up some shirts / blouses.  The fact is, today it is almost impossible to find any 100% cotton blouses or short-sleeved shirts for women.  Almost everything is either a knit, a slimy synthetic, or a cotton blended with 3-4% spandex.  The latter is really uncomfortable as far as I am concerned because that little bit of spandex takes away all the breathability of pure cotton.

Flamingo Material

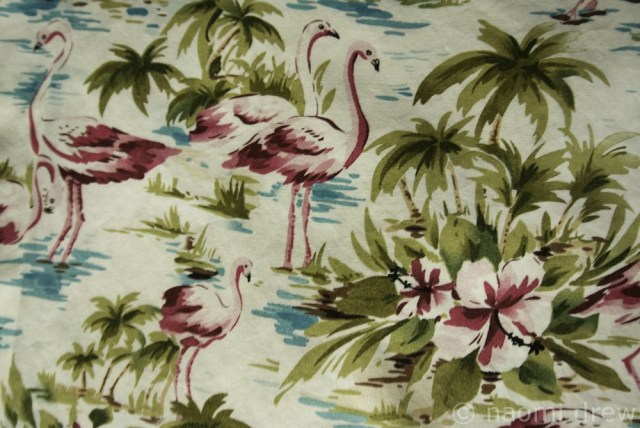
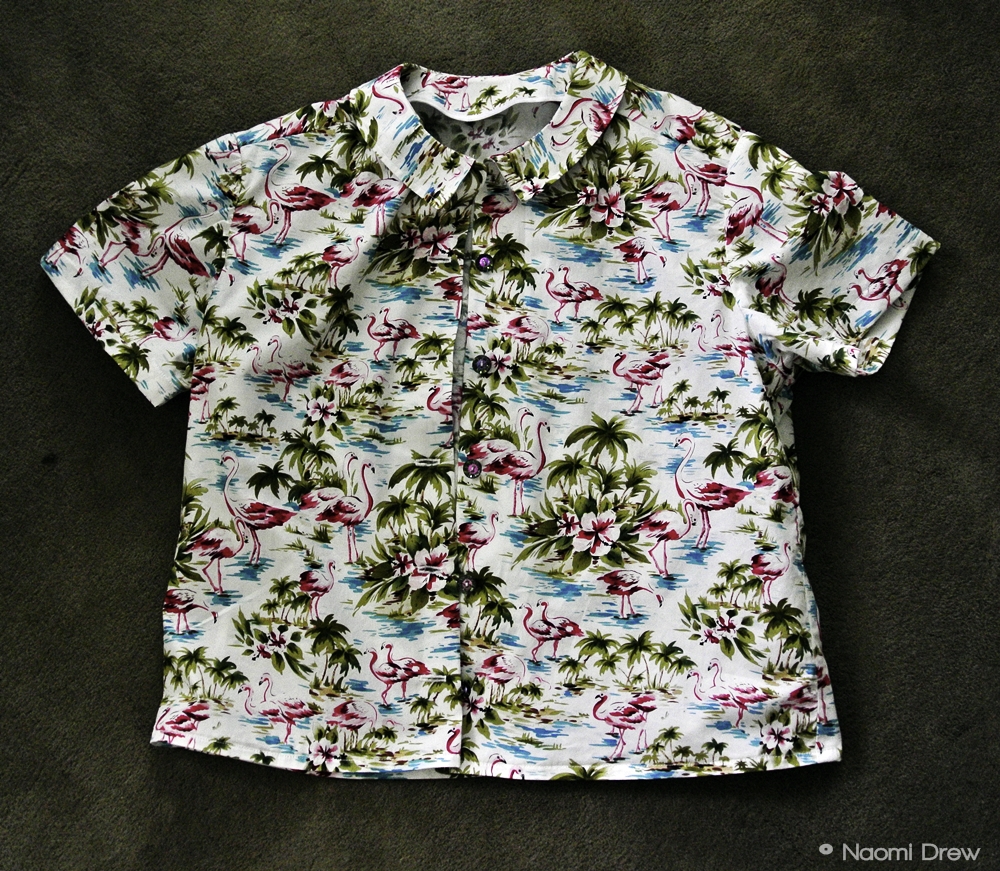
This flamingo pattern caught my eye.  I am a sucker for wild Hawaiian prints, and really, the worse they are, the more fun.  Here in California, prints like this are totally okay, but probably not for NYC in the dead of winter.  There was only 1 yard and 19 inches left on the bolt, but I took it, and got a 50% discount as it was the end of the line.  From my earlier days, I used to make shirts with only 1.5 yards, so I figured I could do it.  And I did, but I have put on a few pounds since my youth, and really needed a bit more for an easy layout, and while I did get it, but the neck facing was scrimped a bit.

Flamingo Shirt Pattern

I rummaged through my patterns, and luckily, I found this one.  Short sleeves, sorta Peter Pan collar, and five easy pieces.

Featherweight 222K and Flamingo Friend

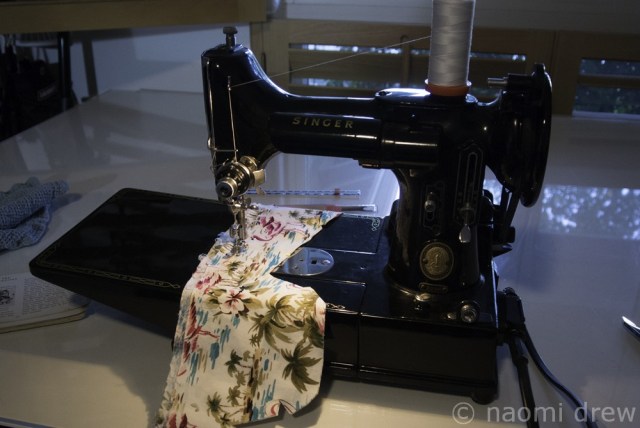
In keeping with nostalgia, I decided to dig out the Singer Featherweight, a 222K with the open arm, reverse stitch, and droppable feed dogs.  All straight stitch otherwise.  I also decided to sew this without the use of attachments, except for the buttonholer (which is later, and with trepidation), and use techniques required of a straight-stitch machine.

Bias Tape on Facing

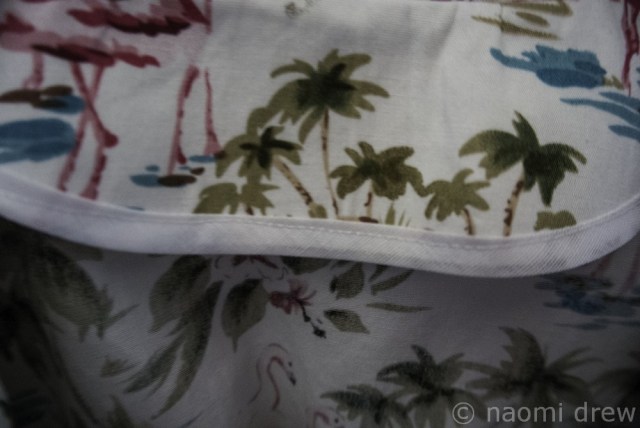
In some ways, I think this was actually a good choice.  I always zigzag every piece before I sew it because I hate raw edges, but I could not do that with this project on this machine.  In reality, I think it may be okay because the material is not constricted by the zigzagging.  I did all my staystitching and edge stitching, and I clipped and layered the collar seams.  In other words – I took my time!

Still a Great Book!

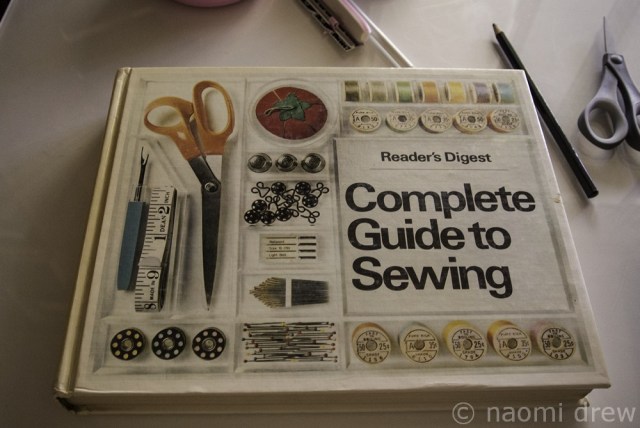
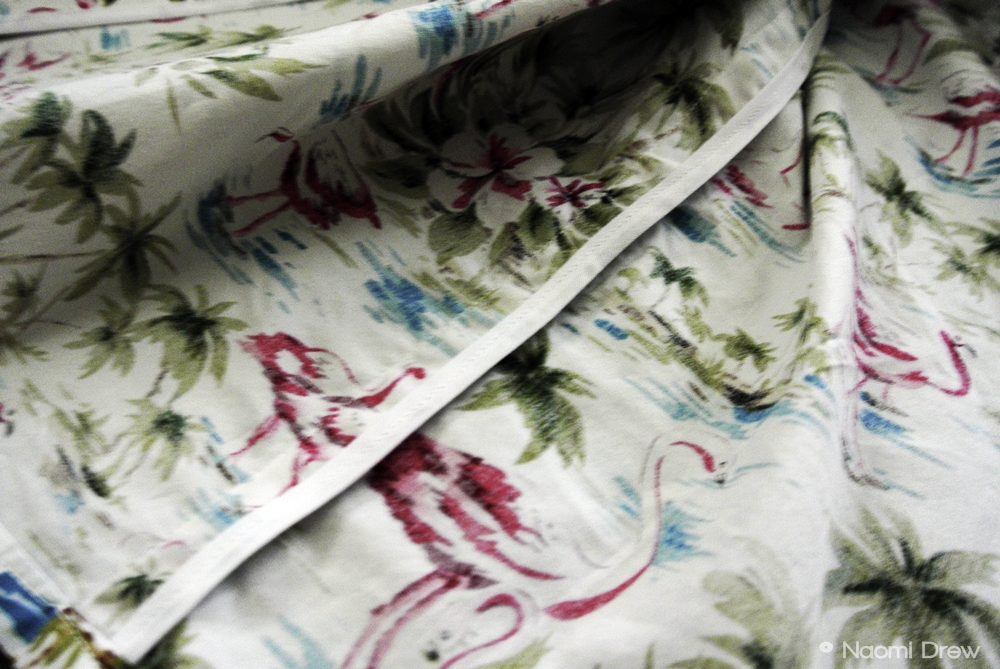
I also refreshed my sewing skills by pulling out The Reader’s Digest Complete Book of Sewing, a present from my father back in the 60s or so.  Compared to more recent books on sewing, this is a real encyclopedia of information and technique; when I was younger, it was too tedious for my helter-skelter approach to sewing, but today, I really appreciated it.  I read about facings and collars and edge stitching and stay stitching.  I also read about using bias tape to finish edges, which I had thought about prior to the project, but learned that into a curve you do one thing, and out of a curve, you do another.

Pointing Collar Corner

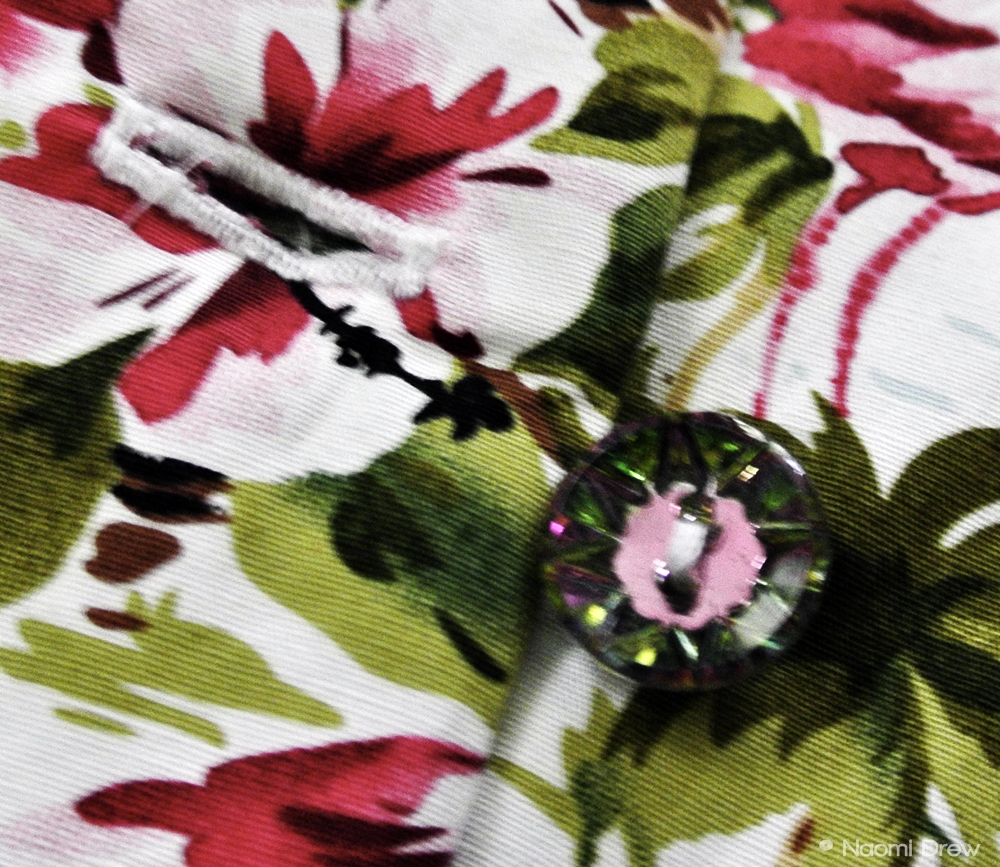
One thing I didn’t learn in my sewing classes in school was that there is a technique to put a nice point on collar – take some thread on a needle, double knot, and once you have pulled most of the collar out, run the needle into the corner on the inside, and push it through the corner on the outside, tug, and cut.  A very nice point is the result!  Like I said, the Reader’s Digest book is full of good information!

Sleeves

The blouse is far from finished, but I am fairly satisfied with my progress.  It was interesting to use a straight stitch machine that is belt driven.  A couple of times, the machine didn’t like the thickness of the blouse, but with some encouragement, we got through it.

What remains to be sewn are the sleeves, side seams, hem, and making the buttonholes.  I am not too sure how long that will take – it may not get looked at until next Friday, because some of my days are pretty long.  In the meantime, I will re-read about setting in sleeves and other good things.  Nothing like a sense of accomplishment – until I destroy it with badly done buttonholes.  Buttonholes are my nemesis, and I need to practice them all the time.

Cause & Effect

The quilt show is to blame for my current focus.  Looking at fabrics and looking at the wonderful handcrank machines got me to look at the machines I have strewn around the house.  There is a treadle machine in the family / kitchen area.  My mom’s old Viking (ca. 1965) – on which I learned to sew – is in the garage, along with a serger which terrifies me.  In the bedroom closet are a couple of handcrank machines, a Singer 222K, and a Janome 1000.

The treadle machine and the handcrank machines came to mind quite quickly – they really are fun to use, peaceful and soothing, and not needing to be plugged in.  The treadle was the first one to be pulled out.  Because of the help I got with the bobbin at the quilt show, it was really easy to set it up and get to sewing.

My treadle is called “The Free,” and it is in remarkably good shape.  I bought it on eBay several years ago; in fact, that is where I bought both my handcrank machines.

_DSC4605

_DSC4610_DSC4615_DSC4607

The treadle machine was rather dusty from a lack of use. I cleaned it up, dusted and oiled everything, popped in a bobbin, and threaded the machine. Off we went!

I have been using a stretchy spinning wheel band to drive it, but found that the band did not have enough width and / or torque to wind the bobbin, which is a long bobbin. I ordered a 3/16″ round band off eBay and installed it when it arrived.

_DSC4612

_DSC4614_DSC4613

Considering how old it is, this machine is still in beautiful shape. I’ve made clothes on it before, and now the urge to sew is hitting strong. The question is, which machine to use? Each has its advantages . . . but I’ll save that for another time.