Sashiko #6 – First Color

This heat is really getting to me – and it is not as hot as in Texas or Florida, and we certainly don’t get the humidity, either. But, I have been staying inside or going to places I know with air conditioning – heat has always not been my best of friends.

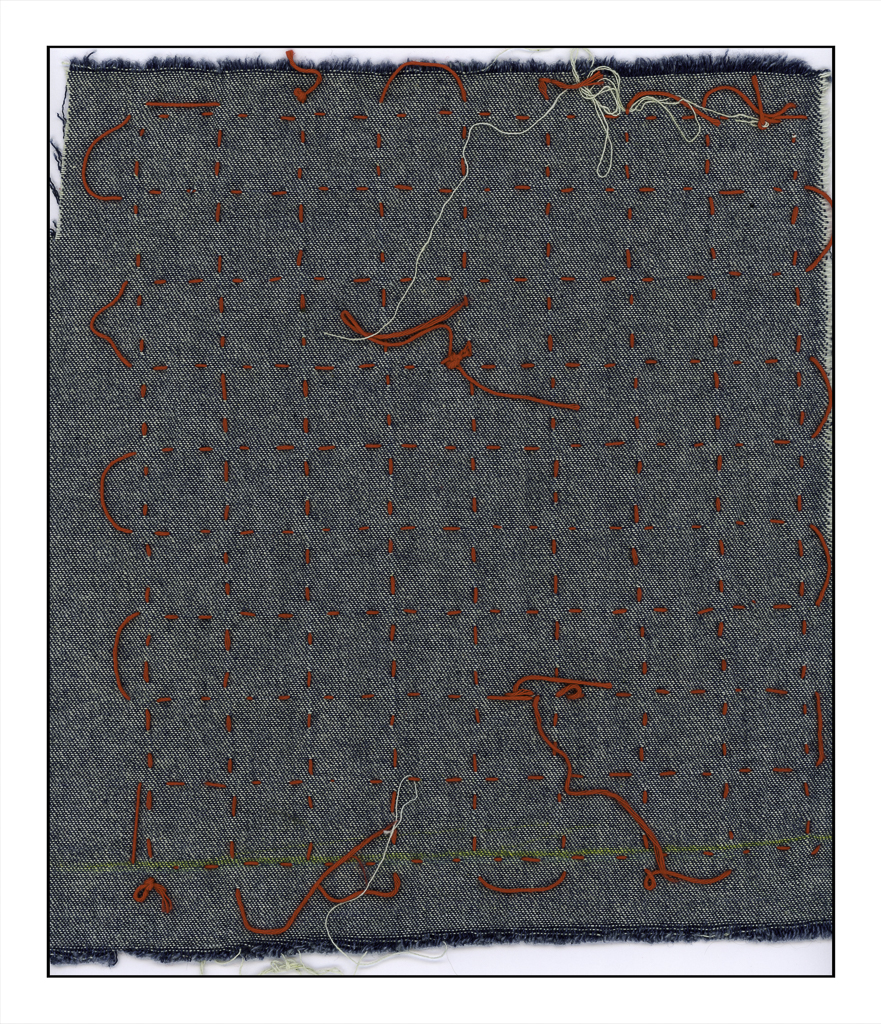
Given that there is only so much you can do lounging around a house, it can be good to just watch a movie or show and do something a bit creative. As the sashiko has been ignored, I figured today would be a good time to do some. The same denim as Sashiko #1-5 was ironed and starched, and a grid laid out.

If you look, you will see that the intersections are little + signs, and then there is one stitch in between each plus sign. I am not sure where I am going to go next, but I have a few ideas. The other question is what color thread or threads? I am not quite sure what I have – maybe a pink or bright green against the denim? Not sure.

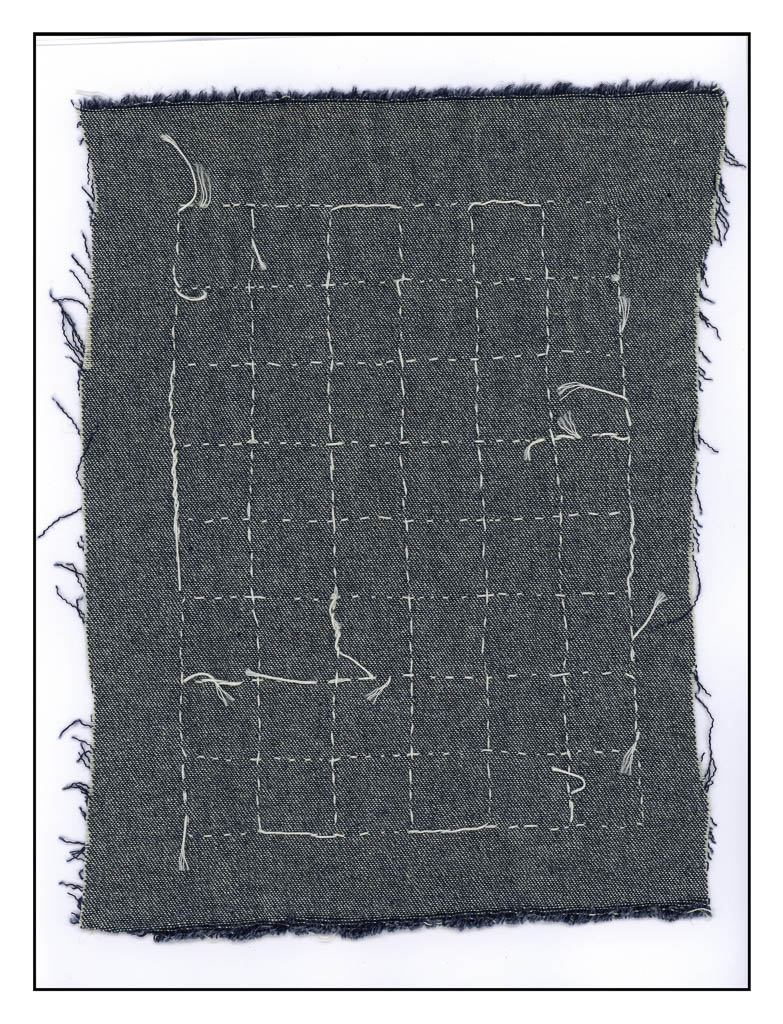
Anyway, below is the reverse side, just because it is so interesting. Oh, I was going to do the stitching on the reverse, but with the plus signs, my mind was not cooperating, so that will be for a simpler project.

Sashiko #5 – Second Color

After waiting a few days to get some red cotton sashiko thread, I went ahead and finished up sashiko sampler #5. I really like this bright red, as it rather glows against the denim, and is nicely balanced by the creamy white threads of the grid.

The goal here was to create a geometric pattern in colors. Patterns which have a rhythm to them are more appealing – I am not sure why! The red threads are designed to create a plus sign (+) in the center of each square, and some do, some do not. It doesn’t really matter all that much to me in some ways as I like the imperfection of the stitches. Despite that, the pattern does work overall. If you nitpick and look at each square and plus sign, you will see mistakes and uneven work. The center of each grid was drawn in freehand and then sewn, and I worked to see the center of my work rather than following lines.

Below is the reverse of this pattern. I worked the stitching from the front of the material. Sashiko #6 will be worked on the reverse side of the fabric as I have read and seen it done that way, too.

Sashiko #5 – First Color

I starched and pressed a rectangle of denim from the same stuff I have been using and had washed. It made a major difference as far as an ability to be nicely stitched, I think. It could also be that I am being more conscientious about the rhythm of my running stitches. With this fifth sample, my hands are getting comfortable.

You can see that my stitches are more even and my lines are more straight. This is not counted cross stitch or Victorian handwork where threads are counted. Instead, it is a decorative art with a bit of the human thrown in! As you can see, some areas have more stitches in the same distance and others have less. Is that important?

My beginnings and endings are a bit neater, too. I’ve been using back stitches to begin and end my thread, but in some areas I carried the thread to a new area in need of stitching by running the threads together on the reverse. All the stitching on this sampler is being done on the right side of the fabric, but sashiko #6 will be on the reverse . . . but that is a few days away!

Sashiko #4

For this sashiko sampler I tried a couple of things. First of all I used two different thread colors, still sewing onto the soft, washed denim. I laid out a 7×7 grid and then just followed the grid lines using the white thread. Then I looked at the stitching and thought a second color would be fun to add, to see what it would like more than anything else, as well as to try to design a design of my own. I don’t really like the results of my own design and it makes me think about what kind of designs work well in sashiko.

When working threads, they need to be secured at beginning and end. I tried knots – meh. Loosely woven fabric lets the knots through a bit easily. Weaving threads in and out is messy but might work okay. I have even thought of using a bit of fray-check but have not tried it out yet. Back stitching over threads at the beginning and the end seems to produce the best results, but getting the needle into the right places to replicate the preceding stitches takes a bit of work – practice will most likely help. The softness of my denim is also a challenge in doing this.

So, a couple of thoughts. I read that many people do sashiko stitching on the reverse side of the fabric. This is something to try, to see how well it looks. As well, I want to starch my next bit of denim to see if that helps. For my next project, I will try both and report the results!

Sashiko Pattern #3

The other day I practiced straight stitch – running stitch – sashiko. Holding a long needle and a palm thimble is a bit of a challenge. Yesterday I decided to try to draft a round pattern to practice stitching in curved lines. I used my pre-washed denim, a circular lotion tin, and a yellow chalk marking pencil I use in sewing. The big problem is that the fabric is very soft from washing – the sizing is gone – and I wonder if I should use unwashed denim or perhaps add a starch to make the fabric stiffer and easier to draw upon for design. When I was drawing the circles, the fabric slid around and some of the circles got squished up. You can see my sampler below!

Sashiko actually stitches up a lot more quickly than I thought it would. My stitches vary a lot, and that is something to work on, and I think how I hold the needle and thread in my right hand and manipulate the fabric with the left will help even things up. You learn as you go, for sure!

Below is the backside of my sampler.

One thing I do enjoy while working on sashiko is listening to audiobooks. It is a great way to sit outdoors, have some coffee, stitch and listen. Even better on a beautiful summer day!