A Year of Living Ycnkely

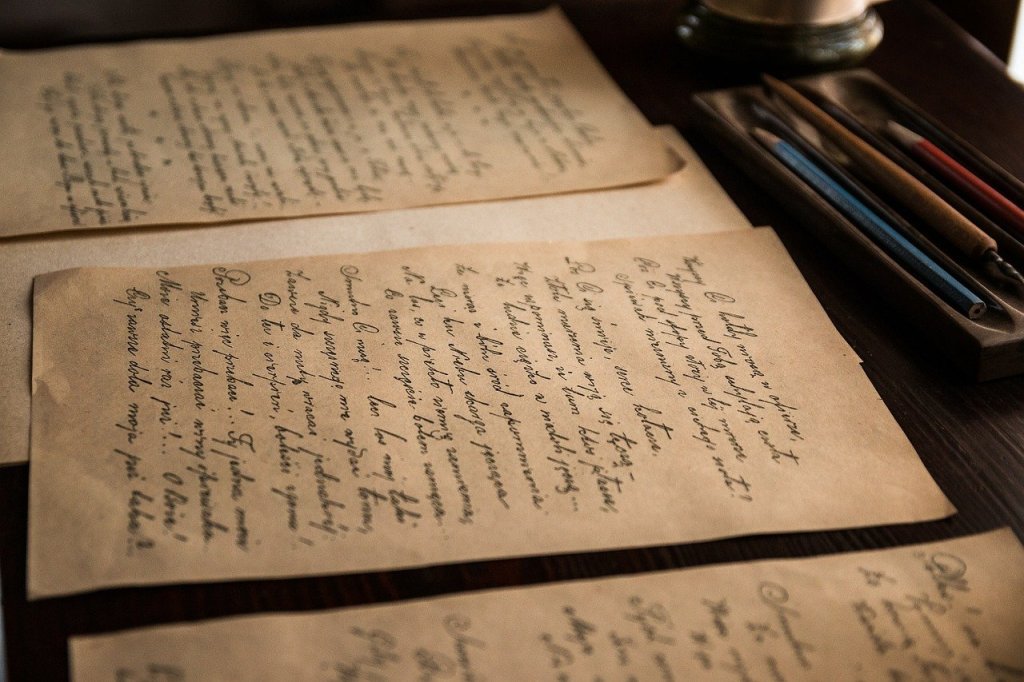
For the past year I have been keeping a journal – something I have done since I was 10 (I shred them, too!) – writing exclusively with goose / duck / turkey quill pens and iron gall ink, all made by myself.

Real quill pens don’t have all the feathery parts on them. They are removed when the quill is made. Not very pretty, but far more functional. All that fluffy stuff gets in the way when you write!

Why do this? I like the act of writing. Just paper and ink and my thoughts or lists or complaints or observations. In this time period, just the daily usage of ink and quill has shown me and taught me a lot of things, things which are perhaps lost through time and the changes in technology. The fact is, too, I like to make things that I can use, and a quill pen and iron gall ink are proving to be two favorites.

Quills gave way from common usage in the 1830s when the metal nib came into easy manufacture and availability. Why not? Easier than cutting your own quill. Iron gall ink is easy to make if you have iron galls (though any plant material with tannin in it also works), and other ingredients available. It just takes time. Interestingly, powdered iron gall inks were available to the public, and apparently in common usage during the Revolutionary War by soldiers and others on the move. The powder was in packets, and all you did was sprinkle some ink on a surface, add water or wine or beer, and with your handy quill and a bit of paper, off you wrote.

Today’s treatise is about the Yncke itself. I’ve made multiple batches and have found out a few things that may have been common knowledge back when it was the only ink commonly available.

Observations

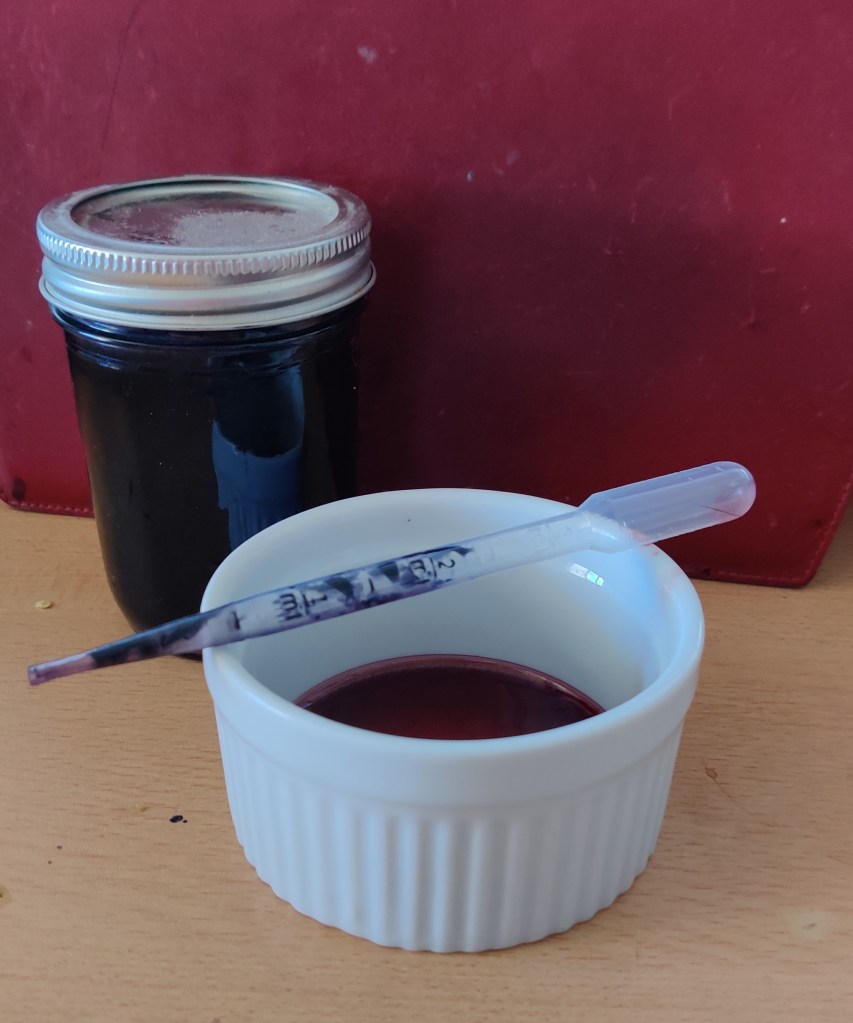
Iron gall ink is best used in small amounts, such as in an inkwell with a lid. The ink evaporates and particulate matter settles out with time. By keeping your ink in a sealed container – I use a mason jar with a lid – you keep it relatively fresh. It won’t evaporate although settling of the materials occurs.

Here are my quills, ink well with porcelain insert, and saucer to catch spills. Notice the stains on my desk! I can usually remove them with some bathroom scrub that has bleach, rinsing thoroughly after scrubbing. Let the cleaner sit for a few minutes to let the bleach work, and use a bit of gentle elbow grease. This is a plastic-topped work station I have had for 25 years, and it has held up very well!

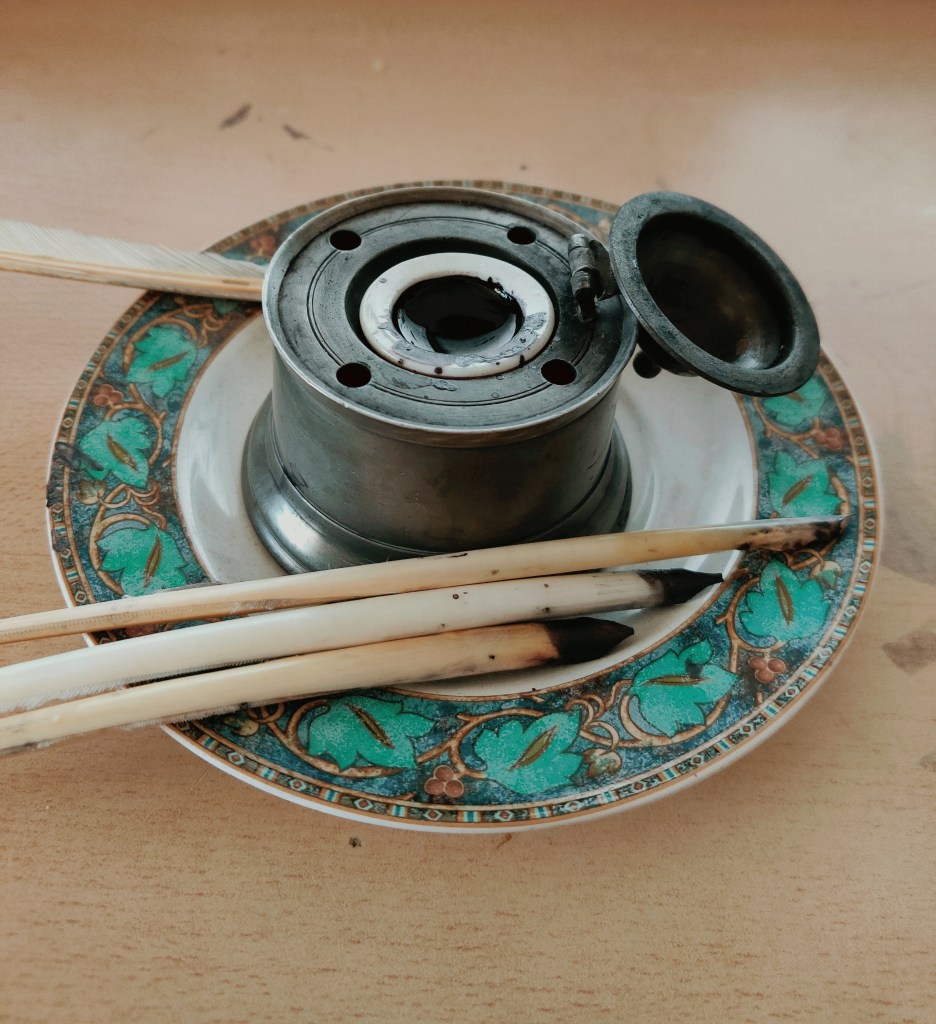
I use a pewter inkwell, reputedly from the early 1800s, with a porcelain well. I keep it on a saucer as spills from iron gall ink stain anything easily. The porcelain is easily cleaned up. I replenish my ink every two or three days – a lot gets used up! Watching it disappear is rather fun.

When I replenish my ink, my choice of adding more ink or thinning it is really my first question. Experience has shown that through evaporation the ink becomes thicker and thus does not easily flow from the pen. I add water in a small amount, but after having read that one should use vinegar or spoilt wine or beer to keep the ink’s color strong, I have tried both. My experience is too limited at this point to make a more definitive statement that either works fine.

How do I know when I need to dilute my ink? I know when I can no longer write a long line of words with a single dip of the quill. The ink begins to blob up and becomes more viscous. If I find I can only write a word or two before the ink is very pale, I know that the first problem is the ink, not the quill. Then, I add a bit of water or vinegar or wine or beer, just a bit, and try writing again. If the flow improves, you are fine. I use a plastic pipette with a squeeze bulb because I can control the addition of liquid more easily than just pouring it into the well.

Here you will see the ink in a 1 cup canning jar with separate screw top and lid. The pipette is made of plastic and has a squeeze bulb on top. This allows for tidy delivery of either ink or thinning liquid – here, old red wine in a custard cup.

In using iron gall ink, I used to keep it in bottles with screw-on lids. Specifically, I used old fountain pen ink bottles. However, this ink is like a glue in some ways because the lids eventually stick to the bottle and become difficult to unscrew. Flying ink is not fun when you finally get that lid off! I store mine in 1 cup canning jars, the kinds with separate screw tops and lids, such as used in making jam or jelly. When I need more, if the lid is sticky, I can usually pry it off with a knife – slowly and gently! And I do it in the kitchen sink or with paper towels beneath the jar to catch any spillage. Clean any spills up immediately!!

Iron gall ink can spoil. I have had batches which developed a scummy surface on it, but it doesn’t seem to affect the quality of the ink. I just shake it up and mix it in. This seems to have occurred when I used water in making the ink. This last batch I made with some old wine, and the scum did not appear. I will say, too, that I like the smell of wine when I use fresh ink! It’s a nice addition.

Making it, as I said, takes time. There a numerous recipes on the internet. You can find my own commentaries on the ink by using the search feature. The recipe I use so far is as follows, and have been pleased with it, especially when I have made it with wine:

Receipt for Iron Gall / Oak Gall Ink

  • Oak galls:  80 g.
  • Distilled water / stale wine or beer / vinegar:  300 g.
  • Ferrous Sulfate (I used ferrous sulfate heptahydrate):  50 g.
  • Gum Arabic:  25 g.

Crush oak galls into small pieces or grind into powder using a spice or coffee mill.  Place into jar and cover with 300 ml. of distilled water.  Place in sunny window 3-7 days (depending on your life and schedule).  I plan to do 3 as per the recipe from the Schoenberg Institute.  After 3 days, there should be a dark murky liquid in the jar.

On Day 3, add 50 g. of Ferrous Sulfate to oak gall mixture; replace in sunny windows for another day.  On Day 4 add the Gum Arabic and leave for another day.  On Day 5, strain the liquid into a clean vessel and voila, ink!

My Check List For Using and Maintaining Iron Gall Ink

  • Take the time to make iron gall ink. I think a week or two is best. Anticipate when you will need a new batch.
  • Store unused ink in a closed container, such as a canning jar.
  • Use a small amount of ink at a time as it easily evaporates and settles out.
  • If your ink is thick, before adding more ink to your well, dilute first with small amounts of water, vinegar, stale wine or beer. Test with your quill. A pipette works well to transfer fresh ink or dilution liquid.
  • Paper towels are excellent as blotting paper. I use toweling to blot a page before I turn it over, and I turn it over onto another sheet of toweling. Sadly, we no longer have blotters as daily items on our desks.
  • Rinse your quill when done, and blot it dry. Have at least 3-4 quills available to use as they need to dry out between uses.

So, that is it for this posting. Hopefully it is of some use to those who would like to use iron gall ink and quills on a more regular basis. If you are just beginning to use these items, be patient and kind to yourself. Learning to write with a quill pen is not easy, and learning how to replenish the ink on your pen has its own quirks. We are used to pens where re-inking is not normal, but with both quills and metallic dip pen nibs, there is a pattern and rhythm to getting the right amount of ink on your pen. Once you master it – and it shouldn’t take long – you might find yourself quite happy with your new skills!

Yncke, Woll, & Bere

If you have read this blog for awhile, you do know that I have made iron gall ink on a number of occasions, as well as cut my own quills. I have tried my hand at learning Secretary Hand from the 1500s, but I never could get into it. Now, though, my iron gall ink needs replenishing, and soon enough I will get around to it – once the rains stop and I can let my galls and old wine ferment in the California sun. And, I do plan to make some red ink from sappan wood (sappen?), too, but that is for another day, when supplies show up.

I came across a recipe for ink in the form of a poem while looking up handwriting or copybooks from days of yore. It contains recipes for iron gall ink, but also ink made from lamp black (soot), which is what sumi ink is from, but also from wool! Wool?

Purportedly from an English book of handwriting entitled A Book Containing Divers Sorts of Hands, by John (Jehan) de Beau Chesne (Beauchesne) and M. John Baildon, and published in 1571, here is an interesting bit of rhyme:

To make common yncke of Wyne take a quart,
Two ounces of gomme, let that be a parte,
Five ounces of galles, of copres take three,
Long standing dooth make it better to be;
If wyne ye do want, rayne water is best,
And as much stuffe as above at the least:
If yncke be to thick, put vinegar in,
For water dooth make the colour more dimme.
In hast for a shift when ye have a great nead,
Take woll, or wollen to stand you in steede;
which burnt in the fire the powder bette small
With vinegre, or water make yncke with all.
If yncke ye desire to keep long in store
Put bay salte therein, and it will not hoare.
Of that common yncke be not to your minde
Some lampblack thereto with gomme water grinde "

I did look up this book online and found many references to it, but not a digitalized copy could be found. I would love to see it. As well, hHow correct or incorrect this poem is as far as original spelling doesn’t matter – it is rather charming, as non-standardized English spelling can be.

What is good about this poem are the specific amounts for ingredients in the iron gall recipe, which perhaps I shall try. Stale beer can be substituted for wine, and the rest has proportions which can be worked out for larger or smaller amounts. “Copras” is known as “copperas” and that is simply ferrous sulfate. “Gomme” is gum arabic. “Galles” are the oak galls.

I found it interesting that vinegar is a better choice than water to thin ink that has gotten thicker with time – evaporation I expect – as well as adding salt (in an unknown amount) to keep it from getting mouldy. Wine helps, but perhaps the salt helps even more. The wool – woll, wollen – was the new source of ink for me! Research was required, and using Google, I came across this video.

I have a feeling I am going to give this a shot, using some odd fleece I have rather than woolen fabric. It will probably be best done outdoors, as the stench could be awful and the smoke could set off the smoke detectors. It is also probably a great way to recycle your old clothes, if you are really desperate for yncke.

Sky Above the Owens Valley

Sky Above the Owens Valley – Watercolor and Ink

Another sketch from a photo I took, this one snapped out of the rear car window! Having a camera can get some great stuff when you don’t have time to stop every 5 minutes.

Sky Above the Owens Valley – Quill Pen and Iron Gall Ink

This was my initial sketch, done with a quill cut with a finer nib as well as done with more attention to detail. After the sketch dried for a few hours, I laid in the watercolor. Some ink was still damp even after a couple of hours drying outdoors and blotting. Below is the original photo.

A Few Trees

A Few Trees – Dehy Park – Independence, CA

I am rather enjoying sketching as part of my morning routine. Today’s sketch is still in Independence, California. There is a trail that connects the native plant garden to a small park, Dehy Park, and I think I took this picture along the pathway. I found the repeated curved rhythm of the trees to be utterly charming – I expect the wind has a lot to do with the way the trees are bent.

Anyway, I decided to not use my Micron pens, as I have for the past three days, but to use a quill I cut myself from a turkey or goose feather and my homemade iron gall ink. First, I sketched the grove.

A Few Trees – Iron Gall Ink & Quill Pen

Then, I let the ink dry – or thought I did! – before adding the watercolor. Areas of ink were still wet. One of the drawbacks of iron gall ink is that it does take a bit of time to dry. The wet ink messed up some of the paints by blending in with the colors, muddying them.

Once I noticed that I decided to use dots and such with the watercolor, especially for the foliage toward the top of the trees. I dabbed the paint on, in between the black, inky branches.

I mixed colors with a water brush, stronger than the paler colors I have been using, and just applied them. The effect wasn’t too bad. In between the leaves I used blue, again, tapping the paint in, avoiding the dark of the ink.

After the paint dried, I went through a second time with the iron gall ink, both with the quill and then a defunct water brush. I think it helped out, but overall, the sketch is still quite messy, and certainly not what I intended. What I do like is the sense of dappled sunlight in the leafy canopy.

A Few Trees – Iron Gall Ink, Quill Pen, Watercolor

Takeaway points: First, the ink needs to dry before applying the watercolor paint. My quill has a wider tip on it than your standard dip pen, and thus makes bold lines. However, a bit more care could create a better combination of lines, and perhaps render the sketch more interesting. Adding brushwork and stronger lines after the first ink and paint applications helped to strengthen some areas. After I did that, I went about the morning chores while the sketchbook dried outdoors in the morning sun. I had to wait an hour at least – and then, the scan of the final sketch!

Pen in Hand

I am a firm believer that handwriting and its practice is important for a lot of reasons.  It is an excellent way to learn fine motor control.  It has been shown to improve thinking skills in children.  You do it with a pen – no need for a computer – paper, too.  Writing implements and paper run from super cheap – hey, steal that pen you use at the office! – as is paper – to crazy expensive.

Jake Weidmann’s Ted Talk is worth the watch – so many reasons presented as to why penmanship and writing are so important.  There is history, there is pleasure, there is beauty, there is – there is – there is.

And then, yesterday, for whatever reason, I came across a 7-day course on learning Secretary Hand, the hand of scriveners, scribes, clerks, and everyday people who needed to write things down 500 years ago.  I began today..I thought I would write down my thoughts about it using my homemade iron gall ink and a genuine, hand cut quill. Read it if you want some more information.  The recipe I used to make my own ink is here – and it is still fine a year later!

This is my first exercise, with notes to myself as to how various letters were made in the 1600s as opposed to in the 2000s. Back then, the alphabet consisted of 24 letters, not our 26. I and J were interchangeable, as were U and V. There are different ways to make various letters, such as the S, depending on the letter’s location within a word. H can be made in the way we recognize it today, or in a form of shorthand that lends itself to quicker, more casual cursive.

And finally, here is a sample of my alphabet in cursive. The top sample is using my homemade ink and using a dip pen nib from the 1800s along with my nib holder from the same era. The bottom sample is with the same ink but with a quill pen.

My own lessons in cursive began in third grade.  The style we learned was very typical for American school children, based on the Palmer Method of handwriting, the goal of which was a clean, functional, and easy-to-read handwriting.  I’ve changed a few of the letters around, to suit my taste, such as the capital A, M, N and Q – they are based upon the letters in the Spencerian alphabet.  Additionally, they lend themselves more readily to writing with a dip pen, fountain pen, or quill in my opinion.

Cursive is designed for speed in writing.  As someone who taught for several years, I find it appalling that kids today say, “I can’t read your handwriting,” meaning cursive.  They print.  Sometimes they are told they have to print since their cursive is abominable, and a computer and keyboard and printer are not available.

So, Secretary Hand will continue to be practiced.  It’s fun to learn something new, as well as by learning how to write it, I will actually be able to read documents from the early modern times of the 1500s-1600s!  Sounds pretty cool to me.

More to come!