Grand Finale: Christmas Stocking, 4

Overall, I am pleased with the final iteration of my SIL’s Christmas stocking. A lot of work in some ways, just because I didn’t think about what I was doing. I ripped it a few times and had to learn how to knit an “after thought” heel. Watching videos for that really helped a lot.

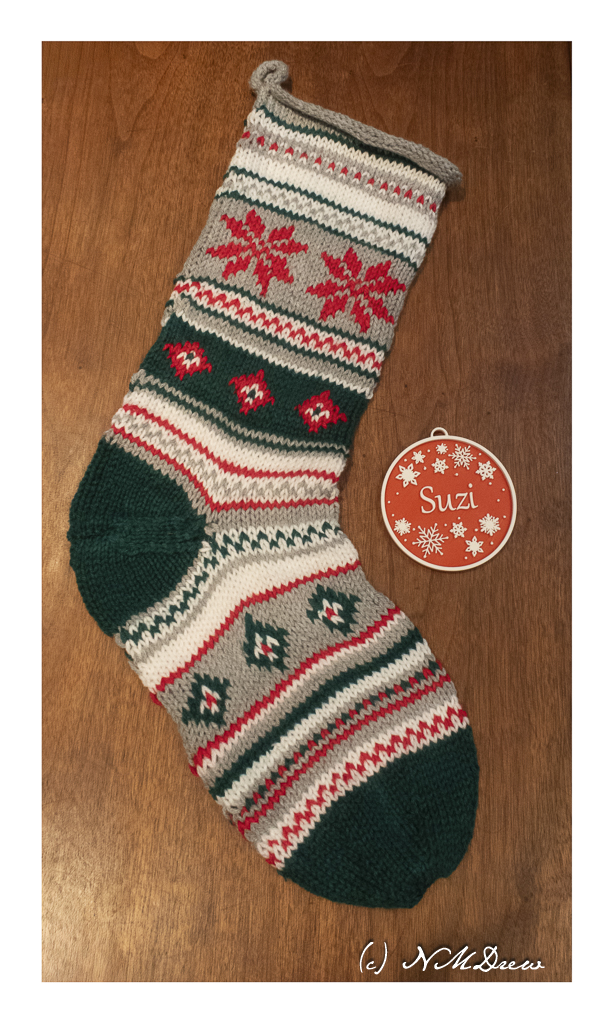
The pattern this stocking is based upon is from Yarnspirations Festive Fair Isle Stocking. I won’t say it is a difficult pattern if you are used to stranded knitting, but because on a number of occasions there are more than 5 stitches between different colored stitches, the floats can get long and the tension can get messy. As well, if you reach into the stocking with rings with things that stick out, you can catch a float, before, after, or during its making. I will putting a note about this into the package when I send it off to Wisconsin in the next few days.

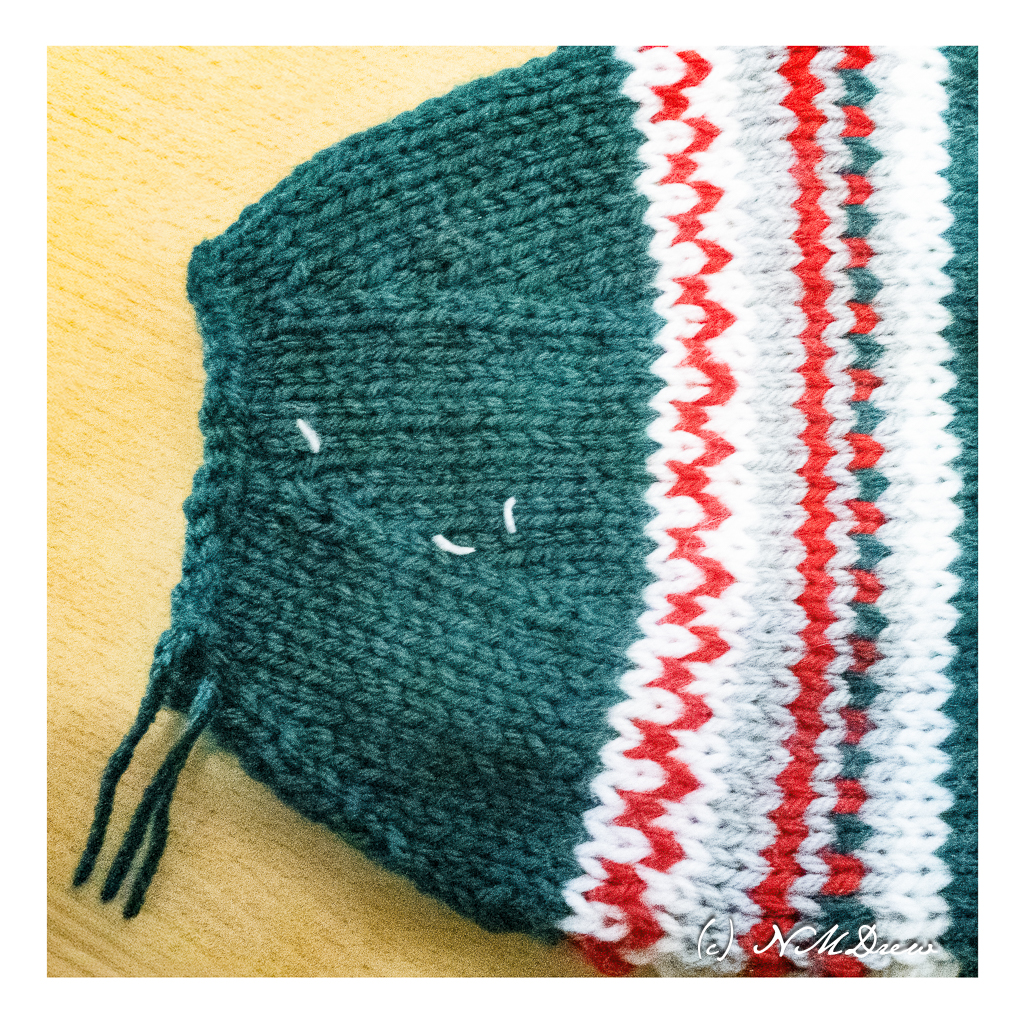
If you recall in my last post about the stocking, I had knit the foot pattern twice. It was way too long. I cut it off, and then moved into picking up the green stitches to make the toe itself, which is green. I used a circular toe decrease just because I was lazy and using circular needles, first 16 inch, and then 11 inch. You can see the decreases in the image below. I have not yet pulled in the open stitches to cinch the toe closed.

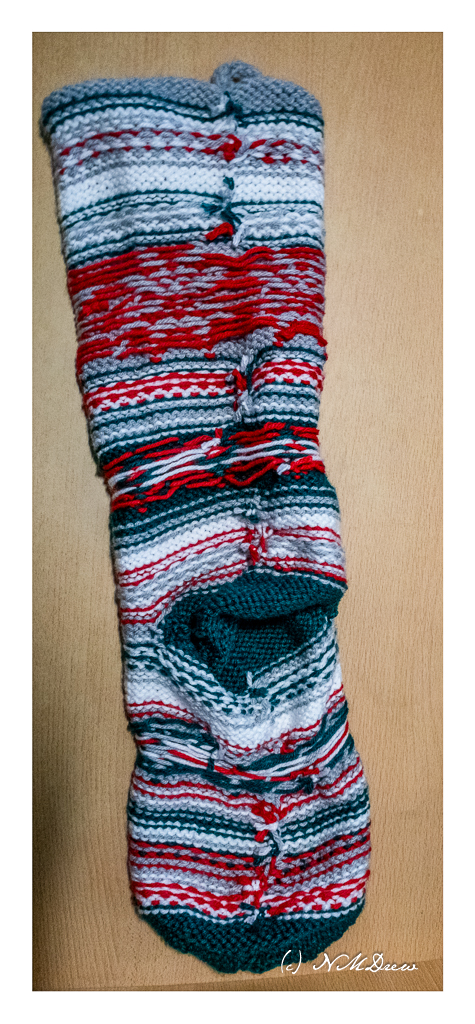
After this, it was time to clean up the mess inside the stocking itself. With all the color changes and dropped stitches here and there, I did not tie off the floats like I usually do. See how messy?

It looks pretty bad, but in reality, it was pretty easy to clean up. I tugged together the loose ends, knotting them (which I would not do if this were a sock to be worn on my foot!) for security. All the long ends were trimmed, and I worked from the top of the sock to the bottom. In the end, it worked out pretty well.

The corners of the after thought heel also needed to be cleaned up and pulled in so there were not any holes. The directions for the stocking do not give you notes that beginners (and non-attentive knitters like me) may need. Having never done this sort of heel, I was confused, but some good YouTube videos proved helpful.

If you are interested, I used size 8 US knitting needles for this project and changed some of the pattern colors and so on. The top of the stocking used a “fur” yarn which is not longer manufactured, so I made an i-cord. The i-cord was made so I could have a loop for hanging the stocking as well as picking up the 60 stitches needed for the pattern itself. The yarn is an acrylic yarn, and may colors were white, warm light grey, green and red. If I were to do this over, I would probably drop down to a 7 US needle. Because I could, I used a 16 inch circular needle, and dropped to an 11 inch needle for the toe.

I did not enjoy the after thought heel. It had me using 4 needles, which I do not like at all. The needles were aluminum and kept sliding out the of the stitches. When I knit socks, I use 3 needles, and ones made of wood or bamboo. I plan to try this heel again, but use a different methodology.

After cleaning up the inside of the sock, securing the heel and toe, and making sure I didn’t have any dropped stitches, it was time to iron the stocking to make it presentable. I sprayed it with water and then pressed it – pushing the iron down on it – between to rather heavy dish towels placed on the ironing board. I had my iron set to linen so the heat could penetrate the towels and set the stitches and shape of the stocking. This was done to both sides. I let it set overnight, to cool and give it some memory.

Years ago, when I was a kid, my mother made Christmas stockings for the four of us. I hung mine in front of the fire and it melted. I will send my SIL a note to that effect! This is also why I misted the stocking and pressed it between heavy towels – I have no desire to peel melted acrylic yarn from my very good iron.

Would I recommend doing this stocking? Yes, I would, but with caveats: know how to do stranded knitting, learn about after thought heels if they are new territory, and either find a fur yarn or make a ribbing or i-cord beginning. And then, enjoy the result.

Skep – A New Hat!

This hat is a simple mosaic stitch pattern, with texture created using purl stitches along with knit and slipped stitches.  Although mosaic knitting looks complicated, it really is not.  The fact is, each knitted round (or round with purl stitches) is done in only one color.  The slipped stitches pull the contrasting color up from the row below.  The biggest challenge in writing up this pattern was actually in translating the written pattern into a charted design.

Besides the mosaic pattern, the foundation round of the hat is done in i-cord, invented or unvented by Elizabeth Zimmermann.  This creates an edge that is tidy, but a bit stretchy.  The result is a hat with a snug edge which helps the hat hold its shape.  From the initial i-cord cast on, the first round increases the stitch count, and thence the pattern commences.  You can purchase pattern on Ravelry – follow the link here, or else click on the pattern listing under my “page” column.

Although I did not make the pattern available in different sizes, it would be easy to modify the pattern for a very large head or a child, simply by adding or subtracting repeats.

What is a “Skep”?

A skep is an old word for a beehive, made of coiled straw or grass, and shaped into a conical formation.  In the New World, there were no honey bees, and so when the Europeans settled, they brought their bees with them.  The shape and texture of this hat made me think of a skep – thus its name!

Unfortunately, our honey bee population is being challenged by viruses or some other horrible illness, and their number is dwindling.  Add to this, they are mating with African bees, which are known to be very aggressive.  Neither is a good thing.

A Bee Artist

I would like to refer you to a site I really enjoy, Pencil and Leaf, which is the blog of an artist who does wonderful drawings and painting of bees and flowers.  Buzz over to see her fine work.

Top Down Beret, vi

I finally found my 40″ circular needles, and transferred this never-ending beret to them.  Spread out, this is an ugly item!  Too much open space between verticals and cables.  Too many stitches.  Way too big even for the 40-inchers!  Maybe I’ll felt it.

Despite that, the progress has been educational.  I think my original pattern with a lot of cables would be far more interesting to look at, though admittedly I am rather tired of them right now.


Basic Beret: Creating a Top-Down Beret, v

For the last couple of weeks knitting has wandered in and out of my day, along with my sourpuss attitude. This latter has, I hope, been vanquished, even if temporarily.

I’ve been really frustrated by this pattern, so decided to try it from the bottom up. And, it began to make sense. The pattern has changed rather considerably, but the lacy mock cable and top down construction remain. I’m not doing as many cables – considerably less. Where I had planned a number of cables, I am now using simple a line of knit stitches on a purl background. All knit stitches are now knit through the back loop except for a couple, which will be seen in the pattern.

The most interesting element is just how much simpler the pattern is, and so much easier to knit as it grows more organically once a certain level is reached in the stitch increases.

Basic Beret: Creating a Top-Down Beret, i

A lot of people have downloaded the pattern for the Basic Beret, both here and on Ravelry. Not a lot of people seem to have made it, though. There has also been some criticism about the pattern itself, especially about the decreasing toward the top. There may be some validity to it, and it could also be the skill level of the individual using it. Given that, if you do decide to try this one, be warned that all I am providing is an insight into my own design process, and what I do. That said, let’s begin!

What do you want your beret to look like?

For my purposes here, I want a small pattern that can show how the beret expands outward.  I want a knitting pattern or stitch that is easy to memorize and small enough to illustrate my points in design.  I figured a pattern of 2 to 4 stitches would be good, and no more than 5 rows in length.

My idea is that, since I will be working from the center outward, I don’t want all the pattern stitches radiating out all at once, but incrementally.  I plan on 6 initial patterns of the stitch, increasing between the pattern stitches in purl, and then adding the knit stitches, which are the foundation of the mock cable rib.  As the pattern itself is 5 rows, the idea is to add a new pattern line every 5-10 rows to keep each pattern repeat parallel.

Preliminary Sketches of Top-Down Beret

My favorite on-line place to go is Knitting Fool, which is a repository of oodles of patterns.  I chose an eyelet rib or cable pattern that most of us have seen – 2 stitches, a yarn over in the middle, knit a few rows, and decrease by pulling a stitch over a couple to create the cable effect.  Here is my circular version, using Knit Visualizer, of the pattern.  I created the MCCO stitch using the stitch editor in Visualizer.

I may decide to move the purl stitches to the right end of the pattern.

Gauge

As I am familiar with my own way of knitting, and about how many stitches per inch I usually get with a given yarn, I tend to skip this step.   However, if you do not know, or you like to swatch, make yourself a swatch knit in the round, and measure from there.  Gauge of flat knitting and circular knitting can vary.  Some good links for getting your gauge may be found here and here, and in the videos below.

Center Beginning

The first decision is to have a flat center, or a little tab, such as found on the classic wool beret, growing out of the center.  If you want a tab, this is how to do it.

Tab Beginning

This is done using I-Cord.  Using double point needles (dpns), cast on three stitches, leaving a tail of 4-5 inches in length.  I-Cord is done by knitting the three stitches, sliding them to the other end of the needle, and repeating.  This video is very nice in illustrating how to make an I-Cord.

While you are knitting, include that long tail left over from beginning.  This means you are doubling up your yarn and knitting the tail into the stitches.  This keeps the problem of the tab’s tail having to be woven in later on.   It also makes a fatter tab, so you may wish to use only two stitches for your I-Cord tab.  Whatever you do, knit all the stitches for each row of I-Cord, do not slip the first or last stitch if this is something you do with regular knitting.

I decided to do a 3-stitch I-Cord for the tab.  Here is my picture of the long-tail cast on, with a tail of about 6 inches.

Long Tail for I-Cord

Well, I knitted up a 3-stitch I-Cord.  Too fat!  Ripped it out, and produced a 2-stitch I-Cord.  Here is the tab, knitting the tail in as I created the I-Cord.  And, as you see, there are now 4 stitches, which can be used as the foundation for the beginning of the beret.  There is also nothing to weave in along the I-Cord itself.

2-Stitch I-Cord, with Long Tail Knitted Into Work

Now that you have all sorts of information, here we go . . .and to quote Elizabeth Zimmermann,

Pithy Directions (so far)

Yarn:  Full of Sheep, in cream

Gauge (from yarn wrapper):  4 st. per inch, 5 rows per inch

Needle Size (from wrapper): US 10.5

I am using size 8 needles because I knit loosely.

Directions: You can knit this beret with the traditional center tab, or flat.  Up to you.  I am using a tab for mine.

Begin Tab.  Using a long-tail method of cast-on, cast on 2 stitches with about an 8-10 inch tail.  Make the I-Cord (see above video or written directions) knitting with the long tail and the skein yarn doubled together.  Knit 5 rows of I-Cord.  At the end, there will be a total of 4 stitches available from the doubled yarn of the I-Cord.

No Tab: Cast on 4 stitches.  Knit one row.  Divide evenly over 3-4 needles.  Mark beginning of round.