Yesterday, in a moment of pique, I packed up the Pfaff Passport 3.0 sewing machine and took it back to the dealer. Time to trade it in for something better, even if a bit heavier for taking to classes. I’ve tried to like the damned thing, but too many little frustrations mounted up. After only two months, it was time for it to get lost. I felt no love for it, only a liking for the fancy, decorative stitches. I had a problem with too-flexible plastic presser feet and a bobbin cover that was capricious, sometimes jumping out of its holder in the middle of a seam. As well, the reverse button would work sometimes – and other times it would not. Why bother? I hate to say it, I gave it a two-star review somewhere on the net . . .
Enter the Baby Lock Presto II. My dealer gave me full credit on the Passport, and I walked out with a brand new machine, marked down incredibly to be a very good deal. To me, that is great business. And, I really am liking the Presto II. It’s not full of decorative stitches, which I admit I do like and imagine using them to create some interesting things in the future, but the practical side of me finds that a machine that works, has solid feet, a good stitch, and a good reputation is more important than fancy stitches. (Oh, the Puritan speaks!) It also has damnably good buttonholes!
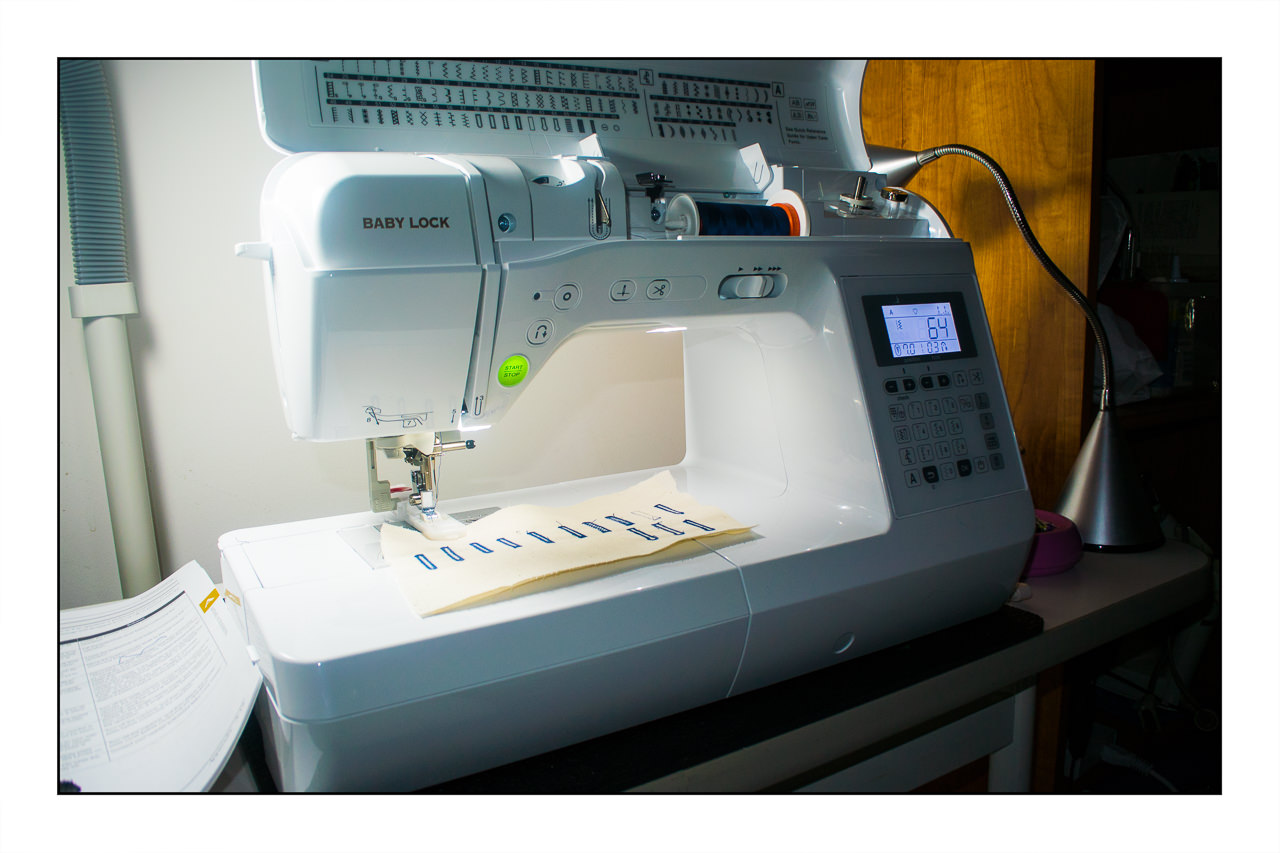
There are 7 buttonholes on this machine, some of which I did multiple times to check out their quality. The default ones are very good as they are, but I prefer the ones where I lowered the pressure on the presser foot from 4 to 3 and shortened the distance between the stitches, for example from 0.5 to 0.3. My trimming is not spectacular as I just cranked them out after putting some medium weight Pellon between two layers of a fine, soft natural muslin. The buttonholes are actually quite nice . . . I wonder if computerized sewing machines produce some of the best ones? I know that my Berninas do a really fine job and they are mechanical machines.
Anyway, this machine is probably 5 lbs. heavier than the Passport and does not have a case. I have a turquoise Tutto trolley (say that 3 times real fast!) to transport the Presto II. The machine also has a handy dandy handle on top to make carrying it easier. Classes will not be a problem as far as weight.
Below is a frontal view of the Presto II, a promo image from Baby Lock. There is a Presto (I) prior to this one – the II has the addition of a thread cutter.
The promo picture below gives you an idea of the location of various buttons for your sewing convenience. On the right is the digital display, which is very easy to use. A few things aren’t intuitive, but you can read, right? Easy peasy afterward.
Beneath the index finger is the thread cutting button, to the left of that is the needle-up / needle-down, then a button to push to terminate a pattern when it is complete, and the reverse stitch. One thing the Presto II has that the Passport does not is a sensor which won’t let you sew if the presser foot is up. What is not shown is the fact it has an absolutely fantastic automatic needle threader! Oh, how my old eyes like that! To the right of the index finger is the speed control – slow to fast, up to 850 stitches per minute (faster than I need!).
Finally, in the Baby Lock promo picture below, you see under the top of the Presto II. The top of the machine flips up. In the picture I took above, you can see the 100 stitches printed on the lid. The spool holder and bobbin winding mechanism are also under the lid, and the bobbin winder sports its own thread cutter. Under the lid and along the thread paths are clear markers on how to set up the upper thread (solid line) and how to set up the thread to wind the bobbin (broken line). The bobbin case itself has a picture showing how to place the bobbin it it.
I’ve never sewn or used a Baby Lock prior to yesterday. I know their sergers are supposed to be phenomenal, so why not their sewing machines? There are a lot of thoughtful little conveniences – small touches – which make this an outstanding machine, more so considering that this is not one of their fancy embroidery machines or even top of the line sewing machine.
After having the Presto II in my possession for a little over 24 hours, I can honestly say that I have “bonded” with it – I like it a lot! – and do not regret getting rid of the Passport 3.0. It’s sad that I feel that way as there is a lot of potential in the Passport, but the poor quality of its plastic feet and the bobbin cover coupled with the reverse button’s finicky quality were not worth working with. Sewing should be a pleasant experience, not a wrestling match with faulty equipment and shoddy materials.