Quilting Project, i

For the past month, every Sunday, I have been taking a beginning quilting class from 1 to 4 pm. It’s like boot camp! The teacher is detail oriented, explains the whys and wherefores, and is perfect. At this point, we beginners are “piecers” and not quilters. No quilting in this session – to be continued in 2019.

I have been sewing forever, since about 10 or 11, and now that I am closing in on retirement, you can guess that I have been doing it for awhile.  However, quilting is different in some ways.  No backstitching.  Precision seaming.  Scant 1/4 inch seams.  How do my points look?  (Those are where the points of square or triangle meet another piece – are they pointed, blunted, exposed?)  Every time you make a seam, you iron – press the piece flat, open the seam.  Then move on.

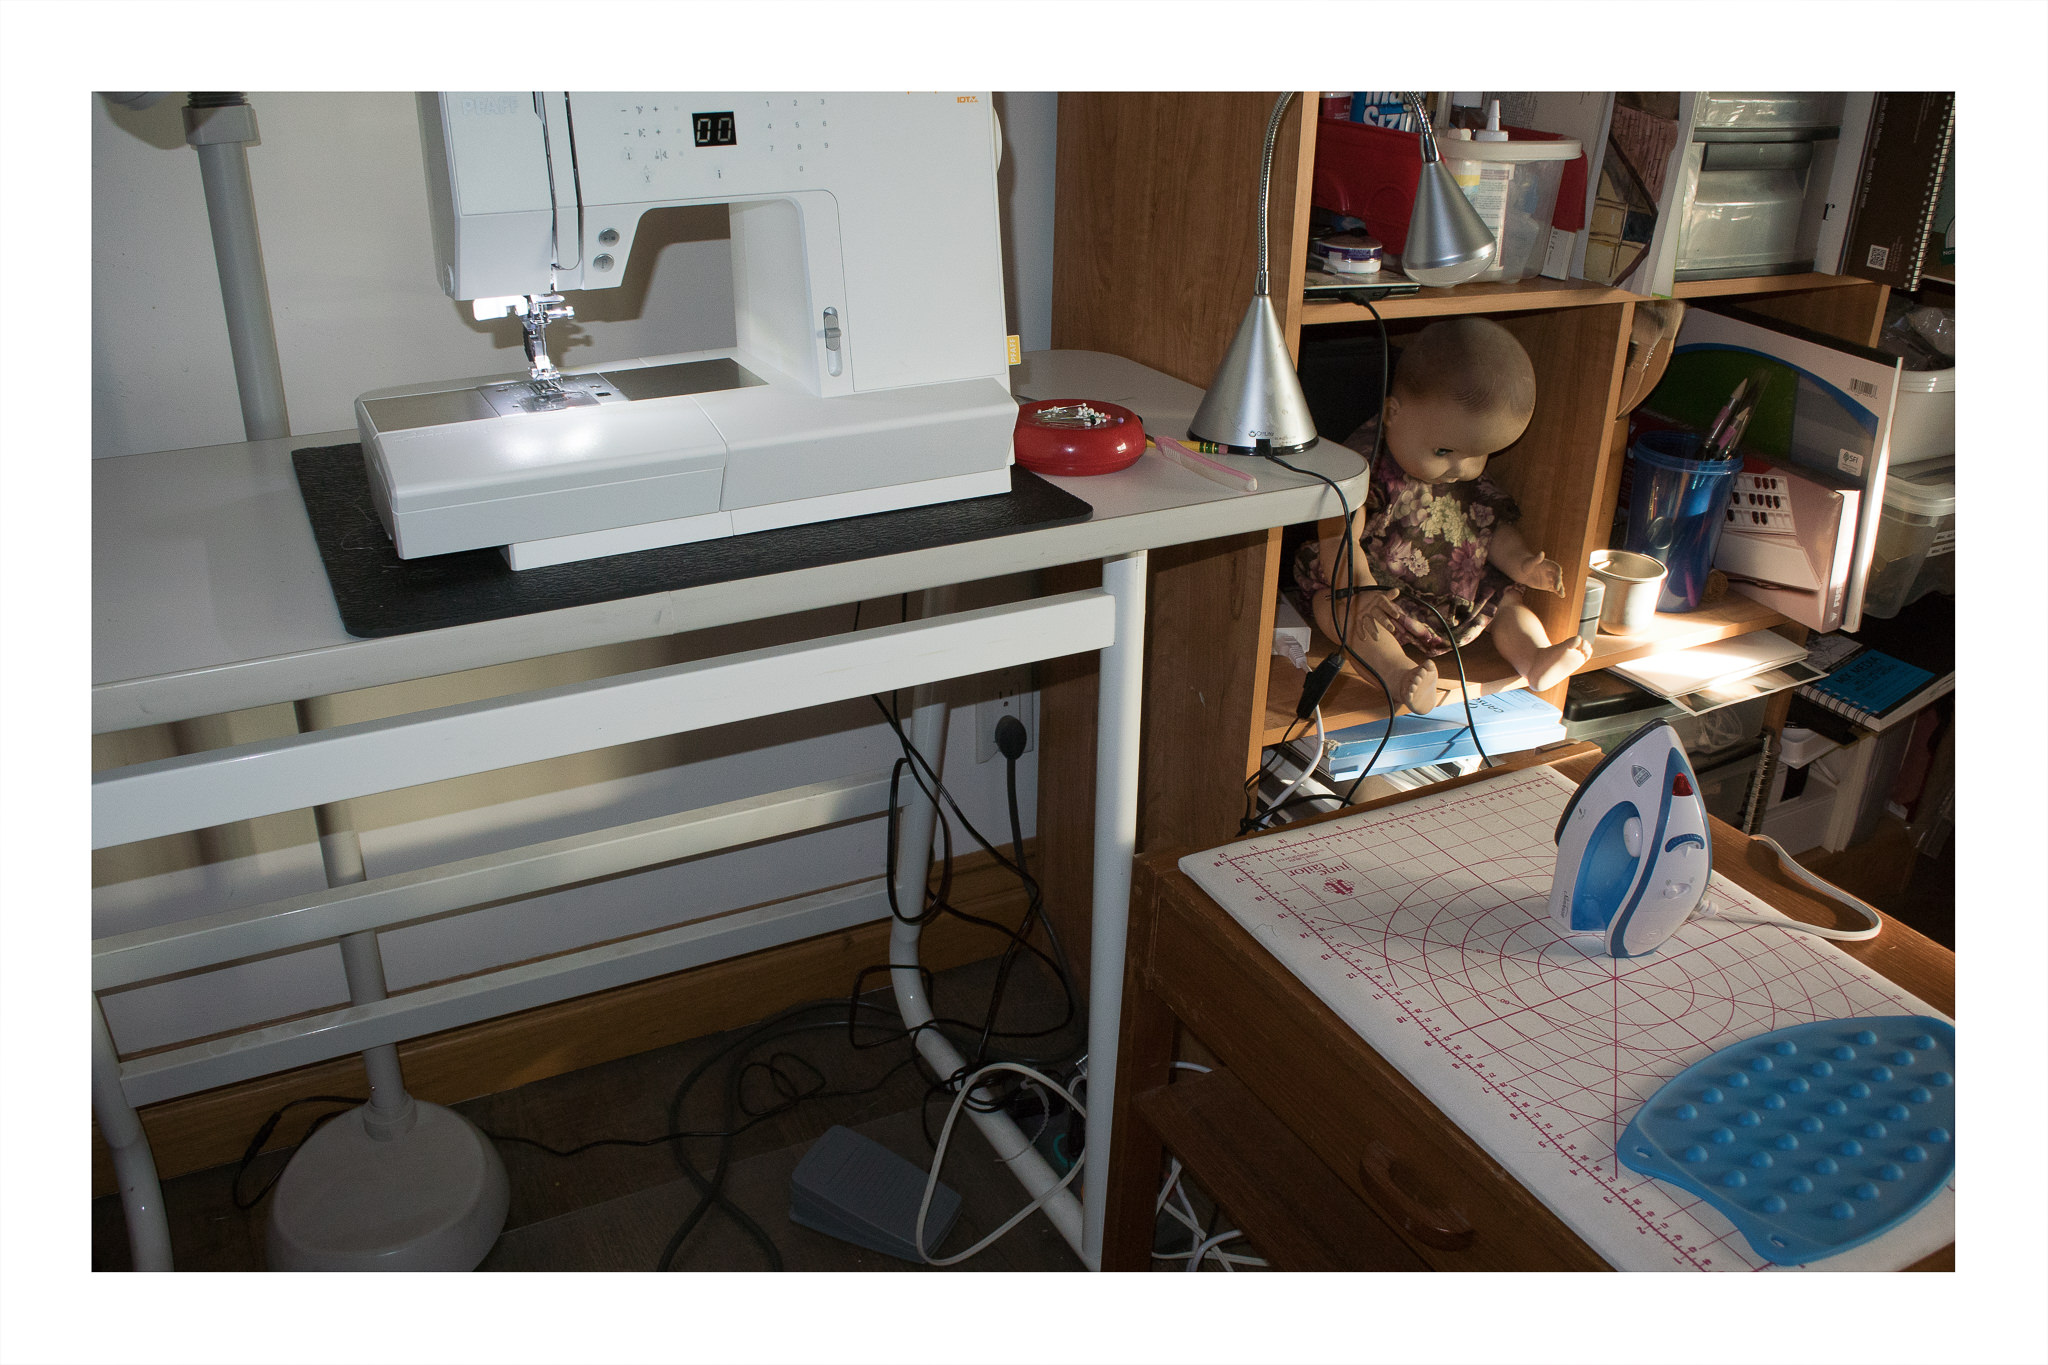
In the picture above, you can see that I have set up a small pressing station next to me. This keeps me from getting up and down with each seam. Many people do this. The little iron is really nice – and really inexpensive, too! It’s a “Hot to Trot” mini iron by Sunbeam, with a mini price of $12.99 at Target or on Amazon. It heats up quickly, has steam, has steam bursts, and is comfortable in the hand. The ironing pad is also a cutting board on the other side, but I find it easier to walk over to the drafting table if I need to cut anything (first picture).

The pattern itself is filled with lessons. To read a quilt pattern requires a bit of work, and a poorly written pattern will kill your enthusiasm very quickly. This one was written by the teacher, Becky, and she’s done a really good job. Her being the teacher, she knows this pattern. Last week, I had sewn a couple of pieces wrong – in just a glance, she said, “You need to fix that!” I think I am so – sew? – lucky to have an exacting and knowledgeable instructor. This is really important as I have been to a few other quilting classes and they have all left me very disappointed. While I don’t see myself becoming an obsessive quilter like some people, I know that I am going to walk away with an appreciation of quilting and a new sewing skillset.

Finally, as a birthday present, I was given a lightweight, take-to-class sewing machine by the best guy in the world, mi esposo Josh. I’ve had a bit of a love-hate relationship with the machine, partly because of problems with a foot being made of a flexing, flimsy plastic (which the dealer replaced with a metal foot – much nicer – love goes up, hate goes down), but also because I am learning a new skill with a new machine. This is a Pfaff Passport 3.0, weighing in at less than 15 lbs. Considering one of my machines is a 50 pounder, a portable, class machine is necessary. This machine was made for portability, and in that arena I really like it. In the big picture, I think this machine is a keeper. If I need to have more harp space – the area between the needle and the right hand part of the machine – I can always use a bigger machine. For the quilting, I may bring in my Janome 6500 as it is more powerful, has a quilting table, and more harp space.

Finally, the quilt itself. In class I completed the center square, and then one of the 3 different squares which will surround the center. I need to complete all 12 squares – 3 different patterns – by next Sunday. That is when we start working on the borders, which consist of strips and squares. I think we will also begin on “squaring the quilt” – when you make your quilt an even shape. Or, that may be the final class. The center square is fairly large, and the other squares will surround it. The center square is below. It is a graphical representation of a flower basket.

The surrounding squares are all variants of flower baskets. Below is “square 1” of the three. Each square requires 4 renditions of the same square; yesterday I completed all of this square – all 4 of them. It took a bit of time.

Over the next few days, today included, I will complete the remaining 8 squares. The dog ears will be trimmed. Fortunately, I have cut out all the pieces for the entire quilt – except the border – and placed each one in a baggy, each piece labeled in size and for which square. These are the details Becky has been so good with! It would be all to easy to get lost in colors, shapes, sizes, and so on.

Okay, time for breakfast, and then on to sewing! To be continued . . .

In Search of the “Perfect” Buttonhole, Part I

I don’t know about you, but sewing a good-looking buttonhole, without a mistake, seems to be a nearly impossible task.  There are attachments for machines.  Some machines have 4-to-6 step built-in buttonholes.  Sew a buttonhole by hand?  Hmmm.  I’ve been tempted and then reconsider:  it’s not worth the stress (even though there are some great YouTube tutorials I have watched!).

In each of these, something can go wrong.  A perfect buttonhole can be destroyed with a slip of the seam ripper when making the final slash.  Birds nests of thread can collect under what looks like a beauty of a buttonhole.  Stitches can be skipped.

I have a small (compared to some people) collection of sewing machines, ranging from a treadle with a long bobbin (The Free #5), two old Singer handcranks (a back-clamping Lotus 66 and a 99), a Featherweight 222K, a Necchi hiding out in the garage in a horrid French Provincial table), some Kenmores (158.1030, 158.1400, 158 904, 158.19802), a Bernina or two (801S and 930), a Janome 6500, and a Pfaff Passport 3.0 (which I may trade in as it seems to have a few too many quirks).  I also have a Viking 19e, fixed at long last, which was my mother’s machine, and the one I used throughout my school years.  I also have attachments for the treadle, Singers, Kenmores, Berninas, and Janome – anything to make life easier.  Or purportedly easier.  Buttonhole attachments are included in the mix.  And as adjuncts, a coverstitch machine and a serger.

Not all attachments fit all machines.  Most are proprietary.  For instance, did you know that Singers of yore come with rounded corners and Kenmores are squared?  Round pegs – or rounded corners – do not fit in square holes – or squared holes.  And in reverse.  Thus, Singer attachments are not likely to work on a Kenmore, and Kenmores might not work on a Singer or a Bernina – but they might.

For awhile, Singer made slant-needle machines, and must have slant-needle attachments.  Kenmore machines range from low-shank, to high-shank, to super-high-shank.  These might require specific buttonhole attachments or shank adapters.

Let’s not talk about Kenmore buttonholers of some variety – many are proprietary to given machine models, and are not clearly identified.  Did you ever look at all the models than Kenmore made?  Maybe even more models than Singer.

I have 4 Singer buttonholers (gotten cheap off eBay – some for a couple of bucks) and a generic, low-shank one I bought 20 years ago at a local sewing machine store.  That last buttonholer is the easiest to use of all of them, but the old Singers are a lot of fun and do a pretty good job.

A good or great buttonhole attachment or machine function is a gift from the gods.  Imagine making clothes at home on a straight-stitch machine in a few hours – or several – and then spending the same amount of time (I would think) sewing in 12 buttonholes on a shirt or a blouse or a dress. Even if funky and weird, a buttonholer is up there with a washing machine and a paperclip and a safety pin as far as being this side of miraculous.

Whoever invented the automated buttonholer, thank you, thank you, thank you!

Stay tuned for Part II!

Another Bag – The Rockport Tote

Between Inktober 2018, watercolors, tasks and errands, I have been working on another bag.  This one is in need of massive trimming of threads – so is the Boxy Tote – before it is done.  Then, it will be shipped off to a friend of 45 years “just because”!  It’s not perfect, but then nothing I ever do is, so that’s life, eh?

This bag is done with one piece of material and quilted every half inch on the body.  It’s called the “Rockport Tote” from Aunties Two.  The pattern is clearly written, and even better, there are videos to accompany it.  If you are interested, follow the preceding links and you will find them.  This project took me awhile to do – it spanned about 3 weeks, and in between a lot of stuff, I was champing at the bit to finish it.  I’m going to start another one next week – bags are in the works for Christmas presents.

The bag comes in three sizes – small, medium, large.  The small is tiny, perfect for little gifts and using up scraps of fabric.  I made the medium size.  The large is a bit bigger, but this one is a nice size to carry around.  Also, I was really happy to find this ceramic Celtic knot work button in my button box – it seems perfect for the bag.


One thing I am enjoying with my time off is the actual ability to have time.  If I was still working, I would be rushing and feeling pressed to finish this bag, and I think the whole project would have become a point of aggravation.  Slowing down requires having time, and in the time I have, I am finding I am enjoying working on things that would otherwise become frustrations.  My sewing skill is far from good, and my own rather casual approach to things doesn’t help.  Still, I do have time to do handwork (hand sewing) and picking apart seams or other bits that might not please me.  I have time to think about what I want to do, and time to set aside a project with the time to return to it.  All of a sudden the rush-rush-rush of my former daily life is gone.

And thus, another project completed.  I start a 5-week introduction to quilting class at Quilty Pleasures and another 2-day class to make another Rockport Tote.  Yes, you read that last right – I figure I would make one Rockport, and then make another, learning from my own experience, as well as that from Betsy, who taught the Boxy Tote class I took last month.  And, though I profess to dislike quilting, my thought is that learning how to cut and sew precisely, as needed for a good quilt, won’t hurt me or my sewing skills.  I can only improve.  And I know I will have a lot of fun in the process (and probably some frustrations, too.)

Boxy Tote, Part II – Completed!

Last month I started the “Boxy Tote” at a local quilt shop.  This is a very complex project, encompassing fusible foam, fusible batting, stays (the things that give the top of the tote its “snap” when opened and shut), pockets, quilting, and sew on (to excuse the bad joke).  It took close to 30 hours to complete!  You can read about it here.

Below is a picture of the bag, inside and outside.  The top side is the lining, which is quilted and has pockets in it.

And finally, here is the tote.  Look at the shape of the top of the bag – flat with tapering sides.  This is where the stays come in.  They are actually quite handy.  The zipper also is there, a plastic jacket zipper to which, on either end, tabs have been added.  Without the tabs, the bag would be really raw.

As I have said, I probably would have thrown the whole project out if I had not taken a class.  Others in the class have said the same thing.  While the bag is great, the instructions left a lot to be desired.  I rather doubt I will make this again, but the experience was so worthwhile.  I learned about fusible foam and batting, neither of which I have ever used before.  Inserting the zipper and stays were also valuable experiences.  Having a room full of fun women (we had a lot of childbirth jokes going on, but I won’t repeat them here!) and an excellent instructor was worth it all.  I’ll be doing more classes, I know, from bags to maybe some quilting, just to refine some sewing techniques if nothing else, as I do not see myself as ever being interested in making quilts – quilted clothing, yes, but not quilts.  But, ya never know!

Janome Coverpro 1000 CPX

Do I really need another new toy?  I guess so, cuz I bought it.  And I got a good deal on it from my favorite sewing machine store, too.  It really pays off to support your local businesses, and it feels good, too.

Anyhow, the video . . . it shows the model prior to the CPX, the CP.  I am not quite sure why the CP was discontinued – I think I read it had some feed issues.  The reason the video is posted here is to show some of the attachments and how to use them.  I like information like that.  I am watching the video before I play with the machine, and probably others, too, to learn what it can do.  Then, sit down and read the manual, and get around to playing.